
Tea party-Diy paper tea bags

I absolutely love creating things. Today my daughter and I had a lovely tea party. We had some tea, pastries, cake and cookies. Sometimes I sneak in some real treats during our play tea party. She loves it!
Today I decided to create some paper tea bags for her tea party.
Materials needed:
craft paper
stapler
yarn
washi tape/optional
stamps
Glue
shape puncher/heart shape
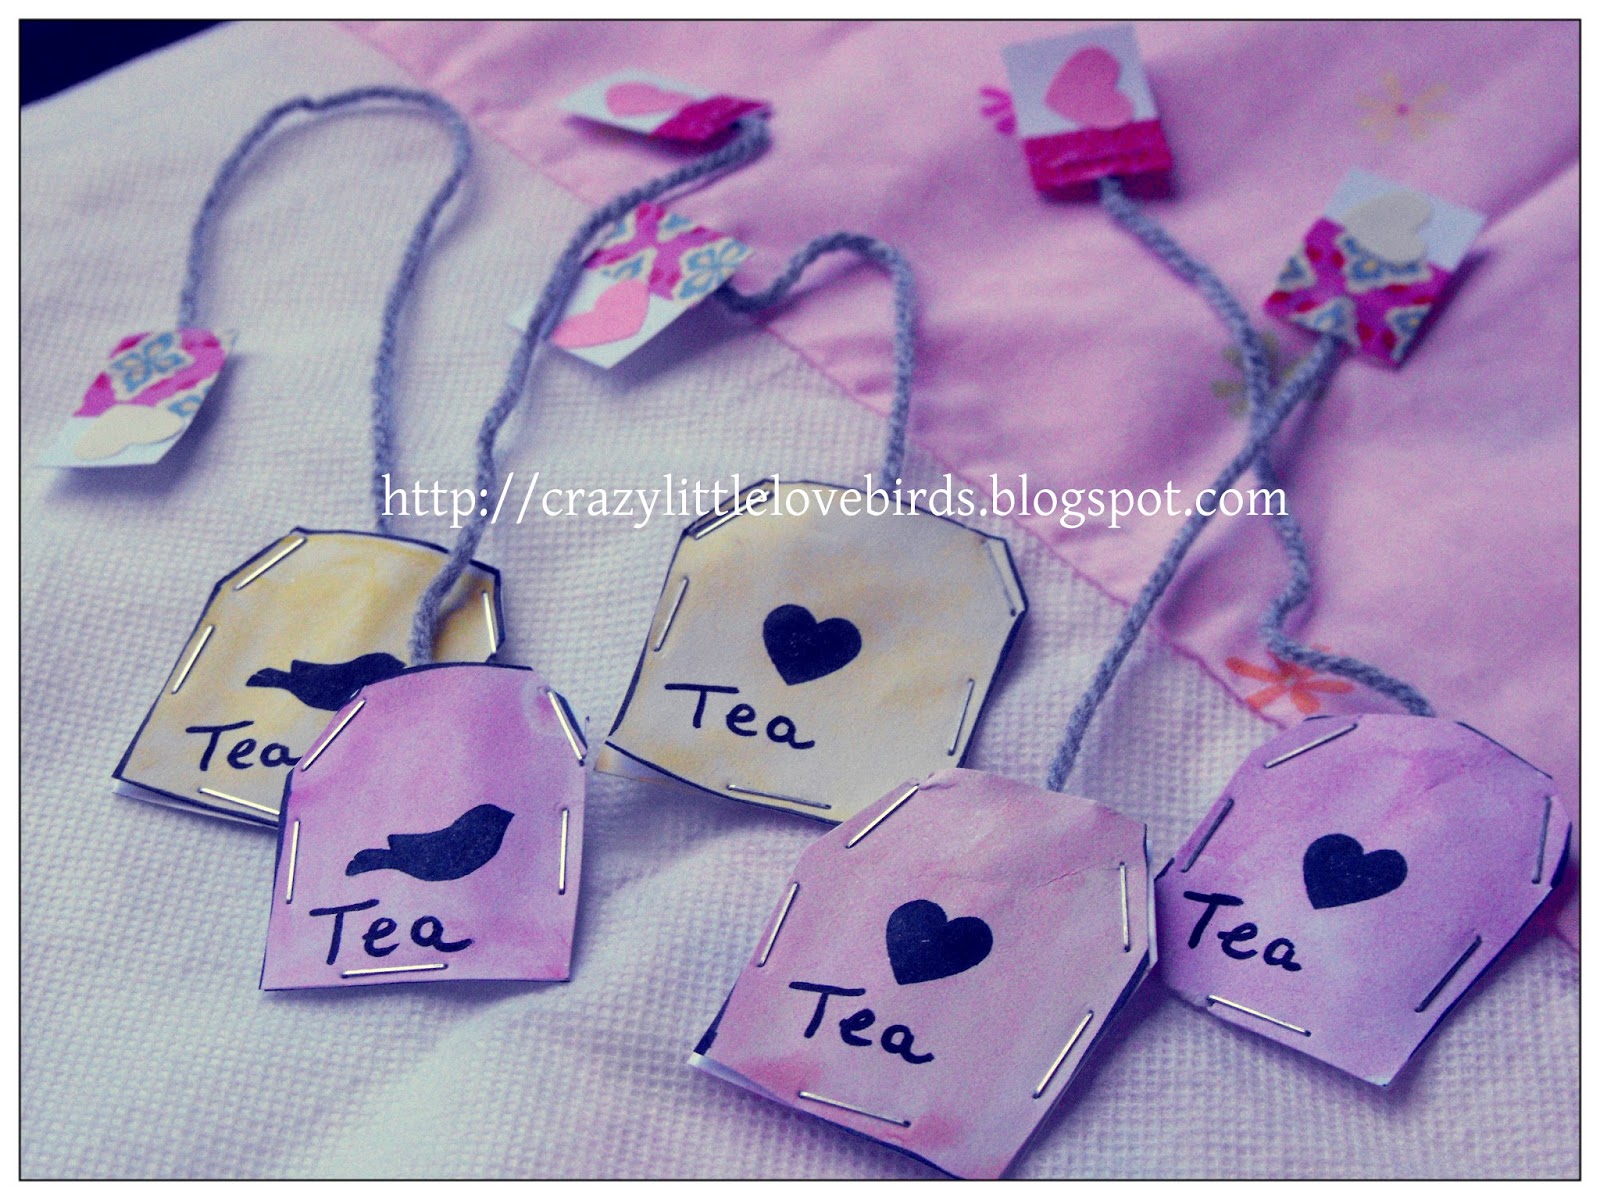


Tea Bags-Start off by tracing out your tea bags.
 Using paint, create the colors you want for your
tea bags. 
Once they are dry you can now stamp on your tea bags.
 Using your stapler add a few staples leaving only an opening on the top  portion of your tea bag. Once that is all finished insert your yarn. Staple the yarn from the inside of the tea bag.
Tea Tags-Using craft paper, staple to end of yarn. 
Using hearts or whatever shape you have glue them to the tag. You can also use washi tape like I did.


Enjoy!


Popular posts from this blog

The Crazy Little Lovebirds Link Party 143

Welcome to The Crazy Little Love Birds Link Party #143! I’m so happy you’re here! This is a warm and friendly gathering where you can share your amazing ideas—whether it's tasty recipes, fun family activities, creative crafts, home projects, or any other joyful inspirations. If you love finding new DIY ideas and learning from other bloggers, you’re in the perfect spot! Happy Friday! I hope you all had a wonderful week. This week, the girls and I picked up our summer reading registration prizes at the library. Prizes included stickers, journals, and a book of your choice. Does your library have a summer reading program? We've been joining in on ours for a while now.  Today also kicks off the free outdoor concerts, which we may attend.   I hope you all have a wonderful weekend, and as always, thank you for joining the party each week. I love visiting each of your blogs and seeing what you've been up to. I'm excited to share this week's featured posts from party 142.  ...

The Crazy Little Lovebirds Link Party 147

   Welcome to The Crazy Little Love Birds Link Party #147! I’m so happy you’re here! This is a warm and friendly gathering where you can share your amazing ideas—whether it's tasty recipes, fun family activities, creative crafts, home projects, or any other joyful inspirations. If you love finding new DIY ideas and learning from other bloggers, you’re in the perfect spot! We just picked up our youngest daughter from summer camp yesterday. She had so much fun and met new people. The drive to her camp was beautiful. When we dropped her off last week, I took this picture of a cow as it passed by.  At that moment, I was reminded of all the beauty that surrounds us. Here in Colorado, like many other places, we are battling wildfires. My thoughts and prayers are with everyone affected, including families, wildlife, firefighters, and others who have been working so hard to deal with these fires. It's been dry and windy, and we could honestly use some moisture. Wishing you all a ...

The Crazy Little Lovebirds Link Party 141

Welcome to The Crazy Little Love Birds Link Party #141! I’m so happy you’re here! This is a warm and friendly gathering where you can share your amazing ideas—whether it's tasty recipes, fun family activities, creative crafts, home projects, or any other joyful inspirations. If you love finding new DIY ideas and learning from other bloggers, you’re in the perfect spot! Happy Friday, everyone! I hope you all had a wonderful week.    As we approach Memorial Day weekend, I want to take a moment to express my gratitude for the brave men and women who sacrificed their lives in service to our country. This weekend is an opportunity to pause, honor their sacrifice, and appreciate the freedoms and simple moments we enjoy because of them. I hope it brings you a sense of peace, some sunshine, and time to reflect with a grateful heart.   I'm excited to share this week's featured posts with you all. As always, thank you for participating in the celebration each week. I truly apprecia...

The Crazy Little Lovebirds Link Party 148

Welcome to The Crazy Little Love Birds Link Party #148! I’m so happy you’re here! This is a warm and friendly gathering where you can share your amazing ideas—whether it's tasty recipes, fun family activities, creative crafts, home projects, or any other joyful inspirations. If you love finding new DIY ideas and learning from other bloggers, you’re in the perfect spot! Hello, blogging friends! I hope you all had a wonderful week. Thank you for your comments at last week’s party. She really enjoyed camp but is happy to be back home. I wish you all beautiful days ahead. As always, thank you for sharing at the party—I love seeing your posts! 💗 Congratulations to our featured bloggers Amalia shares an adorable little sleepover scene, full of quiet coziness and her sweet touch of whimsy. A soft moment that feels light, playful, and gently comforting. Amy shares a peaceful look at Hawks Nest—quiet overlooks, winding roads, and soft waterfall views tucked into the West Virginia hills. Li...

Simple Diy Autumn Tree.

Simple DIY Autumn Tree With just a few materials you can create this simple Autumn tree. My inspiration for this project was my love for Fall. I created this using materials from my local Dollar Tree store. Materials needed 🍁 Ribbon 🍁Fall leaves (I picked up 10 bundles) 🍁Mini lights/ I used mini leaf lights 🍁Twine 🍁 1 Plunger 🍁1 pot 🍁Scissors 🍁Hot glue   Creating your Autumn tree Start by wrapping your twine around your plunger stick.  You'll want to completely cover the wooden stick. Once you're near the middle of the stick, you'll want to stop and start attaching your fall leaves. Take each leaf bundle, and glue it to your plunger stick. You'll want to have some that are glued closer to the top and a few that are lower. This will help fill in spots.   Once you have all the leaves glued on, take the rest of your twine and cover the stems on your leaf bundle. Continue wrapping them, making sure to cover the stems. Using your scissors cut the remaining twine o...

All content copyright 2010-2026

I kindly request that my photos and words not be taken or used without my permission. If you have any inquiries, please do not hesitate to contact me. Additionally, for more information regarding this blog, please refer to the disclosure policy tab located above. Thank you.