
DIY Easy Spring time wreath + Bonus mini wreath


I purchased all my materials at Michaels.- They were having a big sale, and I was
lucky to find a few items on clearance.
 
If you want to make an easy springtime wreath, and this is maybe even your first time creating a wreath... here are some very simple steps.

Below, you will find some easy do-it-yourself instructions on making your very own wreath.

Materials Needed

You will need:
1 wreath. - Any size of your choice.
I am using a grapevine wreath.

Flowers.- silk, or paper. Choose any flower material for your wreath. I am using a paper flower material

Optional letters and butterfly clip

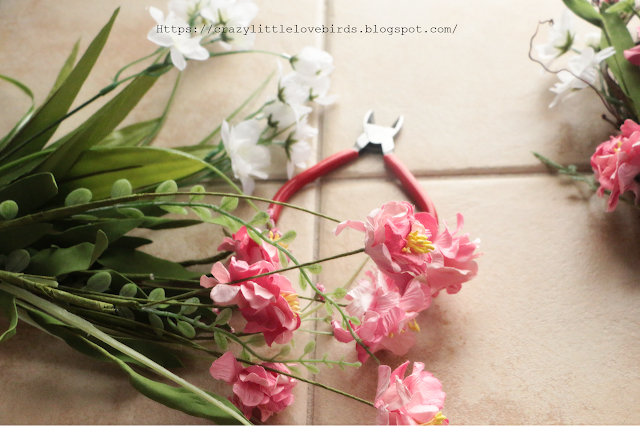
Wire cutter.- If you chose flowers with wires in them, you'll probably want to use this to cut them when preparing them to be placed in your wreath.



DIY- Easy Spring time wreath


Here's what you'll want to do:

1. Start by clipping your flowers. 

Be sure when you clip them that you have some that are a bit longer and some that are short. This will help when you start to arrange your flowers within your wreath.

2. Next, you'll want to arrange each flower on your wreath. 

Take your flowers, and insert them into your wreath. You can use a thin wire if you want to make sure your flowers don't fall out. I noticed that just using my flowers and bending them helped keep them inside the wreath. 

3. Get creative! 

I added one single letter to my wreath. I actually just purchased a wooden letter and painted it white.- You could also do this, or you can skip that step. If you're able to find any butterflies, birds, or other decorative items for your wreath, feel free and add them to your wreath.

(And as far as adding a letter on your wreath; you can either glue it on, or use wire, or string to attach your wooden letter). I used some strings. This way, I can take my letter off if I choose to change it out. 

You're pretty much all done! Now, all that's left to do is to hang it up and enjoy!

We also worked on a mini wreath for my daughter. She wanted one on her room door.- And we used the same steps above when creating this wreath. The only thing that is different is that we used some twine ribbon.


I hope you're all having a lovely weekend. Enjoy.

~Stephanie


Welcome new readers! I'm so happy to have you all here. :)

Pin for later


Comments

  1. What a pretty wreath! Such a pretty way to decorate for spring :)

    ReplyDelete
  2. I love it! That's one of the biggest problems living here in Hawaii no arts and crafts stores. I mean not even the dollar store. I would love to get some nice wreaths and make them myself but I can't. :(

    ReplyDelete
    Replies
    1. Aw, Dina...
      I know you would.

      But, you do have beaches, and beautiful weather! ;)

      Delete
  3. So pretty. Love grapevine wreaths. Your added touches like the butterfly makes it even prettier! Thanks so much for linking up at #IMadeItMondayLinkParty 5. Shared.

    ReplyDelete
  4. CONGRATS Stephanie! Your post is FEATURED at #IMadeItMondayLinkParty 6.

    ReplyDelete

Post a Comment

Welcome! I love hearing your thoughts and seeing what you’ve been up to. Please leave a comment or ask a question below—I do my best to respond to everyone! To keep the blog comments safe and inspiring, spam will be removed. Thank you for being a part of this blogging space!

Popular posts from this blog

The Crazy Little Lovebirds Link Party 158

  Welcome to The Crazy Little Love Birds Link Party #158! I'm so happy you're here! This gathering is all about sharing what brings us joy.  Bring your delicious recipes, fun family moments, cozy crafts, and home projects—basically, everything wonderful you've been working on. Congratulations to our featured bloggers Mod Crochet Loopy Hair Ties Pattern — Val & Holland Val & Holland made the cutest loopy hair ties, and they’re just such a fun, quick little crochet project.  An Unexpected Adventure — Jennifer Jennifer shared how a long‑dreamed‑of getaway with her husband turned into a true adventure — steep trails, gorgeous waterfalls, a few shaky moments, and plenty of faith guiding her through. Creamy Paprika Salad Dressing — Scratch-Made Food Melynda has a creamy paprika dressing that’s simple, flavorful, and perfect for everyday meals. One of those easy homemade staples you’ll want to keep around. Jahresprojekt 2026 – August — Mami Made It Mami Made It shared he...

Easy Floral Decoupage Idea for Faux Pumpkin Display

 Hi everyone! I'm excited to share a simple and easy floral pumpkin design you can create quickly. Today, we will make a faux floral pumpkin display using decoupage and a few additional designs. I'm reusing a foam pumpkin that I bought at Dollar Tree. If you’re ready, let’s begin creating an easy floral decoupage faux pumpkin display! Quick video tutorial **Materials needed:** - Acrylic paint - Paintbrush - Floral napkin - Faux pearls - Faux flowers - Craft knife - Scissors - Mod Podge Carefully remove the top of your pumpkin. I used my craft knife to go around the top section, creating a hole at the top. Using a paintbrush, apply acrylic paint to the pumpkin. I chose to paint mine black. Next, use scissors to cut out a few flowers from your napkin. Make sure to remove the second layer of the napkin before cutting out the designs.   Once you have your floral designs cut out, use a paintbrush to apply Mod Podge to the pumpkin. While the Mod Podge is wet, add the floral napkin c...

The Crazy Little Lovebirds Link Party 159

  Welcome to The Crazy Little Love Birds Link Party #159! I'm so happy you're here! This gathering is all about sharing what brings us joy.  Bring your delicious recipes, fun family moments, cozy crafts, and home projects—basically, everything wonderful you've been working on. Happy Friday, everyone! How's the weather where you live? We're enjoying some cooler temperatures, and the foliage on my trees is starting to change colors. I can't believe we're almost in October! We have an exciting trip planned for next month. I'll be working around the dates of our trip and the link party. As always, thank you all for joining the party; I truly appreciate each of you! Lisa Notes – What I Left Beneath Two Trees Lisa shared a reflective moment about planting two trees and letting go of what weighs us down. If you love quiet reminders to breathe and reset, you’ll enjoy this. Esme Salon – Sizzling Seafood Rice Feast Looking for a new recipe? This seafood rice dish ...

Easy Succulent Centerpiece Table Decoration

 Easy Succulent Centerpiece Table Decoration Create a beautiful and low-maintenance centerpiece for your table with this easy DIY faux succulent decoration. Perfect for adding a touch of greenery to any space without the need for watering or maintenance. Hello! I'm so happy that you decided to check out this easy succulent decoration project.   I was inspired to create this centerpiece after my sister mentioned she was looking at purchasing a succulent wax burner.  So my design does not include a wax burner, but if you stick around I'll tell you how you can create your very own succulent centerpiece table decoration.  Materials Needed ❤ Artificial Succulents and a flower  For my design, I used 4 succulent plants I purchased my  artificial succulents from my local Walmart (Make sure to check your local dollar store as well) ❤ A wooden bowl I purchased my wooden bowl at Walmart.  You can actually find any container of your choice at your local craft...

DIY Floral Wooden Jack‑O’‑Lanterns (Easy Fall Decor)

I’ve been having so much fun creating fall projects this year. These floral wooden jack‑o’‑lanterns  started as simple wooden pumpkins, but with a few pretty transfers and some soft paint colors, they turned into the sweetest little fall accents. I love how the florals give them a cozy, cottage‑style feel while still keeping that classic jack‑o’‑lantern charm. They’re quick to make, easy to customize, and such a cute way to add a warm autumn touch to your home. Watch the video tutorial Materials Wooden pumpkin cutouts Floral transfers Acrylic paint (your chosen colors) Gold acrylic paint Green acrylic paint Mini dowels Hot glue gun + glue sticks Small wooden stands Brown acrylic paint Paintbrushes   Add the floral transfers I started by placing my floral transfers onto each wooden pumpkin, just arranging them until they felt right. Once they were where I wanted them, I used a little rubbing tool to press them down and transfer the design onto the wood. Take your time with this...

All content copyright 2010-2026

I kindly request that my photos and words not be taken or used without my permission. If you have any inquiries, please do not hesitate to contact me. Additionally, for more information regarding this blog, please refer to the disclosure policy tab located above. Thank you.