
Upcycling an older craft

 Happy New Year! I hope this year is a great one for all of you. Today we are going to transform an old craft that I created on my craft blog. I'm often asked do I reuse my materials when I create a new craft. At times I do. I love upcycling, and reusing older crafts especially if they are reusable and in great condition. I'm taking a craft I created for the 4th of July, and creating a simple hanging design that is perfect for displaying on Valentine's day or even in the Spring time.


Materials

One wooden truck decor
One small bamboo ring
One wooden heart
Floral
Acrylic paint
Hot glue
Optional- floral stickers
Paintbrush


Begin by adding paint to your truck. I decided to repaint my truck white. 


Next, apply your acrylic paint to your bamboo ring. Since I am reusing materials, my bamboo ring already had my twine attached to it for hanging. 


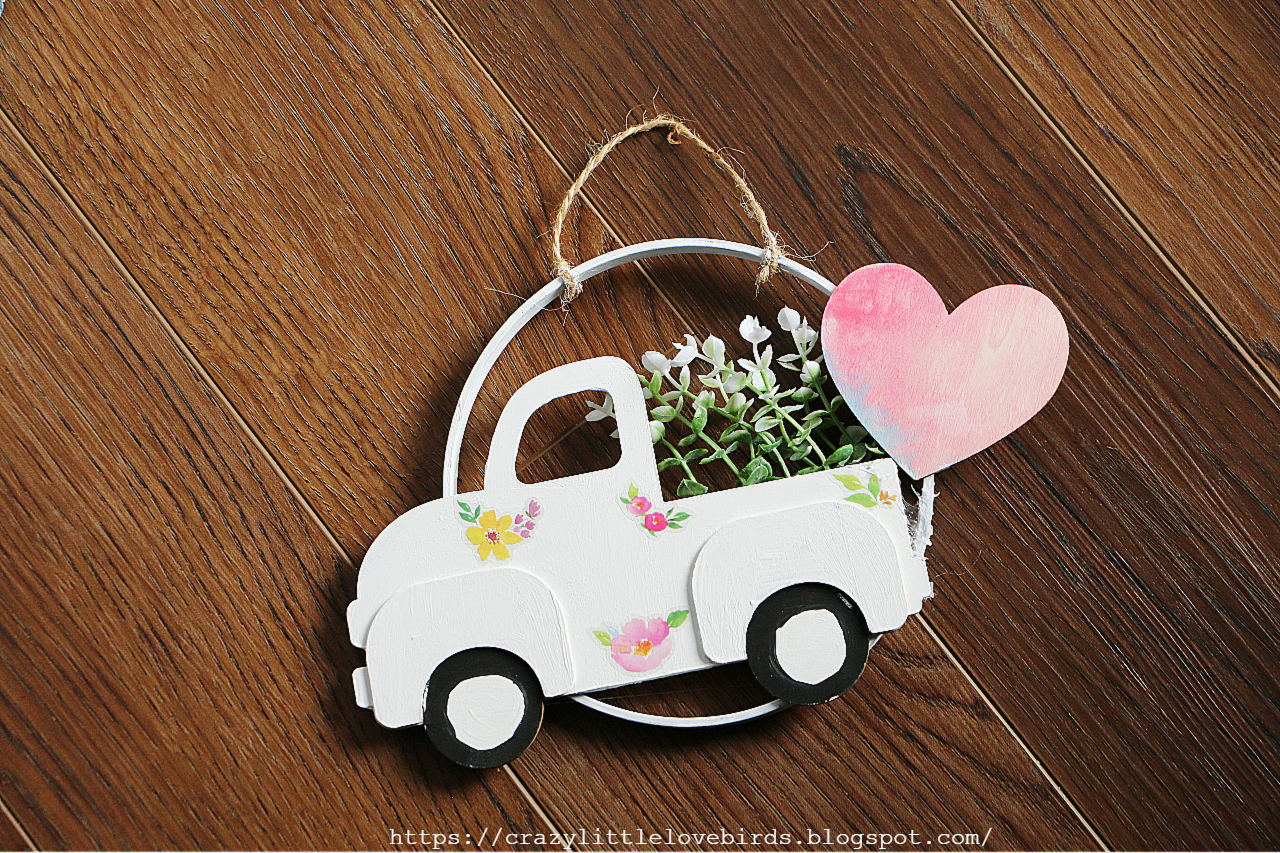
After, use your hot glue to attach your floral to the back of your truck bed. Once you have done this, take your truck and glue it to your ring using your hot glue.


Once you have added your truck, and floral, take your wooden heart and glue that to your ring. After, take your floral stickers and add them to your truck. Your hanging truck decoration is complete and ready to be displayed. I really love how easy this craft was. It is so easy to upcycle an older craft. 
Thank you so much for stopping by. I can't wait to create with you again soon!


pin share save


Comments

  1. How creative! Love how you added the plants to the back of the truck. Thanks so much for linking up at the Unlimited Link Party 97. Shared.

    ReplyDelete
    Replies
    1. Dee, thank you! I think I will be showing a few more upcycled crafts. I love the reusing materials in crafts so that it doesn't go to waste. :) Thanks so much for stopping by.

      Delete
  2. Fabulous upcycle! I’d love for you to join us over at the Creative Crafts Linky Party every Wednesday through Sunday
    https://creativelybeth.com/creative-crafts-linky-party/
    Followed and Pinned! 🙂
    Creatively, Beth

    ReplyDelete
    Replies
    1. Beth, thank you so much! I will be sure to stop by.

      Delete
  3. CONGRATS Stephanie! Your post is FEATURED at the Unlimited Link Party 98!

    ReplyDelete
  4. I was just looking at a vintage car similar to yours and trying to decide whether or not to keep it. You've definitely convinced me I need to recycle it!

    ReplyDelete
    Replies
    1. I'm so happy that this has convinced you to recycle it. I am always so happy to hear this. ☺️

      Delete
  5. Very creative and cute! Love it!

    ReplyDelete
  6. Steph this is such a great idea. This is so cute. And I have to tell you that farm truck is my favorite.
    Thanks bunches for sharing this with Sweet Tea & Friends this month dear friend.

    ReplyDelete
    Replies
    1. Paula, aw thank you. 😊 I thought it was such a simple upcycle. Thanks so much for stopping by.

      Delete

Post a Comment

Thank you for taking the time to leave a comment. Please know that it is appreciated. I try my best to respond to every comment. If you have a question feel free and ask.

Popular posts from this blog

10 Favorite Summer Quotes

As we approach summer... Let us enjoy these beautiful moments. Be thankful.  Be in the moment.  Embrace each day. Hug the people we love. Spread kindness. Say hello to a stranger. Dance to our favorite song. Play with our children. Cook a favorite meal. Create something new. Just be. Enjoy this list of my 10 favorite summer quotes below Do you have a favorite summer quote?  If so, I'd love to know what it is.  Leave a comment below!  May your days be filled with happiness. Pin it for later

DIY Upcycled Sesame Oil Glass Bottle Design

Hello everyone! I hope that all is going well. I've been busy with mom things, and also creating new crafts for all of you. After using the last bit of my sesame oil, I decided I would reuse the glass jar. I love how this jar has a few detailed lines.  This craft cost me around $2, and that was just for my floral sticker pack.  All other materials I already had on hand. Materials needed Chalk Paint  I'm using the colors celery and mineral  Craft gems Paintbrush One faux vine Hot glue A few floral stickers Start by taking your empty jar, and pre-washing it. I added my jar to my dishwasher so that it could remove any sesame oil scent that was left inside the jar. After you have washed your glass bottle, and it has dried, take your paintbrush, and apply a few coats of your main color. The color I am using is called celery. You will need to apply around three coats of paint to the glass surface. Once you have added a few coats of paint, allow it to completely dry.  Once dry, take y

DIY Easy Spring time wreath + Bonus mini wreath

I purchased all my materials at Michaels.- They were having a big sale, and I was lucky to find a few items on clearance.   If you want to make an easy springtime wreath, and this is maybe even your first time creating a wreath... here are some very simple steps. Below, you will find some easy do-it-yourself instructions on making your very own wreath. Materials Needed You will need: 1 wreath. - Any size of your choice. I am using a grapevine wreath. Flowers.- silk, or paper. Choose any flower material for your wreath. I am using a paper flower material Optional letters and butterfly clip Wire cutter.- If you chose flowers with wires in them, you'll probably want to use this to cut them when preparing them to be placed in your wreath. DIY- Easy Spring time wreath Here's what you'll want to do: 1. Start by clipping your flowers.  Be sure when you clip them that you have some that are a bit longer and some that are short. This will help when you start to arr

Follow me on Pinterest!