Create a stunning DIY painted wood riser decoration with this easy step-by-step guide. Elevate your home decor with a personalized touch that is simple and fun to make.
Today I am sharing this easy DIY wood riser with all of you. We're taking the mini pots from Dollar Tree and adding them to this beautiful wood wreath design. The wood wreath decoration is an item I believe I purchased at Joann's. It comes unfinished. This craft is around 20 minutes and I will share all the details on creating your very own.
DIY Easy Painted Wood Riser Decoration
Materials needed
One wood plaque
Four mini pots- I purchased these at Dollar Tree
Acrylic paint- I'm using Espresso and Celery
Wood glue or hot glue
Candle and faux floral are optional
Paintbrush
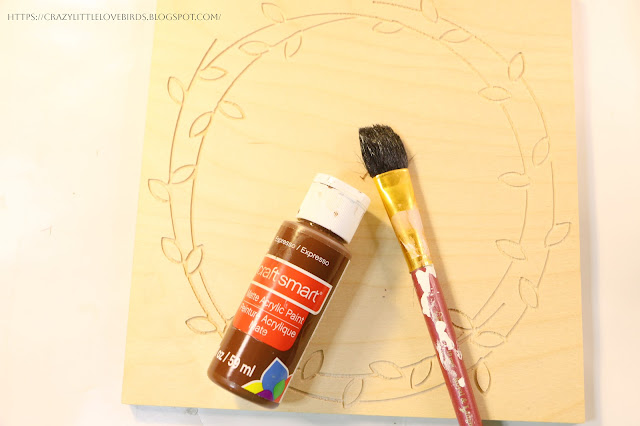
Adding paint to the wooden plaque
To create a wonderful finish on your wooden plaque, start by applying acrylic paint. For a lighter and more stained appearance, try adding a small amount of water to the paint to thin it out. This quick tip is worth trying out.
After creating your leaf garland, it's time to start adding color. I suggest using a small paintbrush for each leaf. In case the paint is too thick, you can dilute it with a bit of water. Nevertheless, I opted not to dilute it when painting my leaves.
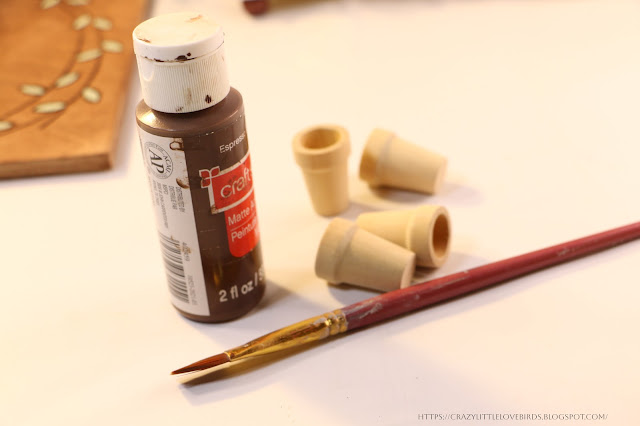
Adding paint to mini pots
Next, using your paintbrush apply your paint to each of the mini pots.
Attaching wooden pots to wooden plaque
Attach each pot to a corner of the wooden plaque using wood glue for a stronger hold.
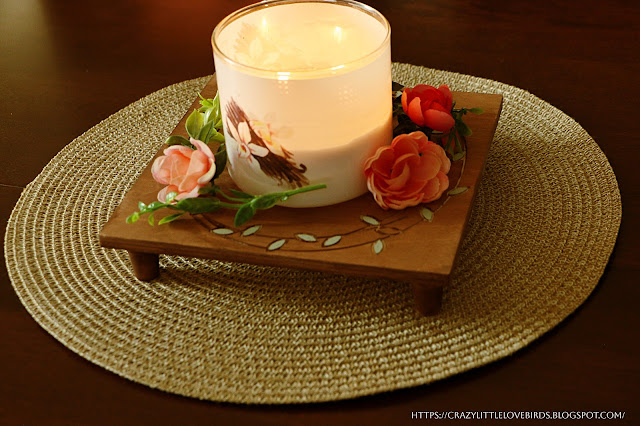
Your wooden riser decoration is complete! I'm delighted with how easy it was to make, and it's stunning, don't you think? I love how it looks. You could use it to showcase a big candle jar or a potted plant. In general, it's worth adding to any room.
Thank you for stopping by. Be sure to check out my other craft blog over at - https://stephcreatesthingsdiyhomeandcrafts.blogspot.com/
You can find more crafts like this one over on that blog.
Pin Share Save


Very creative, cute too. Thanks so much for linking up at the #UnlimitedLinkParty 110. Shared.
ReplyDeleteThank you! I appreciate it. :)
DeleteHow cute Stephanie, I love risers they are so versatile and easy to use in decor, but pricey. Your creation is spot on!
ReplyDeleteThank you! You are so kind. I really enjoy creating wood risers. :)
DeleteLOVE the mini pots as legs, Stephanie!
ReplyDeleteDon't forget to join us over at the Creative Crafts Linky Party every Wednesday through Sunday
https://creativelybeth.com/team-creative-crafts-linky-party/
Followed and Pinned!
Creatively, Beth
Beth, thank you so much. 😊
DeleteOh wow, this is super cute, love it. I visited you via BFF Open House
ReplyDeleteIf you are not already part of SSPS, this is a personal invite to hop over and come and share your posts with us at Senior Salon Pit Stop, every Monday to Saturday.
See my entries: 50+51 and then navigate to the bottom of my page for the Senior Salon Pit Stop linkup, we hope to meet you there virtually.
This is just lovely. I don't know why things look better on little risers or stands but they just do! Featuring when my link party opens!
ReplyDeleteCarol, thank you so much! I was actually thinking that about a week ago. Risers just make things look cuter! 🥰
DeleteOh my goodness I love this! Very creative. I appreciate you sharing this with Sweet Tea & Friends this month dear friend.
ReplyDeletePaula, aw thank you. I'm so happy to hear you enjoyed this craft.
DeleteVery cute and creative. Love the roses. I am happy to feature your diy easy wood riser decoration at Love Your Creativity. Happy Mother's Day.
ReplyDeleteLinda, thank you so much! Happy Mother's Day to you as well.
DeleteStephanie,
ReplyDeleteWhat an adorable idea. I love it. Congratulations, you are being featured on Thursday Favorite Things.
https://www.eclecticredbarn.com/2023/05/decorating-on-thursday-favorite-things.html
Hugs,
Bev
Bev, thank you so much! :)
DeleteWhat a fun craft! Stephanie, I love the use of those tiny flowerpots... I have some that I've had since I was in high school (grad. 1980) and I've never got rid of them because they are just too cute!! Anyway, so happy to feature your post at this past Wednesday's Share Your Style #389 for you. <3
ReplyDeleteHappy Sunday!
Barb :)
Barb, aw I love that you still have some of those mini pots. They are so cute, and there are a lot of different things you can use them on. Thank you so much for featuring my craft. 😊
DeleteVisiting again to say thanks so much for linking up at the #UnlimitedLinkParty 133. Pinned.
ReplyDeleteThank you. 😊
DeleteWhat a cool idea! Pinning!
ReplyDeleteMichelle, thank you! :)
DeleteThanks for sharing with us I'm featuring you when the next To Grandma's house we go link party starts!
ReplyDeleteThank you. I'm so happy you enjoyed it. ♡
Delete