
Weekend love. Creating memories

Friday was such a wonderful day, we spent our morning at the library. They were having a block party. They had vendors, firemen, police, games for children, and live performances.

 
We also had this lovely visitor visit our flowerbed
{Hello hummingbird}


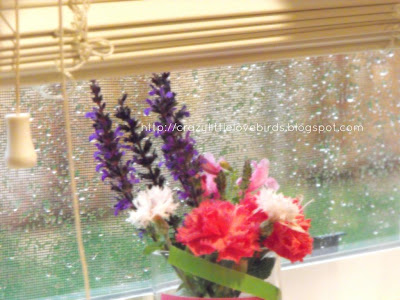
I absolutely love when it rains. We actually had a pretty good thunderstorm over the weekend. The rain came pouring down, and I of course enjoyed the nice breeze that came along with it.


My husband was anticipating the arrival of two books he recently ordered from Barnes and Noble.
This weekend they finally arrived, and he was thrilled.
 
 
He's such a great Daddy to our daughter. They have such a beautiful father-daughter bond.
 
This weekend we also picked up a telescope, and sat out and looked at a few stars once the storm passed.
We also spent a lot of time in the kitchen preparing delicious meals together. This weekend I made some stuffed peppers. These peppers had zucchini, squash, garlic, onions, sausage, parmesan cheese, tomatoes, and a few other seasonings. They turned out great. We ended up throwing them on the grill after I sautéed the vegetables. Did you make a special meal this weekend?
 
This weekend we enjoyed a nice dessert. -My husband loves coffee, he grinds his coffee beans every morning, leaving a fresh coffee aroma throughout our home. (I love it) I too enjoy a nice cup of coffee.  He decided to make some chocolate coffee truffles.  They were delicious.
 
So how was your weekend spent with your loved ones? Did you enjoy time outdoors, and if so how was the weather? I hope you all had a wonderful weekend. Have a beautiful upcoming week!


Comments

  1. What a nice weekend! I love thunderstorms too and we've been getting some really good ones lately. I'm planning to make stuffed peppers on Wednesday! This weekend was relatively lazy for us but I did try a new pizza recipe that we really enjoyed. :)

    ReplyDelete
  2. Jennifer, thank you! You're always so lovely. :) I love lazy weekends. Maybe we will have one of those for this weekend coming up. Oh and I bet your pizza turned out wonderful. I love new recipes.

    ReplyDelete
  3. Sounds like an amazing weekend. I love the library and the free services it provides. It's been a great hangout for us during the summer. The last free weekend before school starts - we went out for lunch and spend time at the park chasing balloons. Today we go hiking :) Have a wonderful day! Jayne

    ReplyDelete
  4. Thank you Jayne! It looks like you all have had an amazing summer. I hope you have a lovely time on your hike. :)

    ReplyDelete

Post a Comment

Thank you for taking the time to leave a comment. Your feedback is greatly appreciated. I strive to respond to every comment and welcome any questions you may have. ***However, spam or comments that do not offer valuable feedback will be deleted.***

Popular posts from this blog

Succulent Centerpiece using Dollar Tree Items

Looking to add some greenery to your space?  Hello everyone! Today, we’re going to create a quick and simple succulent display using a round baking pan from Dollar Tree. I completed this craft a while ago, but forgot to share it with you. It's an easy project, and all the materials—except for the spray paint—were purchased at Dollar Tree. You can make this lovely decoration in just 10 minutes. Let’s get started on this succulent decoration together! Materials -One baking pan -Spray paint -Stones/rocks -Crushed glass -Artificial succulents -One glass candle holder Start by applying spray paint to the baking pan. I had a bronze color from a previous project, and it would be a great opportunity to use it again. When applying spray paint, make sure to cover the surrounding area and ensure that the space is well-ventilated.  Once you have painted the pan, allow the paint to dry. I used a heating tool to speed up the drying process, but if you prefer, you can let it air dry, which m...

Simple Diy Autumn Floral Arrangement

  This simple Autumn floral arrangement takes just a few materials.  And is a beautiful addition to any space!  Materials needed 1 metal pitcher -The metal pitcher that I am using was purchased at Target and was $3. 1 lighted leaf garland - I purchased this lighted leaf garland at my local Michael's Store It takes two double A batteries. 1  can of spray paint I wanted to add some color to my pitcher. For my pitcher, I am using spray paint purchased at my local Michael's store. The color is Espresso. Autumn floral I chose to go with some deep orange/yellow leaves, a few deep green leaves, and mini yellow sunflowers.  (orange leaves and green leaves were purchased at Target in the dollar section.  And mini Sunflowers were purchased from Michael's). Creating your Autumn arrangement When spraying your pitcher make sure that you cover your workspace. **A simple tip** When spraying make sure you apply it in light coats. This will help the spray paint from creatin...

Decoupage Bookmarks using Metal Tags

Create beautiful decoupage bookmarks using metal tags from Dollar Tree. This easy DIY project is perfect for all skill levels and adds a personal touch to your reading materials. Hello everyone! Today, I have an easy and quick craft idea to share with you that book lovers will surely appreciate. My daughters love reading books on their Kindles, but we still take regular trips to the library to check out physical copies of books they are interested in.  However, I wanted to try something new this time, so I went to the Dollar Tree store and found a pack of metal tags. Yes, you read that right - these bookmarks are made of metal, but don't worry, we can add some decorative details to make them more attractive.  Materials Metal tags (I purchased them at Dollar Tree) Acrylic paint Mod Podge Decorative napkins Paintbrush Twine Beads Inspirational stickers Scissors Applying paint to metal tags Begin by applying two coats of acrylic paint to both sides of each metal tag. Use a heatin...

Crafting Personalized Thanksgiving Place Cards with Air Dry Clay and Pie Stamps

Hey there! I am thrilled to introduce you to an exciting Thanksgiving craft that will add a wonderful touch to your holiday table. This project involves using air-dry clay and pie stamps to create personalized and unique place cards. Do not worry, I will provide you with a step-by-step guide throughout the entire process. Additionally, we will use paint, twine, and a brown paper bag to give our place cards a festive feel.  Materials needed Pie stamps which can be obtained from Joann's Acrylic paint  Air-dry clay A hole puncher Paintbrush Wooden beads Twine A brown paper bag (or any other material you prefer to use as a template), one pencil, and scissors. Working with air clay Begin by flattening the air-dry clay, using either your hands or a roller. Once the clay has been flattened, use the pie stamps to press your desired design into the clay. Following the stamping process, remove any excess clay around the outer edge of the stamp and use the stamp press to release your cla...

DIY Spring Birdie Nest Display Using a Recycled Tin Can

There’s something so charming about spring crafting — soft colors, tiny florals, and those small touches that make your home feel fresh again. Today I’m sharing a simple, cheerful project that transforms an everyday tin can into the cutest little birdie nest display. It’s budget-friendly, beginner-friendly, and such a fun way to bring a bit of spring indoors. Join me as I take you through each step for creating your very own. Quick video tutorial 🌼 Supplies You’ll Need One clean, dry metal can Acrylic paint (I used white) Paintbrush Sanding block (optional) One decorative floral napkin Mod Podge Four craft wooden sticks (popsicle sticks) Hot glue One foam craft block One small birdie nest decoration Faux florals Floral cutters Heating tool (optional for faster drying) Paint Your Tin Can Start with a washed and completely dried metal can. If you want a slightly distressed or smoother finish,  lightly sand the surface with a sanding block before painting— totally opt...

All content copyright 2010-2025

I kindly request that my photos and words not be taken or used without my permission. If you have any inquiries, please do not hesitate to contact me. Additionally, for more information regarding this blog, please refer to the disclosure policy tab located above. Thank you.