
Rain, Sunshine, Baking and more!


What a lovely weekend it has been! Thursday we enjoyed some light rain. This weekend the weather went from cool, back to warmer temps. I've been enjoying opening up the windows and hanging a few clothes out on our portable clothesline. (We recently bought it, and I love it) I still use our dryer, but I like to change it up sometime. I've also been enjoying the time we spend out on our porch. I can't wait for Fall weather to arrive.

 
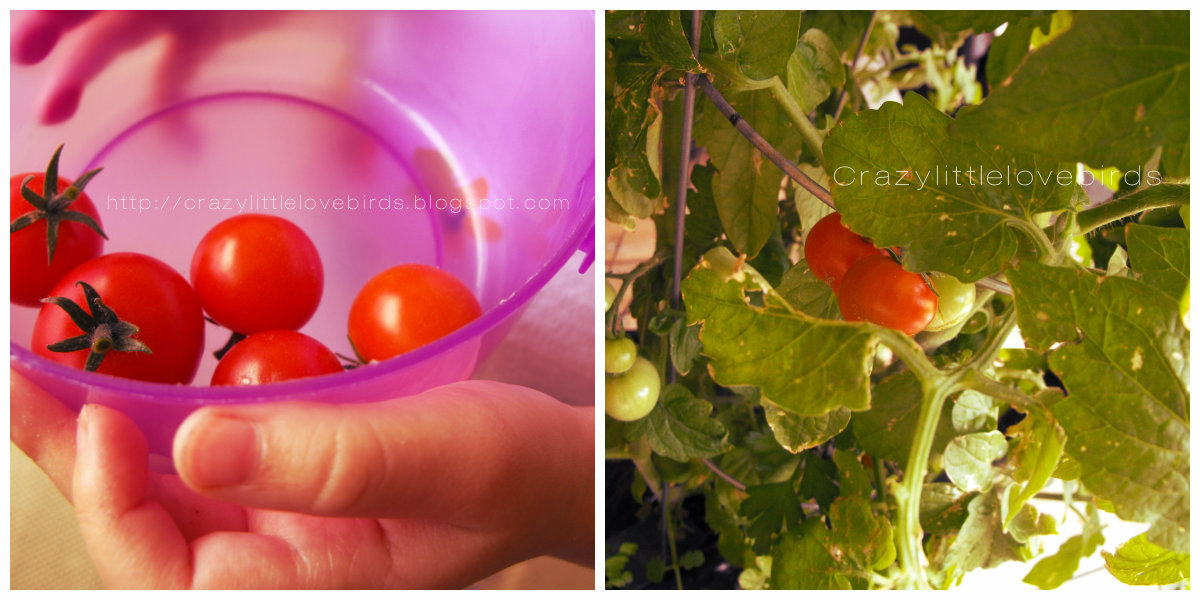
It's nice seeing some color in our vegetable garden.  Our daughter loves helping with picking tomatoes from the vine. We bought a few different pepper plants, and last weekend we cooked up a dish using some jalapenos from the garden. Our plan for our tomatoes is to add them when we make our chicken kabobs.
 
Over the weekend my husband decided to make some Jerky. We picked up Jerky cure and seasoning from  Sportsmen's warehouse. He made chicken and steak jerky. They turned out delicious! :)


This morning, I made some delicious blueberry donuts with glaze. I found this wonderful recipe over at Hearts in my oven. I came across the recipe on Pinterest (which of course I pinned) Then I visited her blog, and was thrilled to make baked donuts with our morning coffee. They turned out wonderful. My husband and I enjoyed them with our morning coffee, and our daughter had them with a glass of cold milk. What a lovely morning treat it was for us all.
 
I've been putting together little busy trays for our daughter. This one included stamps, stickers, Popsicle sticks, and cut-out shapes. I also dropped in crayons, and strips of paper. She's been practicing cutting paper with her safety scissors. Each tray will have a few different activities.
 
My husband and I enjoyed a nice Date this afternoon. While out this weekend we picked up some paint, and two canvases.  During our daughter's nap, we enjoyed some time painting together. We watched a watercolor painting tutorial on YouTube.
I can definitely see adding this to our date list. We had a great time! 


How did you spend your weekend? Did you do any baking or any fun activity?
I hope you all have had a wonderful weekend with your loved ones! And also thank you to my new readers, and Google + followers, so happy to have you with me on this wonderful journey. Welcome!


Comments

  1. It looks like you had an absolutely perfect weekend! :) My weekend was relaxing, yet rewarding. I got lots of cleaning done, and spent time with my little fella.

    ReplyDelete
  2. What a nice weekend. We love our food dehydrator, you can make so many great things with them. Your watercolored canvases are gorgeous! They look professional. Nice work!

    ReplyDelete
  3. Melly, thank you! We really did enjoy the weekend. I would have loved if the weather would have been a bit cooler. :) But I'll take it, at least we spent time as a family. Sounds like you got a lot done! That's always a good thing. Happy to hear you were able to spend time with your little fella. Thank you for stopping by! :)

    Jennifer, thank you so much! We had so much fun painting. :) And you are right, you can make so many things with the dehydrator. It's wonderful! Thank you for stopping by. :)

    ReplyDelete
  4. Stephanie looks like you had an amazing weekend! We had a really mellow weekend. Since I am leaving for MD for 3 months we are just spending time together before I go. Lot's of cleaning and packing going on though lol.

    ReplyDelete
  5. Dina, thank you! Mellow weekends are always so nice, and relaxing. Have a safe trip to MD. :)

    ReplyDelete
  6. Just stopping by from bloggy moms. Following you on bloglovin'. Here is my blog www.fashionostamomma.com. Love all your crafting ideas.

    ReplyDelete
  7. Fashionista Momma, thank you for stopping by and becoming my newest reader. I'll be sure to check your blog out! I appreciate your kind words. :)

    ReplyDelete

Post a Comment

Thank you for taking the time to leave a comment. Your feedback is greatly appreciated. I strive to respond to every comment and welcome any questions you may have. ***However, spam or comments that do not offer valuable feedback will be deleted.***

Popular posts from this blog

Succulent Centerpiece using Dollar Tree Items

Looking to add some greenery to your space?  Hello everyone! Today, we’re going to create a quick and simple succulent display using a round baking pan from Dollar Tree. I completed this craft a while ago, but forgot to share it with you. It's an easy project, and all the materials—except for the spray paint—were purchased at Dollar Tree. You can make this lovely decoration in just 10 minutes. Let’s get started on this succulent decoration together! Materials -One baking pan -Spray paint -Stones/rocks -Crushed glass -Artificial succulents -One glass candle holder Start by applying spray paint to the baking pan. I had a bronze color from a previous project, and it would be a great opportunity to use it again. When applying spray paint, make sure to cover the surrounding area and ensure that the space is well-ventilated.  Once you have painted the pan, allow the paint to dry. I used a heating tool to speed up the drying process, but if you prefer, you can let it air dry, which m...

Decoupage Bookmarks using Metal Tags

Create beautiful decoupage bookmarks using metal tags from Dollar Tree. This easy DIY project is perfect for all skill levels and adds a personal touch to your reading materials. Hello everyone! Today, I have an easy and quick craft idea to share with you that book lovers will surely appreciate. My daughters love reading books on their Kindles, but we still take regular trips to the library to check out physical copies of books they are interested in.  However, I wanted to try something new this time, so I went to the Dollar Tree store and found a pack of metal tags. Yes, you read that right - these bookmarks are made of metal, but don't worry, we can add some decorative details to make them more attractive.  Materials Metal tags (I purchased them at Dollar Tree) Acrylic paint Mod Podge Decorative napkins Paintbrush Twine Beads Inspirational stickers Scissors Applying paint to metal tags Begin by applying two coats of acrylic paint to both sides of each metal tag. Use a heatin...

The Crazy Little Lovebirds Link Party 132

Welcome to The Crazy Little Love Birds Link Party #132! This party offers a platform for sharing inspiring content, including recipes, family-friendly blog posts, crafts, home décor, and other uplifting  ideas. We’re heading to Denver today! We’ll explore the city and attend an event at the Bellco Theatre . Thank you to everyone who came to the party last week; I really appreciate your support. I hope you all are doing well! Congratulations to our featured bloggers  Springing Into View — A Blossoming Table Sandra brings spring indoors with a gorgeous tablescape overflowing with blooms, soft greens, and charming details. Her camellias, daffodils, and pretty floral plates come together to create a truly uplifting, garden‑inspired table. It’s such a beautiful way to welcome the season.  A Quick Trip to New York to Celebrate a Special Family Birthday Pat shares a heartfelt trip back to New York filled with family, snowy streets, and sweet moments celebrating her brother’s...

DIY Fall Picture Frame Art Display

Greetings, lovely people! I hope you're all doing great. I'm thrilled to present to you a fantastic autumn-inspired picture frame art display that's easy to make. With just a handful of materials, we'll be painting, incorporating faux sunflowers, and any other fall-themed embellishments of your liking. Are you eager to create something new? Then, without further ado, let's get started! DIY Fall Picture Frame Art Display Materials that you'll need One frame- Any size will do. My frame is 4 in x 6 in Paintbrush Faux sunflowers-I'm using the paper craft sunflowers from Dollar Tree Acrylic paint -I'm using Waverly chalk paint yellow, and I decided to use brown acrylic paint -You can use any paint of your choice Twine or craft rope Floral cutters Scissors Craft pipe cleaners- I'm using one in this craft Hot glue or any other adhesive of your choice Applying paint to the picture frame To begin, carefully remove the stock paper from inside the frame and set...

Easy Succulent Centerpiece Table Decoration

 Easy Succulent Centerpiece Table Decoration Create a beautiful and low-maintenance centerpiece for your table with this easy DIY faux succulent decoration. Perfect for adding a touch of greenery to any space without the need for watering or maintenance. Hello! I'm so happy that you decided to check out this easy succulent decoration project.   I was inspired to create this centerpiece after my sister mentioned she was looking at purchasing a succulent wax burner.  So my design does not include a wax burner, but if you stick around I'll tell you how you can create your very own succulent centerpiece table decoration.  Materials Needed ❤ Artificial Succulents and a flower  For my design, I used 4 succulent plants I purchased my  artificial succulents from my local Walmart (Make sure to check your local dollar store as well) ❤ A wooden bowl I purchased my wooden bowl at Walmart.  You can actually find any container of your choice at your local craft...

All content copyright 2010-2025

I kindly request that my photos and words not be taken or used without my permission. If you have any inquiries, please do not hesitate to contact me. Additionally, for more information regarding this blog, please refer to the disclosure policy tab located above. Thank you.