
Little Valentine's House Display

 Hi everyone! I hope you are doing well. I've been creating a few crafts for Valentine's. Today we are creating a quick and simple Valentine's house display. I love working with scrap wood pieces that I find around our home. I found the little house during my Christmas shopping. I found it at my local Target store. It comes in a pack of two and it was for $1.00. It included the houses, along with paint. I decided to ditch the paint included in the pack since the colors were Christmas colors. If you're ready let's turn this little wood house into a sweet Valentine's house display.

Little Valentine's House Display

Painted mini house decoration with faux floral and heart fabric displayed on a windowsill


Craft materials such as, paint, mod podge, floral cutters and faux floral

Materials needed

  • One scrap square wood piece
  • One wood house
  • Mod podge
  • Acrylic paint
  • Paintbrush
  • Scissors
  • Floral cutters
  • Faux floral
  • Hot glue or any adhesive
  • One fabric heart decoration
  • Decorative craft paper
  • One pencil for tracing

wood square traced out on decorative paper and pencil on a table


Tracing the wood section onto decorative paper

Start by taking your wood square section and using your pencil, begin to trace it out onto your decorative craft paper. Once you have traced it out, use your scissors to cut out the traced shape.

Paintbrush, decorative paper, wood square and mod podge

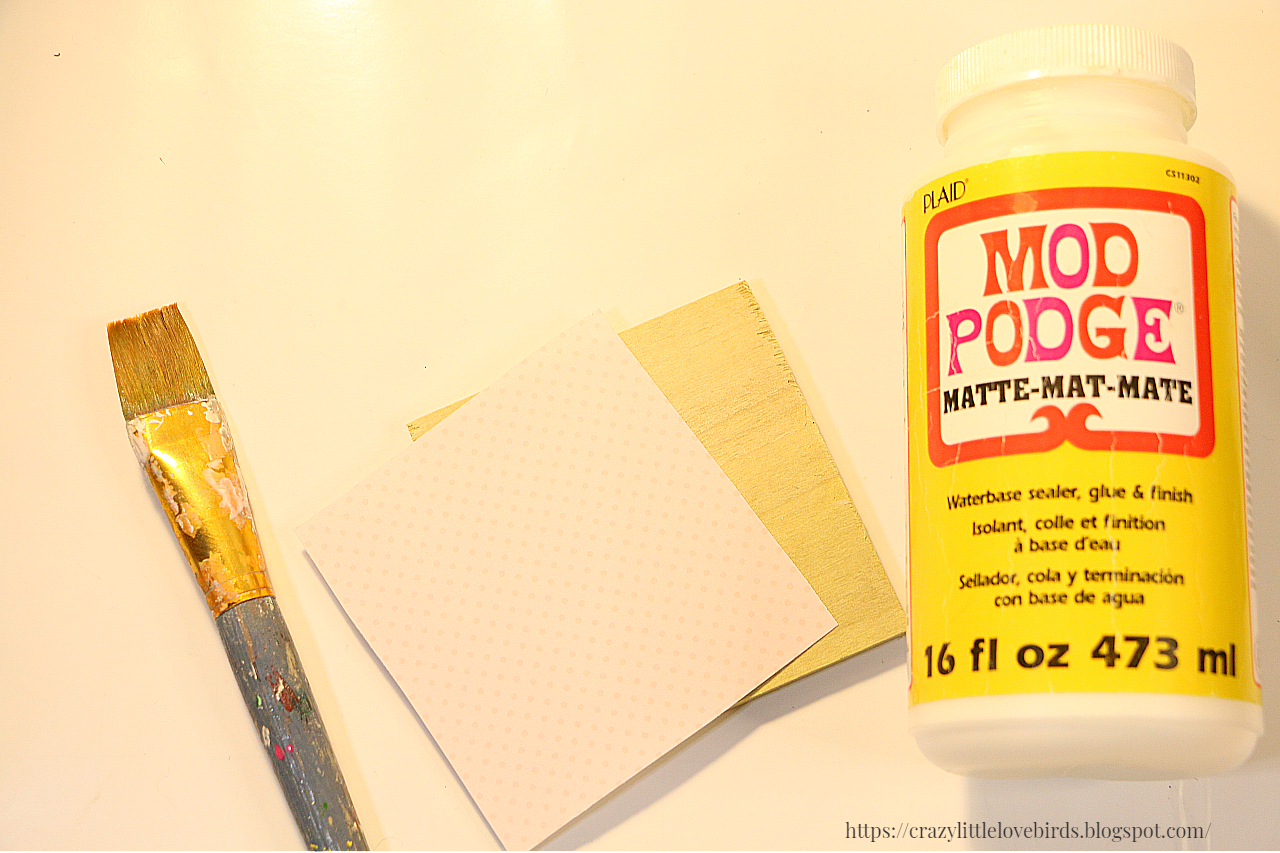
Applying Mod Podge and craft paper

Next, take your Mod Podge and apply a thin coat to your wood section. Place your paper on top of your Mod Podge. I always use my blow dryer when I work with applying Mod Podge. Remove any creases or visible lines. Once you have done so, take your paintbrush and apply a thin layer on top of your decorative paper. Repeat the steps, and use your blow dryer over the top surface of your Mod Podge.

wood square, and acrylic paint on a table

Applying acrylic paint 

Take your acrylic paint and apply it around the four sections of your wood piece.

unpainted mini house, acrylic paint and paintbrush on a table

You are now ready to apply your paint to your wooden house. I ended up combining my white and pink acrylic paints together. I did this when applying paint to the roof of my wooden house. I painted the rest of the house using my white paint.

Close up of painted roof of mini house decoration


Hand holding fabric heart over painted mini house decoration

Adding fabric heart 

After, take your fabric heart and using hot glue add it to the front of your wooden house.

decoupaged wood square next to painted mini house

Mini painted house with fabric heart

Attaching wooden house and wood square

Next, using either hot glue or another adhesive, add your wooden house to your wood square. I found that using an adhesive like E6000 worked much better. The hot glue left my wooden house with a larger gap between the house and the wood square. Definitely see what works better for you.
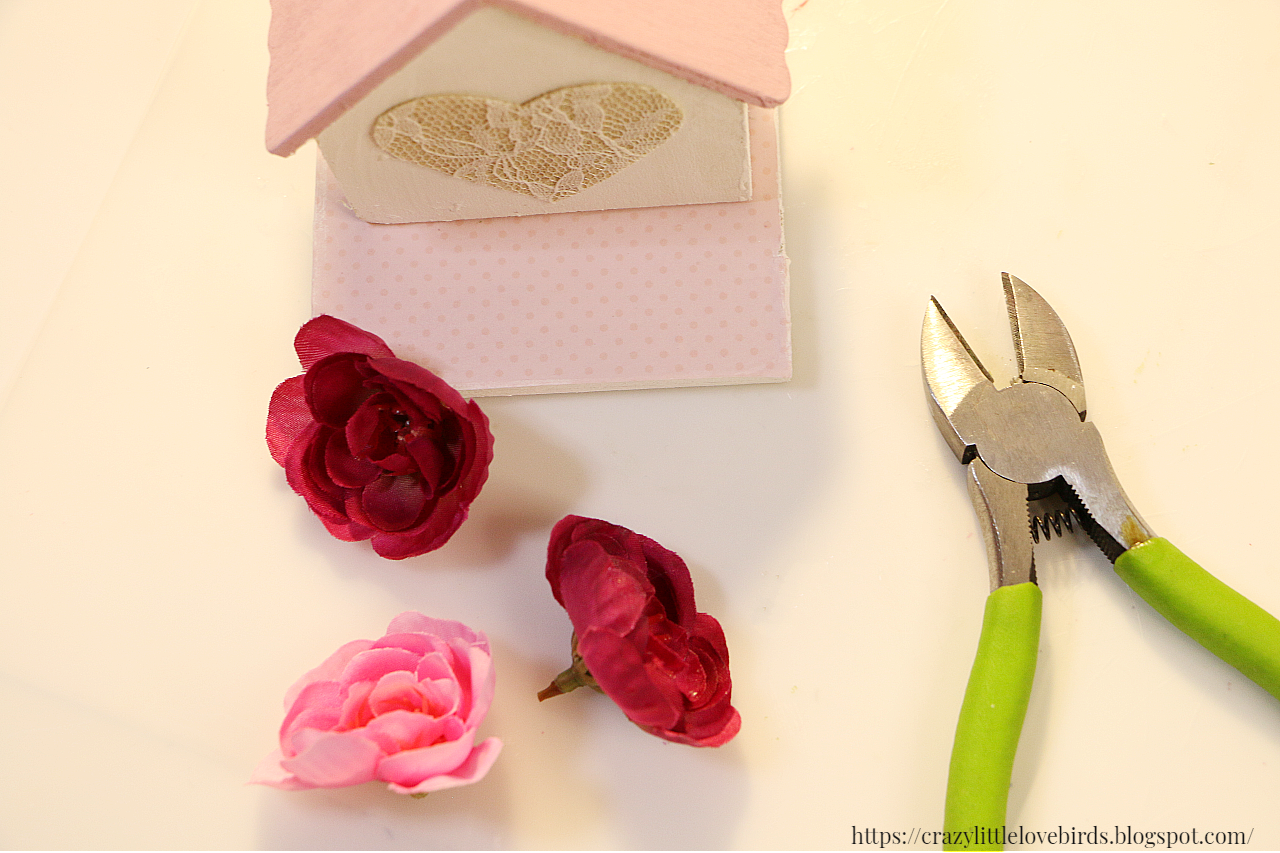

Faux floral, mini painted house, and floral cutters

Adding faux floral

Lastly, take your floral cutters and begin to cut your floral. I wanted to add three of my flowers to the wood section. I used a little hot glue when attaching my flowers to my wood square. I went with larger flowers, but feel free and go with any size floral that you choose.


Close up of mini painted house with faux floral and fabric heart

mini painted house decoration with faux floral and fabric heart


Your wooden Valentine's house display is complete. This lovely little house makes a great addition to a tiered tray near a heart garland, or near other Valentine-themed decorations. You can also display it on a fireplace mantel. I hope that you have enjoyed this simple craft creation. Be sure to let me know if you decide to create your very own. Thank you so much for stopping by. I'll see you soon.
Be sure to check out my recent Upcycled craft where I take an older craft and turn it into a sweet Valentine's hanging decoration. Upcycling an older craft
Also, be sure to check out my other craft blog over at https://stephcreatesthingsdiyhomeandcrafts.blogspot.com/


Pin/Share Save


Comments

  1. Very cute, love the lace heart! Thanks so much for linking up at the Unlimited Link Party 98. Shared.

    ReplyDelete
  2. This is so sweet. I love the idea you can take craft supplies originally designed for Christmas and switch them up for a different season.

    ReplyDelete
  3. Steph, I've got to tell you, you do such lovely work.
    Thank you for sharing this with Sweet Tea & Friends this month.

    ReplyDelete
    Replies
    1. Paula, thank you so much! I really appreciate it.

      Delete
  4. This is so very sweet! You find such lovely things to decorate.

    ReplyDelete
  5. This is so cute - love it!

    ReplyDelete
  6. The little house is adorable and would fit in my home. I really like your crafts! I'm visiting from Will Blog For Comments.

    ReplyDelete
    Replies
    1. Aw, thank you. Glad that you enjoyed this craft. 😊

      Delete
  7. This is darling. And I love that color. I love the scrapbook paper it's sitting on, too--what a great idea. Thanks for sharing this with us at the Will Blog for Comments #77 linkup. :)

    ReplyDelete
    Replies
    1. Jennifer, thank you. Glad you like it. Thanks for visiting. 🤗

      Delete

Post a Comment

Welcome! I love hearing your thoughts and seeing what you’ve been up to. Please leave a comment or ask a question below—I do my best to respond to everyone! To keep the blog comments safe and inspiring, spam will be removed. Thank you for being a part of this blogging space!

Popular posts from this blog

Colorful Summer Flower: Recycled Paper Towel DIY

  Looking to bring a little sunshine into your space without visiting the craft store? This whimsical summer flower decoration makes great use of what you already have—think beads, pom poms, a humble paper towel tube, and a splash of acrylic paint. Bonus: it’s the perfect way to reuse an old frame and welcome summer in style! What You’ll Need: 1 paper towel tube (emptied, of course!) Acrylic paint (I chose a deeper pink) Craft pom poms (yellow makes a great center!) Assorted beads (medium for the stem, smaller for embellishing the petals) Foam letters (for your summer message) A reused frame (square or any shape of your choice) Scissors Hot glue gun Creating your summer flower decoration Cut the Tube and Shape the Petals :  Start by cutting the paper towel tube into four evenly-sized sections. Each section will serve as a petal. You should be left with four rings. Next, flatten each ring, then gently reshape it to form soft ovals. These will mimic delicate flower...

The Crazy Little Lovebirds Link Party 143

Welcome to The Crazy Little Love Birds Link Party #143! I’m so happy you’re here! This is a warm and friendly gathering where you can share your amazing ideas—whether it's tasty recipes, fun family activities, creative crafts, home projects, or any other joyful inspirations. If you love finding new DIY ideas and learning from other bloggers, you’re in the perfect spot! Happy Friday! I hope you all had a wonderful week. This week, the girls and I picked up our summer reading registration prizes at the library. Prizes included stickers, journals, and a book of your choice. Does your library have a summer reading program? We've been joining in on ours for a while now.  Today also kicks off the free outdoor concerts, which we may attend.   I hope you all have a wonderful weekend, and as always, thank you for joining the party each week. I love visiting each of your blogs and seeing what you've been up to. I'm excited to share this week's featured posts from party 142.  ...

The Crazy Little Lovebirds Link Party 144

Welcome to The Crazy Little Love Birds Link Party #144! I’m so happy you’re here! This is a warm and friendly gathering where you can share your amazing ideas—whether it's tasty recipes, fun family activities, creative crafts, home projects, or any other joyful inspirations. If you love finding new DIY ideas and learning from other bloggers, you’re in the perfect spot! Happy Friday, blogging friends! How was your week? Last week, we celebrated my husband's birthday, and I made an ice cream cake for the occasion. While we were shopping, our youngest daughter found a delicious blend of coffee and cookies and cream ice cream.  It was definitely a hit! Since my husband loves coffee, the combination of coffee flavor with cookies and cream was just perfect. What's your favorite ice cream flavor?   As always, we had wonderful posts shared at last week's party. I took the time to visit every single post, and I always enjoy connecting with all of you. If you missed last week’s p...

DIY Tea Tin Planter for Sweet Mint

Today’s tiny DIY win: turning an empty lemon‑ginger tea tin into a planter for a sweet mint plant that needed some love. I cleaned the tin, added drainage, and nestled the mint inside. It instantly brightened up the space — the colors on the tin and the fresh green leaves look so sweet together. I love giving everyday items a second life, especially when they end up this cute. Quick Video Tutorial  I began this little project by cleaning out an empty metal tea container that I had saved. It still held a soft scent of lemon and ginger, and I loved the idea of giving it a second life. Once I washed and dried it, the container felt ready for a new purpose.   Next, I used a finishing nail and a hammer to create a few drainage holes in the bottom of the tin. Since metal containers don’t have natural drainage, this step helps keep the roots healthy and prevents the soil from becoming soggy. Having prepared the container, I carefully removed the sweet mint from its original pot. The ...

DIY Upcycled Peanut Jars

Transform your old peanut jars into stylish, functional containers with these creative and easy DIY upcycling ideas. Learn how to repurpose your peanut jars and give them a new life with practical and decorative uses.   Materials needed: Two  empty peanut containers Two sheets of crafting paper tape scissors Start  by removing the old label on your peanut containers  Next, you'll want to wrap your crafting paper around your container.  If you find that it does not completely cover the container, cut out a single strip to use later. I found it easier to wrap my containers with my craft paper and make the marks I needed before cutting them to size.  Tape your crafting paper into the container and then make necessary cuts to the paper using your scissors. Once this is done, take the last piece of crafting paper that you cut out earlier and place it over the spot that you were unable to cover. Take some clear tape and apply it to the contai...

All content copyright 2010-2026

I kindly request that my photos and words not be taken or used without my permission. If you have any inquiries, please do not hesitate to contact me. Additionally, for more information regarding this blog, please refer to the disclosure policy tab located above. Thank you.