
Easy Dollar Tree Christmas Floral Tray Centerpiece

Create a stunning and affordable Christmas centerpiece using Dollar Tree items. This easy DIY project involves a decorative tray and beautiful floral arrangements that will add festive charm to your holiday decor.

Red Christmas floral tray centerpiece  with candle display, church ornament, and reindeer ornament

Hello! I’m excited to help you create a beautiful Christmas floral tray centerpiece. This craft is perfect for beginners and is simple to create. Most of the materials you’ll need can be found at your local Dollar Tree store.

Materials such as faux floral, red tray, hot glue, and reindeer

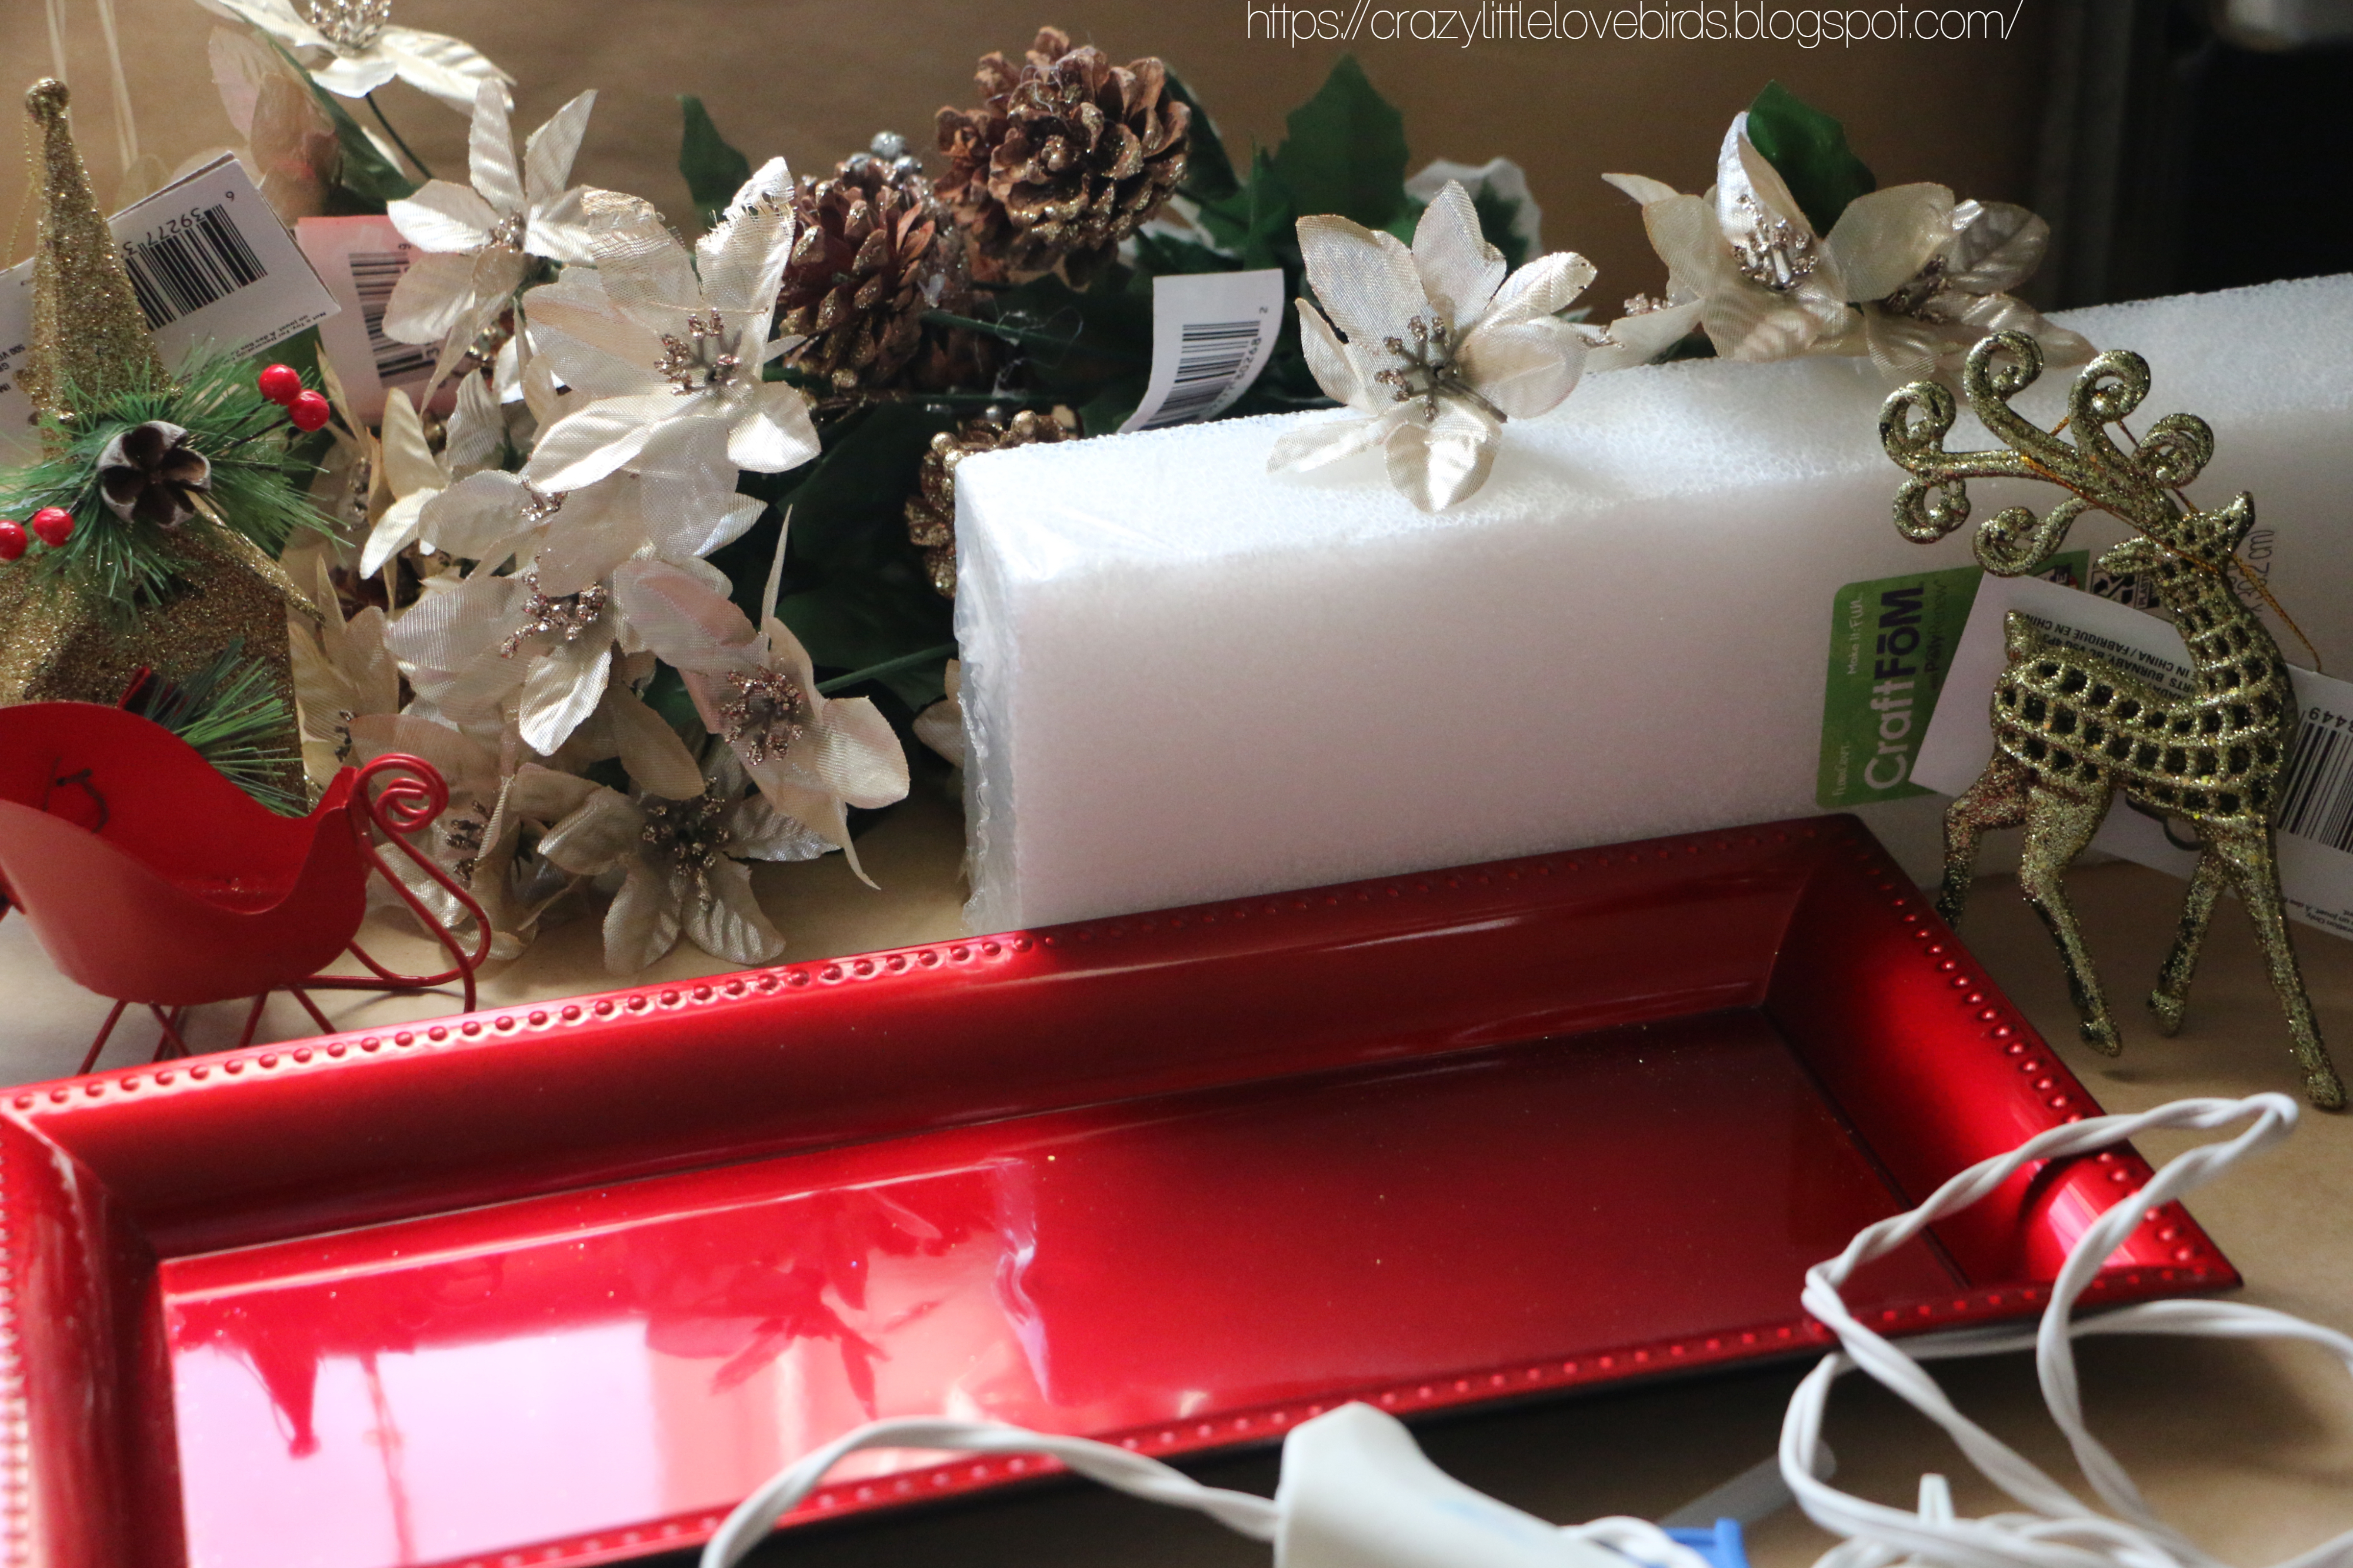
To create a Christmas floral tray centerpiece, you will need the following materials:
  • One rectangle tray (The Dollar Tree has these labeled as Charger plates)
  • One foam block 1.9 in x 3.9 in x 11.9 in (You can purchase this at Walmart or Dollar Tree)
  • Floral (I used about six bunches of holiday floral, a mix between floral and glitter pinecones)
  • One frosted candle holder
  • One mini tealight LED battery-operated candle
  • Variety of ornaments - You can use any for your design (I am using one reindeer and one Church ornament)
  • Hot glue
  • Wire cutters

Creating the centerpiece

Begin by taking your floral and wire cutters.  Use your wire cutters to cut your floral and pinecones. When cutting, you will want to leave some of the stems. Once you have your floral cut, start adding it to your foam block. 

Gently push your stem through the foam block. Be sure you work your way around the front, sides, and back of the block.  Leave the top of the block clear of any flowers and pinecones. 

Faux floral in foam block

Faux floral in foam block

Once you have completely filled the foam block with your floral, flip your tray over and begin to apply a generous amount of hot glue to the bottom side of the tray. This will secure everything together.
Hot glue on top of flipped tray

After you have applied your hot glue, flip your tray over, and press it down over the top section of the foam block. When I first attempted this project, I started with the tray and foam glued together. I eventually separated the two and decided to add my floral onto my foam block before gluing my tray to my foam block. It made things easier for me. 

Decorating your Tray

After gluing your tray to your block, you can now add your decorations. I went ahead and applied a small amount of hot glue on the bottom of each ornament.  Next, take your candleholder and add your LED candle to your candleholder.  You can also add a small bow to your candleholder. This is completely optional.

red tray with faux floral around bottom section

Completed Christmas floral tray centerpiece with decorations displayed on a table

You're all done! I placed my centerpiece on my dining table, and it looks lovely.  I hope that you have enjoyed this simple DIY project. Thank you so much for stopping by.
I love hearing from all of you. Be sure to say hello in the comments! Let me know if this is a project you'll be creating soon. 

Close up of Christmas floral tray


Pin/Share/Save

Pinterest pin showing Christmas floral tray centerpiece and text description

You may also enjoy

Comments

  1. Great idea! I am visiting from the link party on Across the Blvd, and I'd love for you to come link up on my 3 link parties at LifeasaLEOWife.com. This is a project that's right up my readers' allies!

    Happy Thanksgiving!
    Niki ~ Life as a LEO Wife

    ReplyDelete
    Replies
    1. Niki, thank you so much! I will be sure to come by your blog for a visit, and check out your link party as well.

      Happy Thanksgiving to you as well.

      :)

      Delete
  2. Very pretty! Thank you for sharing at Party In Your PJ's.

    ReplyDelete
  3. That's really pretty, love the color of the poinsettias (I guess that's what they are) and of course the candle. Looks nice. Thanks so much for linking up at #IMadeItMondayLinkParty 32. Pinned.

    ReplyDelete
    Replies
    1. Dee, thank you so much. I believe you're correct and they are called poinsettias. I purchased them at Dollar Tree and was surprised that they had them in. Thank you for visiting and taking the time to comment. I appreciate it.

      Delete
  4. Thanks for sharing with us at the Creatively Crafty Link Party. We hope to see you again on Thursday for a new part. #CCBG

    ReplyDelete
  5. CONGRATS Stephanie! Your post is FEATURED at #IMadeItMondayLinkParty 33.

    ReplyDelete
  6. That is so pretty, and much easier to make that it first looks. Thanks for stopping by to share with us at Handmade Monday :-)

    ReplyDelete
  7. Very pretty, I really like the candle in the middle.

    ReplyDelete
  8. Unsure I can make anything as good as you do here, but loved the read🌷God bless you this season and always.

    ReplyDelete
    Replies
    1. Rayla, aw, thank you. I am sure you can create something just as good. You are too kind. Thank you for taking the time to visit and leave a comment. I appreciate it. 😊🌸

      Delete

Post a Comment

Welcome! I love hearing your thoughts and seeing what you’ve been up to. Please leave a comment or ask a question below—I do my best to respond to everyone! To keep the blog comments safe and inspiring, spam will be removed. Thank you for being a part of this blogging space!

Popular posts from this blog

The Crazy Little Lovebirds Link Party 109

  Welcome to The Crazy Little Love Birds Link Party #109! This party offers a platform for sharing inspiring content, including recipes, family-friendly blog posts, crafts, home décor, and other uplifting ideas. Hello everyone! I hope you are all doing well. We made it back from our trip, and I’ve shared some highlights from our experience in a blog post. On the first day, our luggage was misplaced, and it made for quite a night! If you would like to read more about our trip, I will include the details in the link party.  Congratulations to our featured bloggers 3 Winks Design shared their post, featuring two recipes: Canning Cherry Tomatoes and Pickled Peppers. Head over to their blog to learn how they prepared the tomatoes and peppers. Paula at Musings and Glimpses shared her post, My Simple Secrets to Thriving Pothos and Ivy and the Ugly Lamp They Love. She shares her plant journey along with some houseplant care tips. Jennifer at Studio 27 shared her post, Framing Insta...

The Crazy Little Lovebirds Link Party 145

Welcome to The Crazy Little Love Birds Link Party #145! I’m so happy you’re here! This is a warm and friendly gathering where you can share your amazing ideas—whether it's tasty recipes, fun family activities, creative crafts, home projects, or any other joyful inspirations. If you love finding new DIY ideas and learning from other bloggers, you’re in the perfect spot! Happy Friday! I hope you are all doing well. This week was a little rough. It started with my husband having a cough, sore throat, sneezing, and whole-body aches. Of course, that was passed on to the rest of us, but we have been so fortunate to just have a sore throat. This calls for plenty of hydration, vitamin C, and occasional medication. I hope you all had a nice week. Just yesterday, the weather reached 102 degrees! It definitely was hot out. Now, onto the party, we have some wonderful featured posts to share this week. Thank you to everyone who joined last week, and if you are new here, welcome! We're so gl...

The Crazy Little Lovebirds Link Party 146

  Welcome to The Crazy Little Love Birds Link Party #146! I’m so happy you’re here! This is a warm and friendly gathering where you can share your amazing ideas—whether it's tasty recipes, fun family activities, creative crafts, home projects, or any other joyful inspirations. If you love finding new DIY ideas and learning from other bloggers, you’re in the perfect spot! Happy Friday! I want to thank everyone for the kind words at our last party. We've been taking it easy this week and are recovering well from the cold virus. Our youngest is getting ready to leave in a few days for a four-day summer camp, and she's really excited about it. How was your week? I hope you're all managing to stay cool in this summer heat.    We also have some wonderful featured posts to share with you this week. Congratulations to our featured bloggers Salt Prairie – Summer Kitchen Vignette A fresh summer kitchen display with wicker accents, soft coastal colors, and easy seasonal style. Eye...

The Crazy Lovebirds Link Party 64

Welcome to The Crazy Little Love Birds Link Party #64! This party provides a platform for sharing inspiring content such as recipes, family-friendly blog posts, crafts, home decor, and other uplifting ideas. Hello everyone, thank you for joining us today. I hope you are all doing well. Now that the snowstorm has passed, we've been enjoying a few sunny days, perfect for nature walks—we just make sure to bundle up!    Today, we have some fantastic features to share with you, and I can’t wait to tell you all about them. Congratulations to our featured bloggers Lalka Crochetka shares a lovely personalized doll named Margaret. Visit her blog to see her beautiful and talented work. Jennifer from Tea with Jennifer explores the question: Do you view people through emotionally charged lenses? Head over to her blog to read more about this intriguing topic. Julie at Sums of Their Stories provides a tutorial on how to make an adorable ribbon-covered crossbody bag. Check out her post to...

Colorful Summer Flower: Recycled Paper Towel DIY

  Looking to bring a little sunshine into your space without visiting the craft store? This whimsical summer flower decoration makes great use of what you already have—think beads, pom poms, a humble paper towel tube, and a splash of acrylic paint. Bonus: it’s the perfect way to reuse an old frame and welcome summer in style! What You’ll Need: 1 paper towel tube (emptied, of course!) Acrylic paint (I chose a deeper pink) Craft pom poms (yellow makes a great center!) Assorted beads (medium for the stem, smaller for embellishing the petals) Foam letters (for your summer message) A reused frame (square or any shape of your choice) Scissors Hot glue gun Creating your summer flower decoration Cut the Tube and Shape the Petals :  Start by cutting the paper towel tube into four evenly-sized sections. Each section will serve as a petal. You should be left with four rings. Next, flatten each ring, then gently reshape it to form soft ovals. These will mimic delicate flower...

All content copyright 2010-2026

I kindly request that my photos and words not be taken or used without my permission. If you have any inquiries, please do not hesitate to contact me. Additionally, for more information regarding this blog, please refer to the disclosure policy tab located above. Thank you.