
Crazylittlelovebirds Link Party #5

Welcome to Crazylittlelovebirds link party #5


Congratulations to our featured bloggers! 

This link party is possible because of all of you. I am so grateful. Thank you to each and every one of you who entered last week's party. 

Photo Collage of Link Party Features


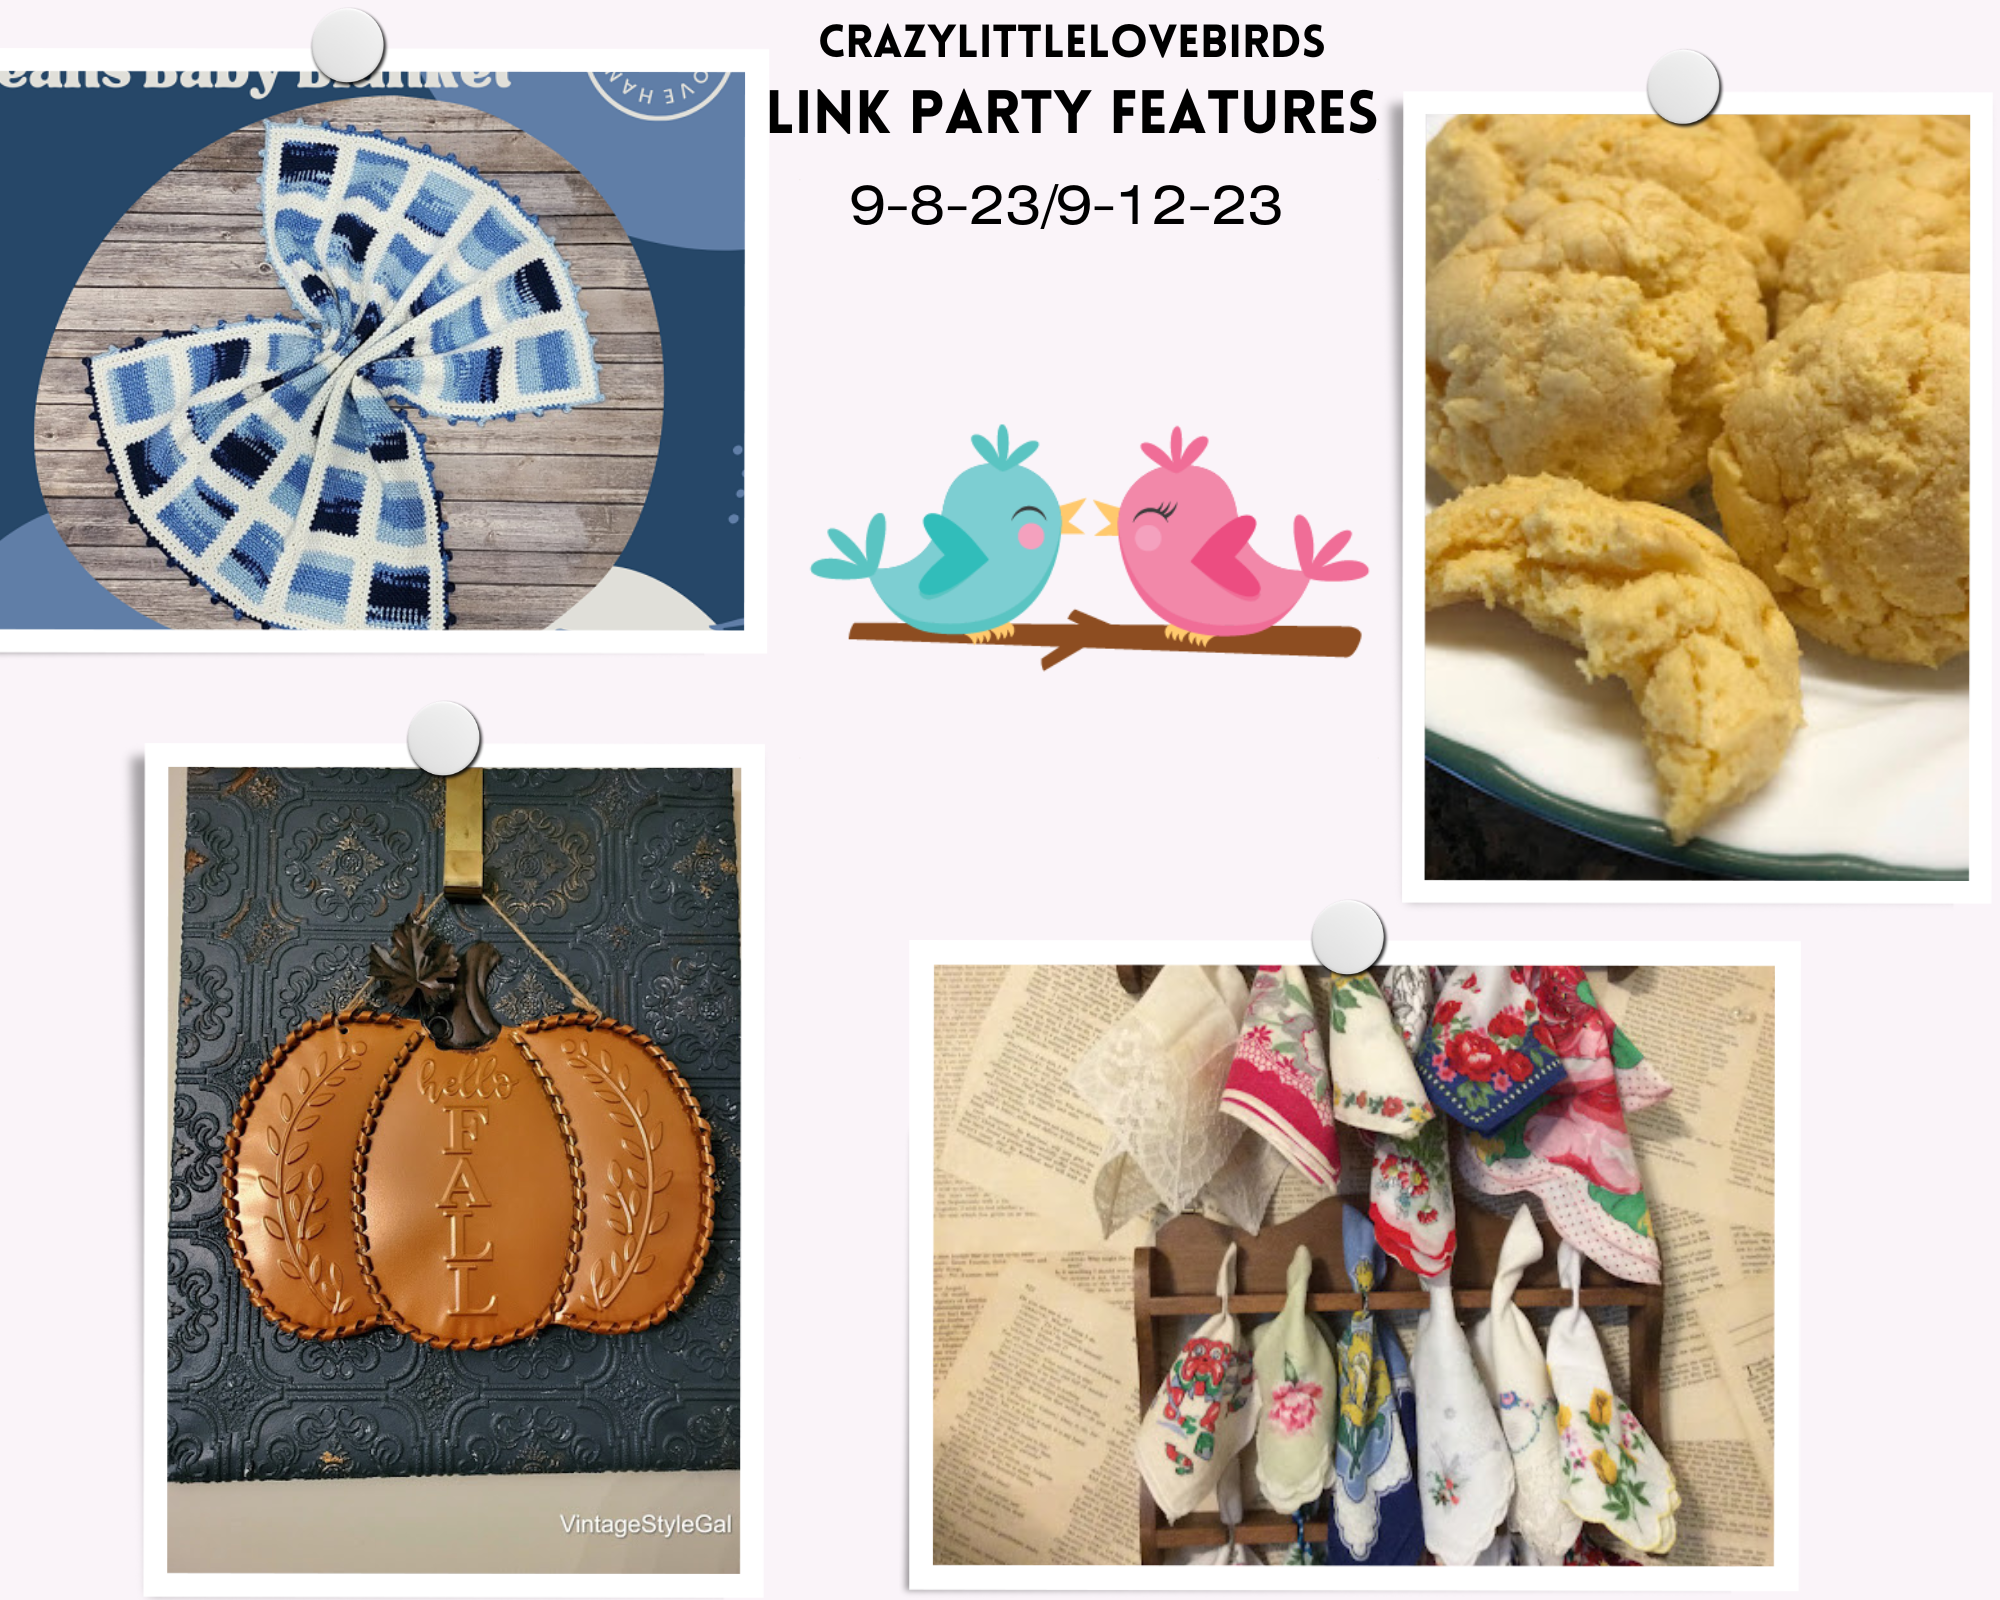
T'onna over at Sew Crafty Crochet has shared a detailed tutorial on how to create a cute crocheted baby blanket.
Check out all the details here--Blue jeans baby blanket


Jennifer from Easy Pantry Recipes shares her super easy recipe for Grandma's lemon cake cookies. Check out the recipe here--Grandma's lemon cake cookie recipe

Cara from Vintage Style Gal shares a tutorial on how to create a beautiful fall decor piece using canvas, wallpaper, paint, and pumpkin decoration.  Want to make one too? Check it out here--DIY Fall Decor


Lisa from Fresh Vintage by Lisa S. shares a creative way to repurpose spoon racks by displaying vintage hankies with various colors, embroidered details, and lace.

Be sure to check it out here--Repurposed Spoon Racks


Be sure if you are pinning any of the posts mentioned above that you pin from the original post from the blogger's blog! 

All featured posts will be pinned on Crazylittlelovebirds Featured Pinterest Board


On to the party
Crazylittlelovebirds link party #5


Don't forget to have a great time and make connections with your fellow bloggers.

Joining the Crazylittlelovebirds link party grants me permission to showcase your links and images on my social media accounts, complete with a mention of your blog name and a link back to your site.


Comments

  1. Than you so much for sharing my repurposed spoon racks!! So happy to join the party.
    Thank you for hosting!
    xo Lisa S

    ReplyDelete
    Replies
    1. Lisa, you're very welcome! Thank you for joining us again. Happy to have you here. :)

      Delete
  2. Not linking anything today but did want to say thanks so much for linking up at the #UnlimitedLinkParty 129. Pinned.

    ReplyDelete
    Replies
    1. Dee, it is always a pleasure linking up at Unlimited link party. :) Wishing you a wonderful weekend.

      Delete
  3. Thank you so much for the feature Stephanie, I am honored to be a part of the wonderful features this week! Have a wonderful weekend!

    ReplyDelete
    Replies
    1. Cara, you're very welcome. Thank you for joining us here. Wishing you a wonderful weekend. 😊

      Delete
  4. Thank you for featuring my Grandma's Lemon Cake Cookies! They're so easy and yummy--I hope your readers will enjoy them, too. :) Thanks for hosting this linkup. Have a great weekend!

    ReplyDelete
    Replies
    1. Jennifer, you're very welcome. Happy that you joined us again. I hope that you have a wonderful weekend.

      Delete
  5. Thanks so much for hosting each week! Blessings!

    ReplyDelete
  6. Replies
    1. Thank you, Teresa. Thank you for joining us. 😊

      Delete

Post a Comment

Thank you for taking the time to leave a comment. Your feedback is greatly appreciated. I strive to respond to every comment and welcome any questions. Additionally, I will visit your blog and leave a comment if you provide your name or blog link! ***However, spam or comments that do not offer valuable feedback will be deleted.***

Popular posts from this blog

Transforming a Chocolate Box into a Beautiful Hanging Heart

Chocolates always have a way of making things better, don't they? In this project, we'll repurpose a heart-shaped chocolate box into a beautiful hanging heart decoration that you can proudly display for Valentine's Day. I'll provide you with a list of materials needed and guide you through the simple step-by-step process. So, get ready to give your leftover chocolate box a new lease on life! Materials One heart-shaped chocolate box Acrylic paint One sanding block Fabric heart garland (I purchased my fabric heart garland at Dollar Tree) Paintbrush Faux flowers and greenery Hot glue Twine or rope Scissors Floral cutters Prepping the box I used a heart-shaped box for my project, which had raised letters and hearts design. To prepare the box, I used a sanding block to sand down the lettering and design. It was easier than tearing the packaging paper off.  Applying Acrylic paint After sanding down the box and cleaning my workspace, I applied acrylic paint with a paintbrush. ...

Easy Dollar Tree Halloween Floral Creation DIY

Create your own simple Halloween floral arrangement using Dollar Tree supplies with this easy DIY tutorial. Embrace your creativity with this enjoyable and budget-friendly project. Hey everyone! Today, I want to share a simple craft idea using items from Dollar Tree. I recently visited my local store and found a Halloween-themed mini tin pail pack. I already had some foam balls at home, so I knew exactly what I wanted to make. We will create an easy floral decoration that's perfect for Halloween. This craft is quick, and you might already have some materials at home. If you're ready, let's start making the Halloween floral creation! Quick Video Tutorial Materials needed: - Mini tin buckets (I purchased mine at Dollar Tree) - Craft foam balls (smaller size) - Hot glue - Foam flowers (pack found at Dollar Tree) - Mini pumpkins (using mini pumpkin cocktail picks found at Dollar Tree) -Paintbrush Start by removing the handle from the tin pail.  Before attaching the foam ball to...

DIY Holiday Decor: How to Make a Wintery Faux Foliage Bowl

Create a stunning DIY holiday decor with this step-by-step guide on making a wintery foliage bowl. Learn how to craft a beautiful centerpiece that brings the essence of winter into your home. Hi there, I hope everything is going well for you. Today, I want to share with you a simple upcycling holiday craft idea. The three main materials you will need for this craft are a bowl, a cork, and some wintery foliage. I used a cork lid from a salt bottle that I had kept, and a pink bowl I had bought a few months ago for just 50 cents. You can easily put this project together in less than 15 minutes, and it looks absolutely beautiful once it's displayed. So, if you're ready, let's start creating! Here's what you'll need One bowl (any size works, I am using a smaller bowl for my design) Wintery faux foliage Cork (I am reusing a cork from a salt bottle) Hot glue Floral cutters (to cut foliage to size) Pinecones (optional) Attaching the cork to the bowl To begin, turn your bowl...

All content copyright 2010-2025

I kindly request that my photos and words not be taken or used without my permission. If you have any inquiries, please do not hesitate to contact me. Additionally, for more information regarding this blog, please refer to the disclosure policy tab located above. Thank you.