
Are you looking for some creative gift wrap ideas? If so, you have come to the right place. There's no better way to create a personalized package for someone special than this. It's simple, fun, and the result will be loved by you and the recipient. This craft allows you to use up any leftover materials, such as buttons, beads, and flower embellishments that you may have in storage.

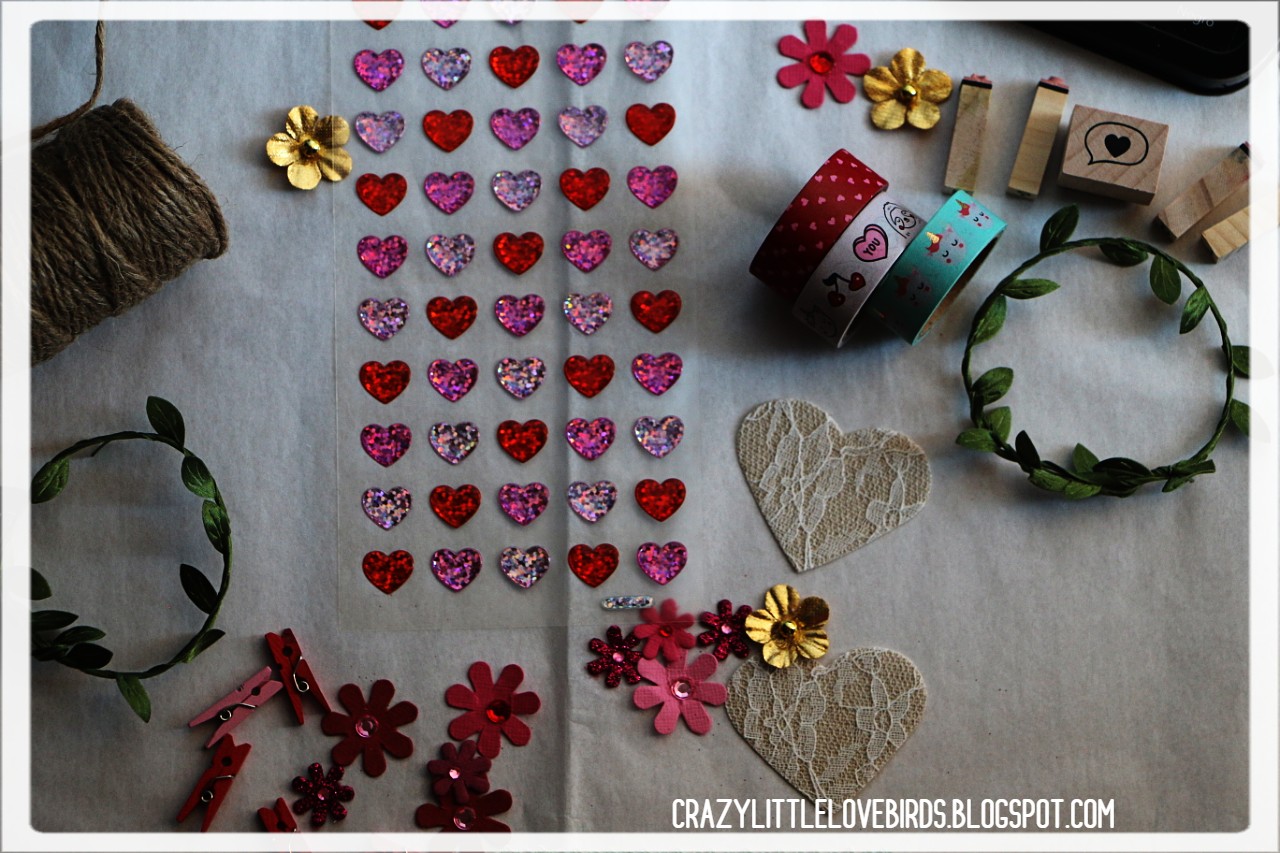


Here are the materials you'll need:
- Craft flowers (paper, silk or foam)
- Twine, string or ribbon
- Craft hearts (fabric, foam or sticker)
- Garland (any type)
- Craft clothespins (any color)
- Stamps and ink (any color and design)
- Washi tape (decorative tape)
- Hot glue or any craft glue
- Plain gift wrap paper/tissue paper (any material)
- Scissors
To create your own wrapping paper, begin by cutting a piece that is the appropriate size for the box you are wrapping. Then, carefully wrap the paper around the box and use decorative tape to secure it. Now, it's time to add some decorative elements to the wrapping paper. You can use stamps, hearts, stickers, garlands, and other decorations. Let your creativity shine!
Stamps and embellishments
Stamps are a fantastic way to add personalized messages, names, or cute sayings to your gift wrap. You can also enhance your gift wrap by adding embellishments such as stickers, hearts, or other designs that give your gift a unique look. Whether you choose shimmery embellishments or burlap, you can make your gift stand out.
Washi tape
Washi tape is a great way to add a new design to your gift wrap. You can use longer or shorter sections, or break the tape and add it to specific areas of your gift. You can even use a section of washi tape and place it on your gift, then use a stamp to imprint a name over the tape.
Twine, Rope, and Garland
Adding twine, garland, or decorative rope is another excellent way to make your package special. You can even string some beads on your twine for added flair.
Adding simple materials such as decorative tape, beads, gems, or twine to a plain gift box can make it unique and special.
Gift Tissue paper
Wrapping a gift in tissue paper gives it a more delicate appearance and makes for a fun way to prepare gifts.
This is a cute way to personalize a gift for someone special. If you enjoyed this post, please feel free to share it. Feel free and leave a comment below and let me know what you created for someone special, or just say hello!

Pin/Share for later


Nice and creative gift wrapping ideas! I'm visiting from Over The Moon party.
ReplyDeleteAllyson, thank you for stopping by.
DeleteMarilyn, thank you! I will be sure to visit the over the moon party. It is such a lovely party. Thank you for sharing.and pinning my post. I appreciate it very much.
ReplyDeletethese are great! I am horrible at crafting but this looks like something I could totally do. also something fun for my daughter when she goes to bday parties.
ReplyDeleteThank you! I think that is a great idea for when your daughter goes to birthday parties.- I love that idea. :)
DeleteI love how simple this all is and how pretty it looks. The fact that this can be done with any paper also opens the door for those of us who would like to make smart environmentally aware choices - Rather than wrapping gifts with expensive (and wasteful) commercial wrapping paper, we can do this with recycled paper.
ReplyDeleteBritt, thank you! And absolutely this can be done with recycled paper as well. Love that idea. :)
DeleteI would absolutely love a gift wrapped like this and while I am not crafty at all, this looks like something I could actually do myself. I am not sure if it would look as pretty as yours, but I do have some pretty supplies, I may actually give it a go.
ReplyDeleteStella, thank you. Yes, it is very simple,and I am sure when you create yours it will be just as pretty!! :) Thank you for stopping by.
DeleteWhat a fun and creative idea! I had never even considered creating something like this when I wrap gifts. But I am also terrible at wrapping. Every time it ends up looking like a blind and intoxicated t-rex wrapped the gift. Reading this post makes me want to practice and learn to make beautiful wrapping like that though.
ReplyDeleteErica, you had me laughing so much with your blind intoxicated T-rex comment. When it comes to wrapping gifts I've noticed my husband sticks me with the tasks, and I end up not being able to find him, lol. I'm sure if you give it a try it would turn out great!!
DeleteThese are all beautiful and it looks like fun decorating all of the gifts! It would be so lovely to receive a gift wrapped like this.
ReplyDeleteLuna, thank you! :)
DeleteIts amazing how things can come out so beautiful with the simplest little basic details. I love the creativity flowers ideas.
ReplyDeleteSonia, so very true! Thank you so much. :)
Deletehow cute! I am totally not sure if I could do it that neat and pretty but it sure is fantastic and I would have been over the moon to receive such a gift
ReplyDeleteLyosha, aw thank you. And I am sure you could do it just as pretty. :)
DeleteAs a former scrapbooker, I have so many leftover embellishments and they would be perfect for this. I'm so lazy and always use gift bags, but these are lovely and such a personal touch! I love attention to the little details when I receive gifts, so I should be more creative when giving them!
ReplyDeleteDebra, I honestly thought I had responded. This is a great way to use your extra embellishments. I had so many lying around, and this was perfect. Thank you for stopping by.
DeleteI'm with Debra, so many embellishments and I know I'll never use them all. Great ideas here! Thanks so much for linking up at #IMadeItMondayLinkParty 16. Pinned.
ReplyDeleteDee, thank you. Yes this is a great way to use those extra embellishments. 😀
DeleteAaaawww... There are so many pretty options! Thank you for all the lovely ideas! -Marci @ Old Rock Farmhouse
ReplyDeleteMarci, thank you so much! I'm happy you enjoyed. :)
DeleteCute ideas - anyone would be thrilled to receive one of these gifts!
ReplyDeletePatti, thank you so much.
DeleteBrilliant. I love making the outside of gifts as special as what's inside. Featuring when my link party opens.
ReplyDeleteCarol, thank you. I'm happy to be featured at your party. 🥰
DeleteThanks for sharing with us at the Homestead Blog Hop! I can't wait to see what you bring us this Wednesday.
ReplyDeleteKelly, thank you very much! I can't wait to share at your blog hop this Wednesday.
DeleteLove these ideas - so simple yet effective!
ReplyDeleteThank you. ☺️
DeleteWhat lovely ideas! Featuring you at Wednesdays in the Studio!
ReplyDeleteJennifer, thank you! :)
DeleteLove these ideas. Thanks for sharing them. This post will be a feature this week. #HomeMattersParty
ReplyDeleteThank you! 😊
DeleteI think I need to make a few of these for my Harry Potter Christmas tree as ornaments. They are such fun. Thanks for sharing them and this post will be a feature this week. #HomeMattersPartuy
ReplyDeleteDonna, that sounds like a cute idea for your Harry Potter Christmas tree. Thank you for visiting and letting me know about the feature.
DeleteI absolutely love these ideas, Stephanie. They are gorgeous! So much better than patterned wrapping paper. Pinning to save and share! :) Visiting from the To Grandma's House We Go link party.
ReplyDelete