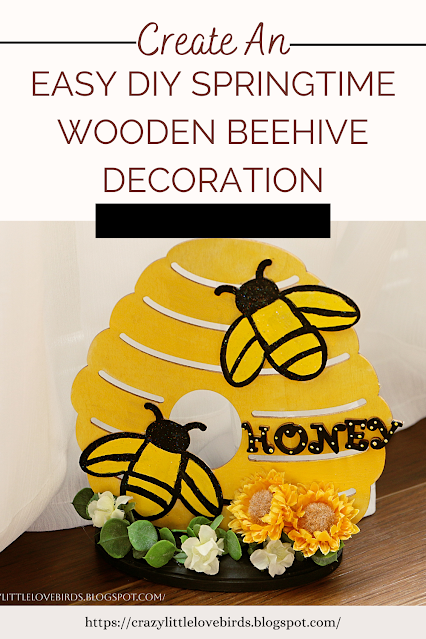
Hey! Let's create a cute and simple Springtime beehive wooden plaque decoration using just a few materials.
Easy DIY Springtime Wooden Beehive Decoration
Materials
One wooden beehive decoration
Wooden oval piece
Scrap wood or wooden rectangle section
Mod podge-optional
Acrylic paint
Faux Floral
Hot glue
Paintbrush
Wooden letters
Adding paint to the wooden decoration
Start by applying your paint to your wooden beehive decoration. I used yellow and black paint for this. After you allow your paint to dry, you can add a layer of Mod Podge over your beehive decoration. I decided to use my Mod Podge that has glitter in it.
Adding paint to wooden letters
Next, take your black paint and apply paint to your wooden letters. I decided to paint the letters black, and I used a smaller paintbrush and added yellow dots to my wooden letters.
Adding paint to oval wood and rectangle wood section
After, apply your black paint to your rectangle wood and oval wood sections.
Attaching your wood sections
Use your hot glue and glue the two sections together. This will create a stand for the beehive decoration. After take your wooden beehive and glue it to the scrap wood section.
Cutting and attaching faux floral
Lastly, take your faux flowers and after you have cut them to size, begin to add them to your wooden stand. I decided to just add my flowers to the front side of my stand. After adding your flowers, take your wooden letters and glue them to your beehive decoration.
Your wooden beehive decoration is complete and ready to be put on display! Thank you so much for stopping by and giving this craft a try. I will see you soon.
Be sure to check out my EASY DOLLAR TREE EASTER TABLETOP DECORATION on my craft blog.
Pin Share Save


So cute and cheerful looking!! Thanks so much for linking up at the #UnlimitedLinkParty 102. Shared.
ReplyDeleteDee, thank you! I agree, it is very cheerful looking. :)
DeleteThis is so cute. I appreciate you sharing this tutorial.
ReplyDeleteVisiting today from Unlimited Linky #102 #50
Paula, thank you!
DeleteThat is so cute!
ReplyDeleteJoanne, thank you. :)
Delete