
Creating a Festive Winter Design with Dollar Tree Faux Arched Window Frame

Learn how to create a festive winter design in your home using a Dollar Tree faux arched window frame. This budget-friendly DIY project will add a touch of holiday charm to your decor. Find step-by-step instructions and inspiration for creating a stunning winter window display.

Hey there everyone! Today, I want to share an easy DIY craft transformation with you all. We'll be using a faux arched window frame from Dollar Tree and turning it into a beautiful winter decor piece that can be displayed on a mantel, shelf, or any room. The best part is that you won't need many materials, and I will provide you with the list of materials that you will need. So, let's get started and create our arched window frame design!

Faux arched window frame winter design

Faux Arched Window Frame, paint, paintbrush, hot glue, and greenery

Materials

  • One faux arched window frame decoration
  • Acrylic paint
  • Faux greenery
  • Paintbrush
  • Hot glue
  • Optional: Mod Podge, snow powder, and floral cutters
  • Holiday embellishments

Applying paint to the faux window frameFaux Arched Window Frame with white acrylic paint
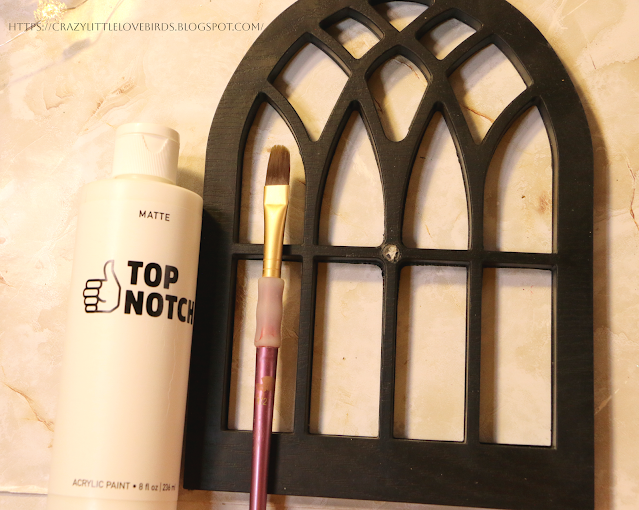

Take your paintbrush and apply acrylic paint to your faux arched window frame decoration. The frame I purchased was black, and for the winter design, I painted it white. You can paint your window frame any color you like.

Optional step: Applying Mod Podge and faux snow powderFaux Arched Window Frame with paintbrush and Mod Podge
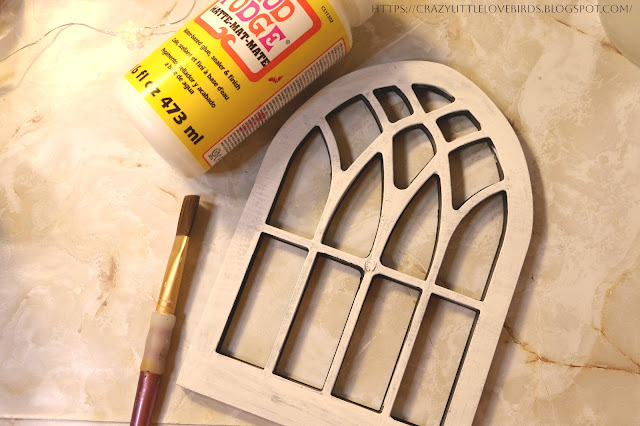

Faux Arched Window Frame with snow powder

Next,
 
Take your paintbrush and apply Mod Podge to the areas where you want to add your faux snow powder. This step is optional. Sprinkle the faux snow powder over the Mod Podge area. I added a little to the lower section of the window frame.

 You are now ready to add your holiday embellishments. I decided to add a single snowflake sticker to the center of my window frame. You could add gems, a mini wreath, or other embellishments as well.

Adding embellishments and faux greeneryHand holding greenery in place over window frame design
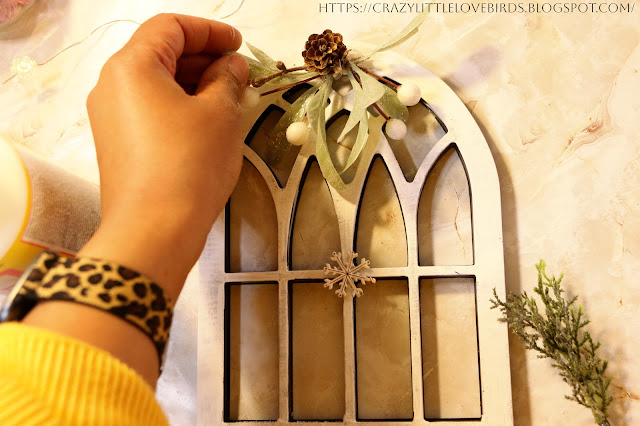
Take your faux greenery and begin to add it to the window frame using hot glue.

Faux Arched Window Frame with floral cutters and foliage
Cut your faux greenery/foliage using your floral cutters to the desired size. Take your faux greenery and add it to your window frame using hot glue.

faux arched window frame winter design displayed with lights and mini trees


 Your faux arched window frame winter design is now complete! I hope you enjoyed this DIY project as much as I did. It’s a simple and inexpensive way to add holiday cheer to your home decor. If you’re looking for more holiday craft ideas, check out these inexpensive DIY Christmas decorations or these easy DIY winter crafts below.


Pin Share Save
Pinterest pin showing Faux Arched window frame


Comments

  1. Looks nice, I like how you decorated it. Thanks so much for linking up at the #UnlimitedLinkParty 139. Pinned.

    ReplyDelete
  2. Looks nice, I like how you decorated it.

    ReplyDelete
  3. I love what you've done with this faux frame. There are so many possibilities with what has become a bit of a classic piece.

    ReplyDelete
    Replies
    1. Thank you so much. I appreciate you visiting as well.

      Delete
  4. This looks really sweet. I saw something similar to this in the charity shop just this morning, I think I might need to pop back asap and see if it is still there!

    ReplyDelete
    Replies
    1. Julie, aw thank you. It might still be there, and hopefully, you can pick it up. If not, maybe you can create your very own. 😊

      Delete
  5. So pretty and decorative and I love it that its small enough to use in a small home with very little space
    Happy Thanksgiving to you all.
    Thank you for sharing your links with us at #286 SSPS Linky. See you again next week.

    ReplyDelete
    Replies
    1. Thank you. Yes, you can use it in a smaller space. Thank you so much for visiting. Happy Thanksgiving to you as well.

      Delete
  6. I haven't seen these at Dollar Tree but will be looking for one now. Your project turned out so pretty. This post will be a feature this week. #HomeMattersParty

    ReplyDelete
    Replies
    1. Thank you so much. Yes, they have them with the frames. :)

      Delete
  7. This is a beautiful DIY - I just love the arched window look! Thank you for an excellent tutorial!

    ReplyDelete
    Replies
    1. Marilyn, thank you so much. I'm happy to hear you enjoyed this craft and the tutorial that goes along with it. I appreciate it. Thank you so much for visiting.

      Delete
  8. Simple, yet elegant! Very nice! Good job!👏🏻

    ReplyDelete
    Replies
    1. Mary, thank you very much. I'm glad you enjoyed it. 😊

      Delete
  9. That is so pretty! I love how you painted it. Visiting from Tuesday Turn About.

    ReplyDelete
  10. very pretty thanks for sharing with Create-it Link Party https://tryit-likeit.com/link-party-it/

    ReplyDelete
  11. Absolutely adorable Stephanie! That window has been in my craft box since last year waiting for the perfect project. This is it! Thank you so much. Happy Holidays.

    ReplyDelete
    Replies
    1. Denise, thank you very much. I'm glad you enjoyed this DIY project. Wishing you a very happy holiday.

      Delete
  12. This is so lovely. I haven't seen these at my stores. Will be on the lookout. Featuring when my link party opens.

    ReplyDelete
    Replies
    1. Carol, thank you so much. I found this in the springtime at my Dollar Tree.

      Delete
  13. I love this idea, Stephanie! I already have an arched window frame that I thought I'd have to put away for the holidays but your clever project has me thinking! Thank you!

    ReplyDelete
    Replies
    1. Laura, thank you very much. I'm glad you enjoyed the project. Yes, before you throw it away, try this out! 😊

      Delete

Post a Comment

Welcome! I love hearing your thoughts and seeing what you’ve been up to. Please leave a comment or ask a question below—I do my best to respond to everyone! To keep the blog comments safe and inspiring, spam will be removed. Thank you for being a part of this blogging space!

Popular posts from this blog

The Crazy Little Lovebirds Link Party 158

  Welcome to The Crazy Little Love Birds Link Party #158! I'm so happy you're here! This gathering is all about sharing what brings us joy.  Bring your delicious recipes, fun family moments, cozy crafts, and home projects—basically, everything wonderful you've been working on. Congratulations to our featured bloggers Mod Crochet Loopy Hair Ties Pattern — Val & Holland Val & Holland made the cutest loopy hair ties, and they’re just such a fun, quick little crochet project.  An Unexpected Adventure — Jennifer Jennifer shared how a long‑dreamed‑of getaway with her husband turned into a true adventure — steep trails, gorgeous waterfalls, a few shaky moments, and plenty of faith guiding her through. Creamy Paprika Salad Dressing — Scratch-Made Food Melynda has a creamy paprika dressing that’s simple, flavorful, and perfect for everyday meals. One of those easy homemade staples you’ll want to keep around. Jahresprojekt 2026 – August — Mami Made It Mami Made It shared he...

Easy Succulent Centerpiece Table Decoration

 Easy Succulent Centerpiece Table Decoration Create a beautiful and low-maintenance centerpiece for your table with this easy DIY faux succulent decoration. Perfect for adding a touch of greenery to any space without the need for watering or maintenance. Hello! I'm so happy that you decided to check out this easy succulent decoration project.   I was inspired to create this centerpiece after my sister mentioned she was looking at purchasing a succulent wax burner.  So my design does not include a wax burner, but if you stick around I'll tell you how you can create your very own succulent centerpiece table decoration.  Materials Needed ❤ Artificial Succulents and a flower  For my design, I used 4 succulent plants I purchased my  artificial succulents from my local Walmart (Make sure to check your local dollar store as well) ❤ A wooden bowl I purchased my wooden bowl at Walmart.  You can actually find any container of your choice at your local craft...

The Crazy Little Lovebirds Link Party 119

Welcome to The Crazy Little Love Birds Link Party #119! This party offers a platform for sharing inspiring content, including recipes, family-friendly blog posts, crafts, home décor, and other uplifting ideas. I hope you all are doing well. I think we've all noticed some of the issues Inlinkz has been having, specifically the 500 error. If that happens, just be sure to revisit to add your links. It usually doesn't last long. Sorry to those who were unable to add your links at the last party. If you did join, thank you. As always, I enjoy visiting each post and catching up with all of you. Congratulations to our featured bloggers Lisa at Handmade in Israel shared her visit to  Larnaca, a coastal city on the southern coast of Cyprus. Visit with her to see how her trip went, and while there, explore the beautiful photos she shared. Our Grand Lives  shared a post about their Favorite Holiday Traditions. I love seeing other people's traditions during the holidays. Visit with th...

Easy Floral Decoupage Idea for Faux Pumpkin Display

 Hi everyone! I'm excited to share a simple and easy floral pumpkin design you can create quickly. Today, we will make a faux floral pumpkin display using decoupage and a few additional designs. I'm reusing a foam pumpkin that I bought at Dollar Tree. If you’re ready, let’s begin creating an easy floral decoupage faux pumpkin display! Quick video tutorial **Materials needed:** - Acrylic paint - Paintbrush - Floral napkin - Faux pearls - Faux flowers - Craft knife - Scissors - Mod Podge Carefully remove the top of your pumpkin. I used my craft knife to go around the top section, creating a hole at the top. Using a paintbrush, apply acrylic paint to the pumpkin. I chose to paint mine black. Next, use scissors to cut out a few flowers from your napkin. Make sure to remove the second layer of the napkin before cutting out the designs.   Once you have your floral designs cut out, use a paintbrush to apply Mod Podge to the pumpkin. While the Mod Podge is wet, add the floral napkin c...

Creating faux stained glass using plastic plates

Learn how to create stunning faux stained glass using plastic plates with this easy and eco-friendly DIY project. Discover creative ways to reuse plastic plates and bring a beautiful stained glass effect to your home decor. Hi everyone! I'm excited to share a quick craft with all of you. I am reusing a plastic plate, giving it a stained glass look. I will run you through two options. I'm joining the Sustainable challenge with a group of other bloggers, sharing eco-friendly and sustainable craft ideas. This is my first time participating. I am thrilled to share this upcycled craft with you all. The theme this month is sunshine. I chose to go with this project since I had extra clear plastic plates stored away since my oldest turned 12 this past April. I purchased a pack around her birthday and stored away the plastic plates that weren't used.  Creating faux stained glass using plastic plates Materials One plastic plate One sheet of paper for creating a template Pencil Stenci...

All content copyright 2010-2026

I kindly request that my photos and words not be taken or used without my permission. If you have any inquiries, please do not hesitate to contact me. Additionally, for more information regarding this blog, please refer to the disclosure policy tab located above. Thank you.