The Crazy Little Lovebirds Link Party 77

Welcome to The Crazy Little Love Birds Link Party #77! This party provides a platform for sharing inspiring content such as recipes, family-friendly blog posts, crafts, home decor, and other uplifting ideas. 


Thank you all for being part of the party! Wishing everyone a fantastic week or weekend ahead! 


Congratulations to our featured bloggers

Lisa at Handmade in Israel has created a card for Emily and Sam, who recently got engaged, and we absolutely love the details she has included in it. There is so much excitement for this newly engaged couple! With big smiles, Sam pointing at the ring, and Lisa capturing the exact background of their engagement, it’s beautiful!  


Maria at Krafty Planner has shared a post titled "Simple Ways to Show Yourself Some Love this February." She's right; while we often focus on showing love to others, it’s important to take some time to show love to ourselves. She provides wonderful ideas for self-care, such as journaling, eating nourishing foods, and exercising. Visit her blog for more!  


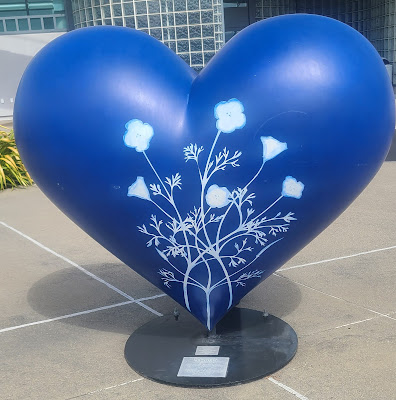
Check out Adventures in Weseland, where he shares a post called "Got to have Hearts and Heroes." He has put together a collection of pictures of hearts found around San Francisco. 

Sally over at Within a World of My Own has shared a post featuring "Two Teal Winter Outfits for SIA Diamond Dust-Shoes and DIY Jewelry." She shares her inspiration for the outfits, along with her DIY jewelry and shoes.  

All featured posts will be pinned on Crazylittlelovebird's Featured Pinterest Board.

If you would like you can use the featured party button! Just right-click and save the image.


You are invited to the Inlinkz link party!

Click here to enter

Comments

  1. Thanks so much for hosting us all, Stephanie! I love all your features this week - especially the "Hearts and Heroes" one! Wishing you a fabulous February weekend ahead!

    ReplyDelete
    Replies
    1. Laura, thank you. I enjoyed that post, as well. Thank you for joining us. We appreciate it very much. Have a great weekend.

      Delete
  2. Thank you so much for featuring the card I made for Emily and Sam!
    Have joined in again with no.3
    Have a great weekend.

    ReplyDelete
    Replies
    1. Lisa, you're very welcome. We enjoyed your card. Have a great weekend.

      Delete
  3. Thank you for hosting every week - I appreciate the feature too! Hope everyone is looking forward to a great weekend.

    ReplyDelete
    Replies
    1. Sally, you're very welcome. Thank you for joining us here. Have a great weekend. :)

      Delete
  4. Dear Stephanie, thanks for hosting. Enjoy your day and weekend
    My entries this week #9+10
    Please share with SSPS: https://esmesalon.com/tag/seniorsalonpitstop/

    ReplyDelete
    Replies
    1. Esme, thank you for joining us here. Wishing you a beautiful weekend.

      Delete
  5. Stephanie, I love Lisa's cards! What a great feature. Thanks so much for hosting, have a great week ahead. Melynda @scratchmadefood!

    ReplyDelete
    Replies
    1. Melynda, she sure does create wonderful cards. I love them. Thank you for joining us here. I hope you have a great weekend.

      Delete
  6. Thank you for hosting Stephanie ☺️.
    I'm sitting at #16 this week.

    I hope you have a great week.
    Blessings, Jennifer

    ReplyDelete
    Replies
    1. Jennifer, you're very welcome. Wishing you a beautiful week.~

      Delete
  7. Thank you so much for hosting Stephanie and for including my self-care tips post with this weeks features. I hope you have an amazing weekend!

    ReplyDelete
    Replies
    1. Maria, you're very welcome. We enjoyed your post, and we're happy you joined us. Have a wonderful weekend.

      Delete

Post a Comment

Thank you for taking the time to leave a comment. Your feedback is greatly appreciated. I strive to respond to every comment and welcome any questions you may have.

Popular posts from this blog

Spring Refresh: Mini Clip Photo Frame Hack for Seasonal Decor

  Are you ready to spruce up your living space this spring? If yes, I have an easy and inexpensive DIY project for you. We will use one of Dollar Tree's mini clip photo frames to create a mini spring display that will complement your existing spring decor. This fun craft project can also be added to a tiered tray.  I'll provide you with a full list of materials below. Materials needed Mini clip photo frame Acrylic paint Decorative floral napkin  Mod Podge  Paintbrush Optional paper flower embellishment/magnet for hanging on the refrigerator Letter stamps and stamp ink pad Scissors Step One: Applying Paint to the Photo Frame Start by taking a paintbrush and applying paint to the frame. I chose to paint my frame white. It took me about two coats of paint to give it complete coverage. Set your frame aside and let it dry. Step Two: Cutting the Napkin Use scissors to cut out any floral designs from your napkin that you want to use in your design. I cut a few leaves and mi...

Transform a Plastic Organizer into a Chic Artificial Succulent Hanging Garden

Hello everyone, I hope you're doing well. Today, I want to share a simple decor idea using a Dollar Tree plastic organizer. The organizer I'm using has three compartments.  We will be creating a hanging garden display with faux succulents. If you know me, then you know how much I love succulents.  Honestly, I could decorate every space in my home with them. The best part is that with artificial succulents, I won't have to worry about killing them. I'll provide you with all the details on creating your own hanging garden display, and I'll include a full materials list below. Let's get started! Materials One plastic organizer (I'm using the one with three compartments) Dollar Tree wallpaper sheet Wire Artificial succulents Hot glue Pencil or pen for tracing floral cutters scissors Tracing onto the wallpaper Begin by placing your plastic organizer on top of the wallpaper sheet. Use a pencil to trace around the organizer, but don't worry if you don't tra...

Transforming a Chocolate Box into a Beautiful Hanging Heart

Chocolates always have a way of making things better, don't they? In this project, we'll repurpose a heart-shaped chocolate box into a beautiful hanging heart decoration that you can proudly display for Valentine's Day. I'll provide you with a list of materials needed and guide you through the simple step-by-step process. So, get ready to give your leftover chocolate box a new lease on life! Materials One heart-shaped chocolate box Acrylic paint One sanding block Fabric heart garland (I purchased my fabric heart garland at Dollar Tree) Paintbrush Faux flowers and greenery Hot glue Twine or rope Scissors Floral cutters Prepping the box I used a heart-shaped box for my project, which had raised letters and hearts design. To prepare the box, I used a sanding block to sand down the lettering and design. It was easier than tearing the packaging paper off.  Applying Acrylic paint After sanding down the box and cleaning my workspace, I applied acrylic paint with a paintbrush. ...

Archive

Show more

Labels

Show more

All content copyright 2010-2024

I kindly request that my photos and words not be taken or used without my permission. If you have any inquiries, please do not hesitate to contact me. Additionally, for more information regarding this blog, please refer to the disclosure policy tab located above. Thank you.