
Creative Artificial Flower Display Using Upcycled Container

Do you have an old plastic container lying around? Before you throw it away, consider turning it into a lovely indoor flower display using artificial blooms. Upcycling everyday items helps reduce waste and adds a personal and creative touch to your home. Here’s how to transform a simple container into a charming floral piece that brightens up any space.

Upcycled plastic container display flowers


Video tutorial

Gather Your Materials

Before you get started, make sure you have the following:

  • A clean plastic container (any shape or size works!) The container I am using is round

  • Artificial flowers (silk flowers work beautifully)

  • Acrylic paint or spray paint

  • Decorative elements (I am using decorative peel-and-stick paper)

  • Hot glue

  • Floral foam or pebbles (for stability), I am using floral foam

  • Scissors

  • Paintbrush or sponge brush

Note: Apply a clear coat or acrylic sealer to protect the paint from chipping, scratching, and fading.

Step 1: Prep Your Container

Thoroughly wash and dry your plastic container to remove any residue. If necessary, smooth any rough edges with sandpaper. Prepping your container will also help the paint adhere to the surface.

Prepping plastic container

Step 2: Give It a Makeover

Paint your container using acrylic or spray paint to complement your home décor. Choose neutral shades for a farmhouse style, metallics for a chic look, or bright colors for a playful touch. I initially painted mine white, but later added a layer of gold on top of the white. Be sure to dry your paint completely before adding a second layer. 

Adding white paint to container

Step 3: Add Decorative Touches

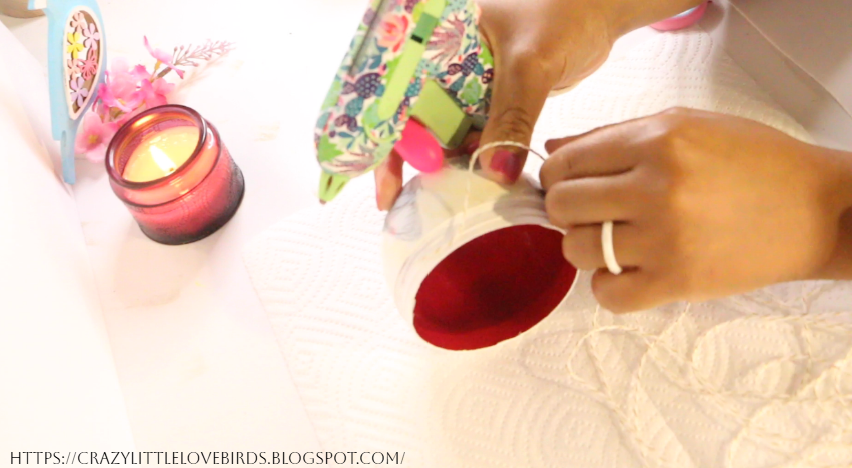
I enhanced my container by adding decorative pieces from my peel-and-stick paper. I decided to add butterflies to the design. I used scissors to cut out the designs. I removed the back of each and attached the design to the container.

Holding peel and stick paper

Using scissors to cut out design

Adding butterfly to container

Showing butterfly design


If you prefer a rustic style, consider distressing the paint slightly. I decided to add gold paint over the white paint and around the butterflies. I added a string around the top portion of the container. I used hot glue to attach the string. 

Holding gold paint

Adding decorative string

Step 4: Insert Floral Foam or Pebbles

I decided to add floral foam before adding the flowers. If you don’t have floral foam, small pebbles work just as well to provide weight and stability. I attached the floral foam block with hot glue.

Adding glue to foam block

Inserting foam block into plastic container


Step 5: Arrange Your Artificial Flowers

It's time to get creative! Start by trimming the flower stems if necessary and arranging them inside the container. Mix different types of flowers for an eye-catching display. You can also include artificial greenery. I chose to add craft moss around the stems of the flowers for an extra touch.

Adding flowers and moss

Step 6: Display & Enjoy

Find the perfect spot for your new creation—whether on a coffee table, shelf, or windowsill. These upcycled flower displays make excellent gifts, too!

Flowers displayed in decorated container

Upcycling not only helps reduce plastic waste, but it also allows you to unleash your creativity and create something beautiful for your home. Additionally, artificial flowers require no maintenance while still adding lasting charm!

Have you ever transformed a plastic container into a floral display? Share your ideas and creations in the comments below!

Pin Share Save

Pinterest pin showing upcycled container

Comments

  1. Love this, Steph! Those butterflies are so delicate and sweet, and I love the tiny twine. Thank you for sharing this with us at the Will Blog for Comments #61 linkup! Looking forward to see what you'll share next week at #62. Have a great week.

    ReplyDelete
    Replies
    1. Jennifer, thank you so much! I'm glad you enjoyed this craft. :) Thank you for taking the time to visit and comment.

      Delete

Post a Comment

Welcome! I love hearing your thoughts and seeing what you’ve been up to. Please leave a comment or ask a question below—I do my best to respond to everyone! To keep the blog comments safe and inspiring, spam will be removed. Thank you for being a part of this blogging space!

Popular posts from this blog

The Crazy Little Lovebirds Link Party 135

Welcome to The Crazy Little Love Birds Link Party #135! I’m so happy you’re here! This is a warm and friendly gathering where you can share your amazing ideas—whether it's tasty recipes, fun family activities, creative crafts, home projects, or any other joyful inspirations. If you love finding new DIY ideas and learning from other bloggers, you’re in the perfect spot! Hello everyone, I hope you all had a wonderful week. We celebrated our oldest daughter's 15th birthday. I let her know that you all shared those sweet birthday wishes with her, and she thanks you and truly appreciates it. I baked her a cookie cake, and we enjoyed dinner at Applebee's. My mom sent us a gift card, so we didn't have to decide what to have for dinner that day. She really made things easy! As always,  thank you to everyone who joins in each week . I appreciate each of you. You truly make this party wonderful. I've enjoyed visiting each of your blogs and seeing what's new in the bloggin...

The Crazy Little Lovebirds Link Party 136

Welcome to The Crazy Little Love Birds Link Party #136! I’m so happy you’re here! This is a warm and friendly gathering where you can share your amazing ideas—whether it's tasty recipes, fun family activities, creative crafts, home projects, or any other joyful inspirations. If you love finding new DIY ideas and learning from other bloggers, you’re in the perfect spot! Thank you so much for joining this week’s link party. I truly enjoy seeing all the creativity, recipes, projects, and inspiration you share. Your ideas brighten this space and make it such a lovely place to gather. If you missed the last party and would like to revisit some of the posts, you can do so by clicking here: The Crazy Little Lovebirds link party 135 Congratulations to our featured bloggers Salt Prairie – My Favorite Tips for Making House Cleaning More Enjoyable I really enjoyed this post because the tips are so simple and doable. If you’ve been wanting to make cleaning feel a little lighter and less over...

The Crazy Little Lovebirds Link Party 134

🌼 Welcome to The Crazy Little Love Birds Link Party #134! I’m so happy you’re here! This is a warm and friendly gathering where you can share your amazing ideas—whether it's tasty recipes, fun family activities, creative crafts, home projects, or any other joyful inspirations. If you love finding new DIY ideas and learning from other bloggers, you’re in the perfect spot! Happy Friday! I want to thank everyone who joined the party last week. I truly enjoyed visiting with you and reading your posts.  A special thanks to those who took the time to comment on my latest post about our adventures; your comments really made me smile.  Next week, our oldest daughter turns 15. I can’t believe how quickly time flies! I am so grateful for the opportunity to strengthen our mother-daughter relationship and to create even more memories together as the years go by. If you missed the last party, just click here to revisit the post: The Crazy Little Lovebirds link party #133 Congratulations t...

DIY Holiday Decor: How to Make a Wintery Faux Foliage Bowl

Create a stunning DIY holiday decor with this step-by-step guide on making a wintery foliage bowl. Learn how to craft a beautiful centerpiece that brings the essence of winter into your home. Hi there, I hope everything is going well for you. Today, I want to share with you a simple upcycling holiday craft idea. The three main materials you will need for this craft are a bowl, a cork, and some wintery foliage. I used a cork lid from a salt bottle that I had kept, and a pink bowl I had bought a few months ago for just 50 cents. You can easily put this project together in less than 15 minutes, and it looks absolutely beautiful once it's displayed. So, if you're ready, let's start creating! Here's what you'll need One bowl (any size works, I am using a smaller bowl for my design) Wintery faux foliage Cork (I am reusing a cork from a salt bottle) Hot glue Floral cutters (to cut foliage to size) Pinecones (optional) Attaching the cork to the bowl To begin, turn your bowl...

Crafting Personalized Thanksgiving Place Cards with Air Dry Clay and Pie Stamps

Hey there! I am thrilled to introduce you to an exciting Thanksgiving craft that will add a wonderful touch to your holiday table. This project involves using air-dry clay and pie stamps to create personalized and unique place cards. Do not worry, I will provide you with a step-by-step guide throughout the entire process. Additionally, we will use paint, twine, and a brown paper bag to give our place cards a festive feel.  Materials needed Pie stamps which can be obtained from Joann's Acrylic paint  Air-dry clay A hole puncher Paintbrush Wooden beads Twine A brown paper bag (or any other material you prefer to use as a template), one pencil, and scissors. Working with air clay Begin by flattening the air-dry clay, using either your hands or a roller. Once the clay has been flattened, use the pie stamps to press your desired design into the clay. Following the stamping process, remove any excess clay around the outer edge of the stamp and use the stamp press to release your cla...

All content copyright 2010-2025

I kindly request that my photos and words not be taken or used without my permission. If you have any inquiries, please do not hesitate to contact me. Additionally, for more information regarding this blog, please refer to the disclosure policy tab located above. Thank you.