
Easy Dollar Tree Christmas Floral Tray Centerpiece

Create a stunning and affordable Christmas centerpiece using Dollar Tree items. This easy DIY project involves a decorative tray and beautiful floral arrangements that will add festive charm to your holiday decor.

Red Christmas floral tray centerpiece  with candle display, church ornament, and reindeer ornament

Hello! I’m excited to help you create a beautiful Christmas floral tray centerpiece. This craft is perfect for beginners and is simple to create. Most of the materials you’ll need can be found at your local Dollar Tree store.
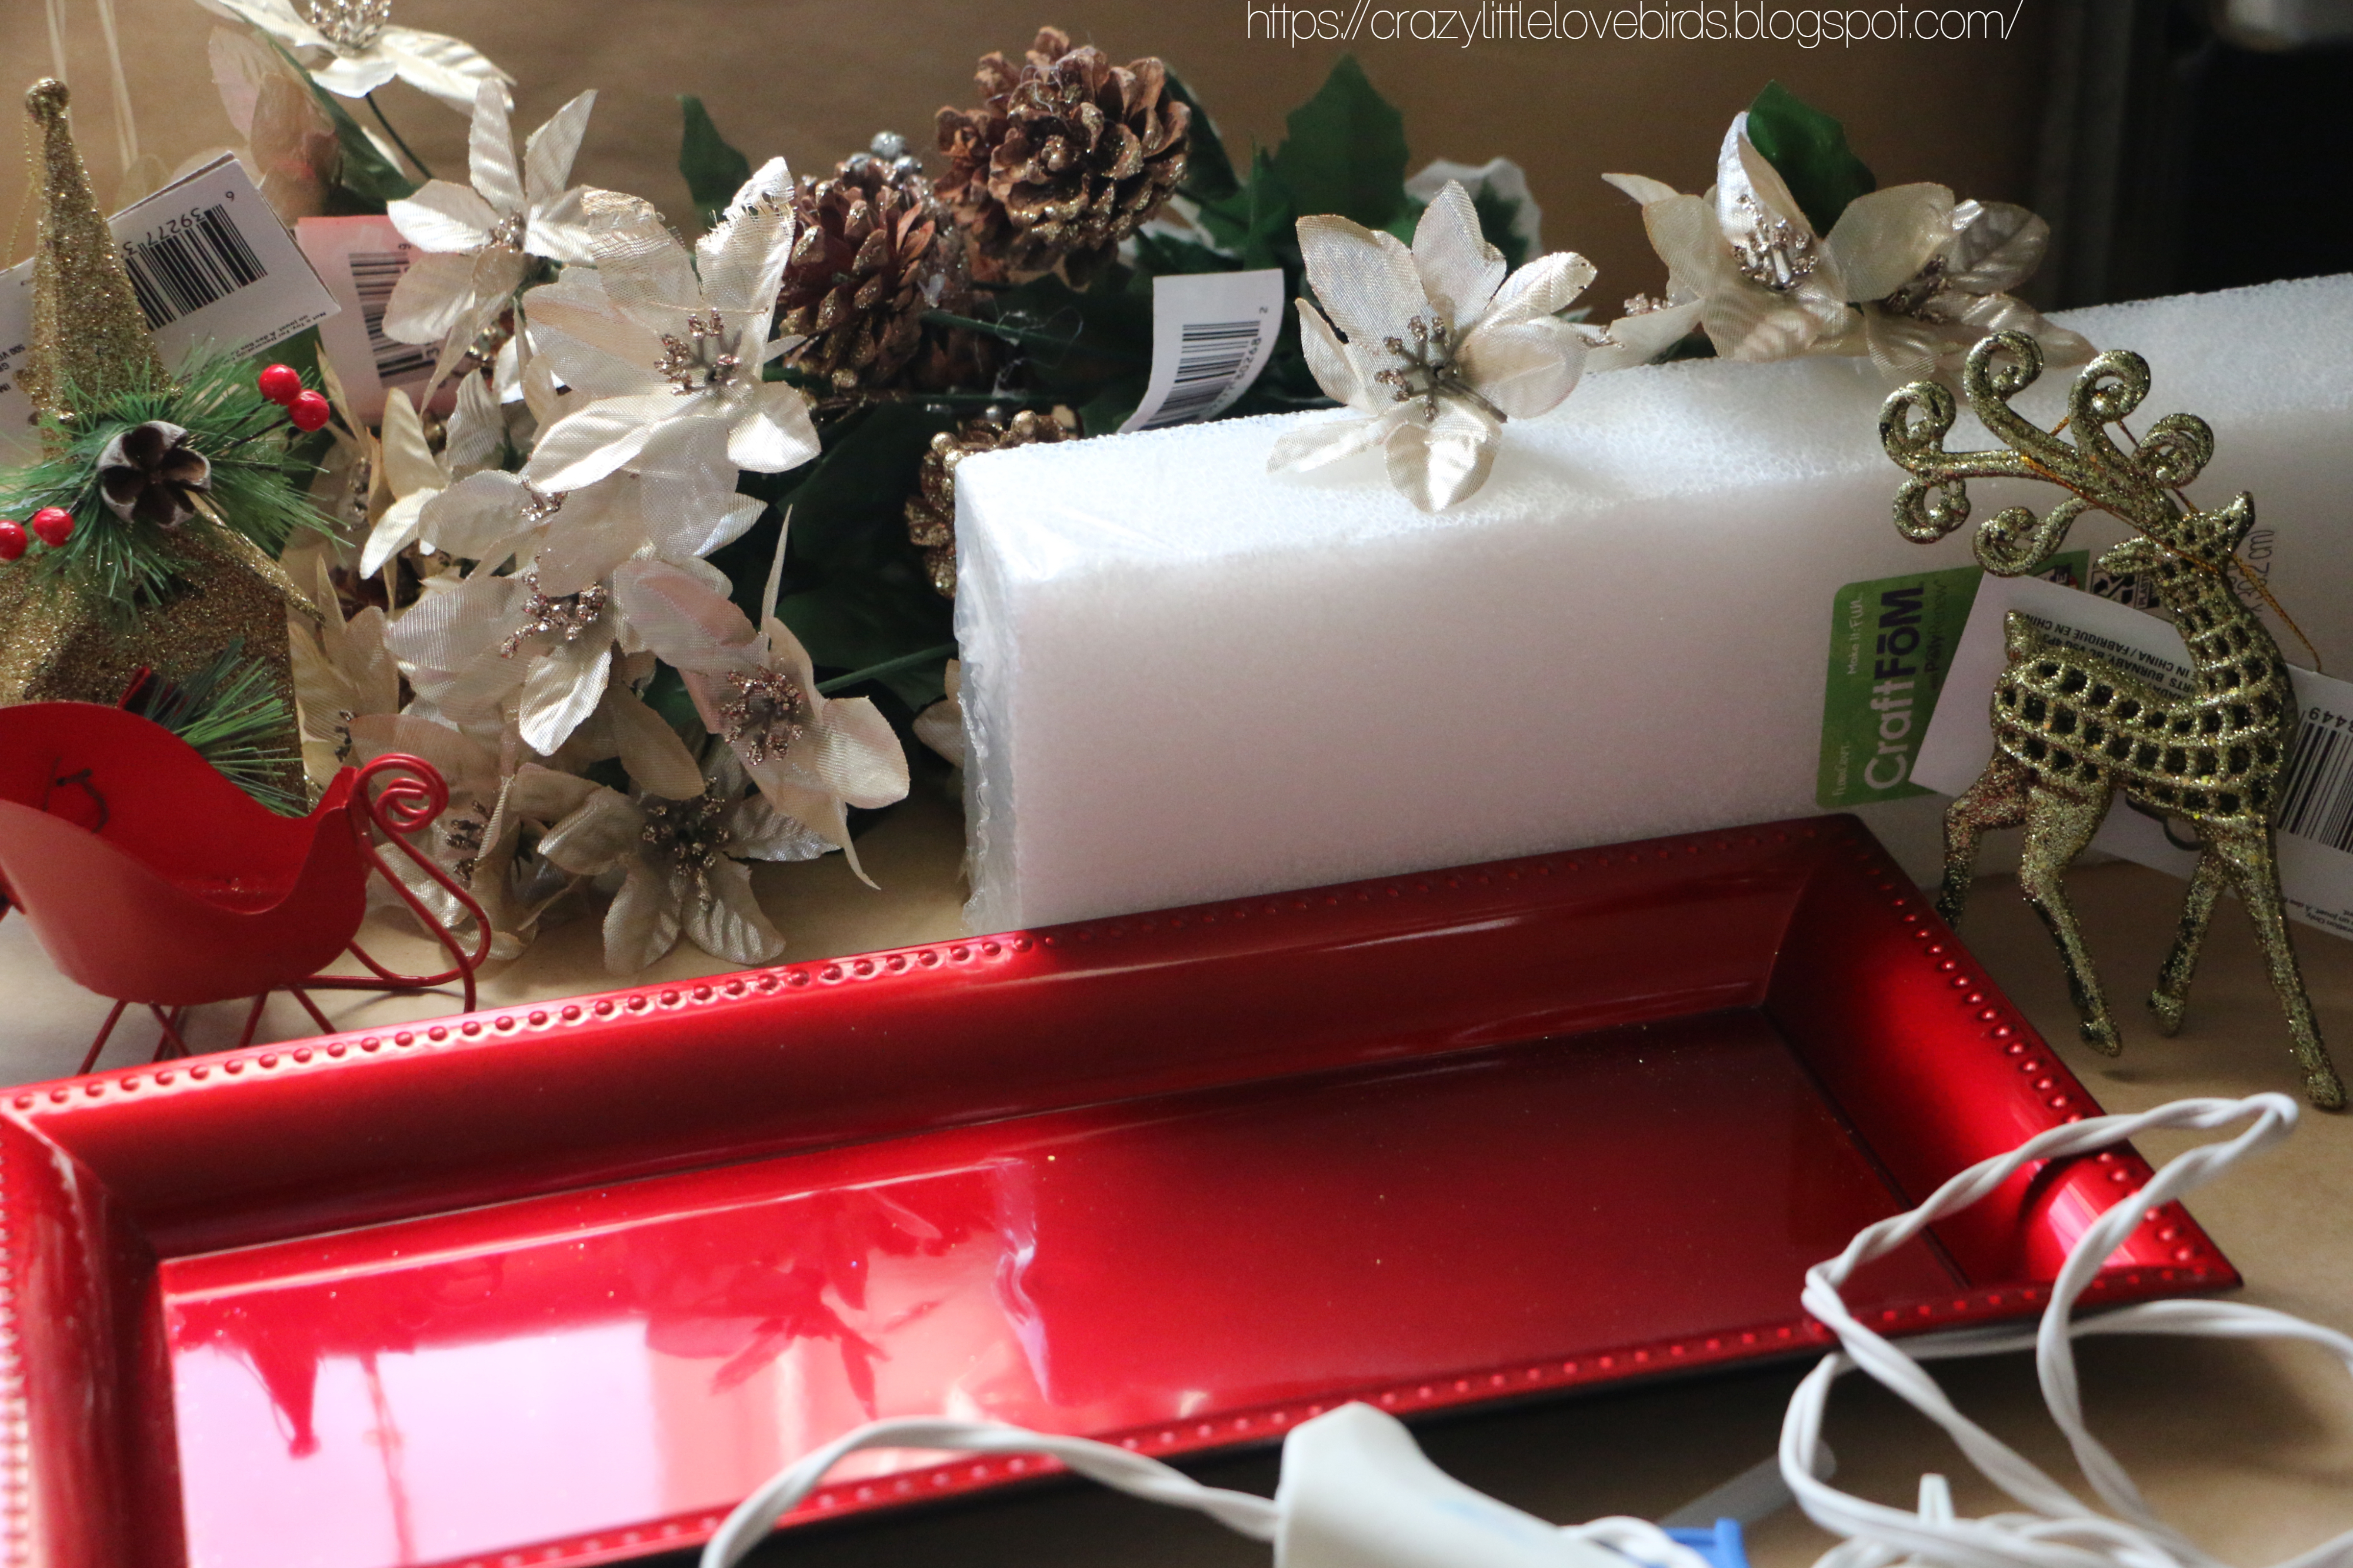
Materials such as faux floral, red tray, hot glue, and reindeer

To create a Christmas floral tray centerpiece, you will need the following materials:
  • One rectangle tray (The Dollar Tree has these labeled as Charger plates)
  • One foam block 1.9 in x 3.9 in x 11.9 in (You can purchase this at Walmart or Dollar Tree)
  • Floral (I used about six bunches of holiday floral, a mix between floral and glitter pinecones)
  • One frosted candle holder
  • One mini tealight LED battery-operated candle
  • Variety of ornaments - You can use any for your design (I am using one reindeer and one Church ornament)
  • Hot glue
  • Wire cutters

Creating the centerpiece

Begin by taking your floral and wire cutters.  Use your wire cutters to cut your floral and pinecones. When cutting, you will want to leave some of the stems. Once you have your floral cut, start adding it to your foam block. 

Gently push your stem through the foam block. Be sure you work your way around the front, sides, and back of the block.  Leave the top of the block clear of any flowers and pinecones. 

Faux floral in foam block

Faux floral in foam block

Once you have completely filled the foam block with your floral, flip your tray over and begin to apply a generous amount of hot glue to the bottom side of the tray. This will secure everything together.
Hot glue on top of flipped tray

After you have applied your hot glue, flip your tray over, and press it down over the top section of the foam block. When I first attempted this project, I started with the tray and foam glued together. I eventually separated the two and decided to add my floral onto my foam block before gluing my tray to my foam block. It made things easier for me. 

Decorating your Tray

After gluing your tray to your block, you can now add your decorations. I went ahead and applied a small amount of hot glue on the bottom of each ornament.  Next, take your candleholder and add your LED candle to your candleholder.  You can also add a small bow to your candleholder. This is completely optional.

red tray with faux floral around bottom section

Completed Christmas floral tray centerpiece with decorations displayed on a table

You're all done! I placed my centerpiece on my dining table, and it looks lovely.  I hope that you have enjoyed this simple DIY project. Thank you so much for stopping by.
I love hearing from all of you. Be sure to say hello in the comments! Let me know if this is a project you'll be creating soon. 

Close up of Christmas floral tray


Pin/Share/Save

Pinterest pin showing Christmas floral tray centerpiece and text description

You may also enjoy

Comments

  1. Great idea! I am visiting from the link party on Across the Blvd, and I'd love for you to come link up on my 3 link parties at LifeasaLEOWife.com. This is a project that's right up my readers' allies!

    Happy Thanksgiving!
    Niki ~ Life as a LEO Wife

    ReplyDelete
    Replies
    1. Niki, thank you so much! I will be sure to come by your blog for a visit, and check out your link party as well.

      Happy Thanksgiving to you as well.

      :)

      Delete
  2. Very pretty! Thank you for sharing at Party In Your PJ's.

    ReplyDelete
  3. That's really pretty, love the color of the poinsettias (I guess that's what they are) and of course the candle. Looks nice. Thanks so much for linking up at #IMadeItMondayLinkParty 32. Pinned.

    ReplyDelete
    Replies
    1. Dee, thank you so much. I believe you're correct and they are called poinsettias. I purchased them at Dollar Tree and was surprised that they had them in. Thank you for visiting and taking the time to comment. I appreciate it.

      Delete
  4. Thanks for sharing with us at the Creatively Crafty Link Party. We hope to see you again on Thursday for a new part. #CCBG

    ReplyDelete
  5. CONGRATS Stephanie! Your post is FEATURED at #IMadeItMondayLinkParty 33.

    ReplyDelete
  6. That is so pretty, and much easier to make that it first looks. Thanks for stopping by to share with us at Handmade Monday :-)

    ReplyDelete
  7. Very pretty, I really like the candle in the middle.

    ReplyDelete
  8. Unsure I can make anything as good as you do here, but loved the read🌷God bless you this season and always.

    ReplyDelete
    Replies
    1. Rayla, aw, thank you. I am sure you can create something just as good. You are too kind. Thank you for taking the time to visit and leave a comment. I appreciate it. 😊🌸

      Delete

Post a Comment

Welcome! I love hearing your thoughts and seeing what you’ve been up to. Please leave a comment or ask a question below—I do my best to respond to everyone! To keep the blog comments safe and inspiring, spam will be removed. Thank you for being a part of this blogging space!

Popular posts from this blog

Easy Floral Decoupage Idea for Faux Pumpkin Display

 Hi everyone! I'm excited to share a simple and easy floral pumpkin design you can create quickly. Today, we will make a faux floral pumpkin display using decoupage and a few additional designs. I'm reusing a foam pumpkin that I bought at Dollar Tree. If you’re ready, let’s begin creating an easy floral decoupage faux pumpkin display! Quick video tutorial **Materials needed:** - Acrylic paint - Paintbrush - Floral napkin - Faux pearls - Faux flowers - Craft knife - Scissors - Mod Podge Carefully remove the top of your pumpkin. I used my craft knife to go around the top section, creating a hole at the top. Using a paintbrush, apply acrylic paint to the pumpkin. I chose to paint mine black. Next, use scissors to cut out a few flowers from your napkin. Make sure to remove the second layer of the napkin before cutting out the designs.   Once you have your floral designs cut out, use a paintbrush to apply Mod Podge to the pumpkin. While the Mod Podge is wet, add the floral napkin c...

The Crazy Little Lovebirds Link Party 155

Welcome to The Crazy Little Love Birds Link Party #155! I'm so happy you're here! This gathering is all about sharing what brings us joy.  Bring your delicious recipes, fun family moments, cozy crafts, and home projects—basically, everything wonderful you've been working on. Hi, blogging friends. I hope you are all well. As always, thank you for joining me here at the party. I can't wait to see what you all share. Here's a sweet picture I took this week of one of the neighborhood squirrels that sits on the fence and watches while relaxing. I captured this photo one morning while bringing the trash bin in. Congratulations to our featured bloggers To visit the featured bloggers' posts, just click on their images, and you will be directed to each of their blogs. Rebuilding A Stone Front Stoop – Exquisitely Unremarkable Kim tackled her front stoop and oh my goodness… it turned out so pretty. She took a worn little entry and gave it a fresh, welcoming makeover. Suc...

The Crazy Little Lovebirds Link Party 154

  Welcome to The Crazy Little Love Birds Link Party #154! I’m so happy you’re here! This is a warm and friendly gathering where you can share your amazing ideas—whether it's tasty recipes, fun family activities, creative crafts, home projects, or any other joyful inspirations. If you love finding new DIY ideas and learning from other bloggers, you’re in the perfect spot! Hi everyone! How was your week? This week, we were blessed with more rain, and I am so thankful. It's been a hot summer with wildfires and droughts, so it's nice to have a few days to cool down a bit. Below, I've shared two photos that I posted on my Instagram story. The first one shows one of our lovely hummingbirds relaxing on the swing near the feeder. I love watching them from our dining room window. In the second photo, we had another visitor at the feeder, and the sunlight shining through the window that evening was absolutely beautiful. I'd say this week was a nice one. Congratulations  to ou...

7 Creative Gift Wrapping Ideas

Looking for creative gift-wrapping ideas? Check out these 7 unique and artistic ways to design and decorate your gifts. Get inspired and make your presents truly stand out! Gift wrapping is an art that can be as creative as you want it to be. I’m always on the lookout for new ways to make my gift wrapping unique and personal. Sharing these ideas with others is a joy, and the best part is seeing the recipient’s face light up with happiness when they receive the gift. I hope you enjoy these simple yet creative gift-wrapping ideas 1. Buttons, and Ribbons Ribbons and buttons are two simple yet effective ways to add a touch of creativity to your gift wrapping. You can use ribbon to create a bow or a unique layout that reflects your personal style. Buttons, on the other hand, can be used to add a pop of color or texture to your gift. You can choose from a variety of button sizes and styles, including colorful, plain, small, or large. To incorporate buttons into your ribbon design, you can lo...

Dollar Tree Peel‑and‑Stick Wallpaper Box Makeover

I transformed a simple, everyday box into a beautiful and functional storage piece for my belongings. This makeover is both easy and budget-friendly, using affordable supplies from Dollar Tree along with some creative touches to enhance the box's appearance. With a few simple steps, you can create an attractive decorative storage box that can be styled in any room of your home. Whether you're looking to organize small items on your desk or add a pop of color to your living space, this project is versatile and practical. If you have a box that you're considering throwing away, think again! This DIY project not only gives new life to unused items but also allows you to showcase your creative side. Join me as I guide you through transforming an ordinary box into a charming accent piece you'll love to display. Watch the video tutorial Materials Peel‑and‑stick wallpaper (Dollar Tree) Gold acrylic paint Decorative edge scissors Adhesive gems Paintbrush Optional: greenery or s...

All content copyright 2010-2026

I kindly request that my photos and words not be taken or used without my permission. If you have any inquiries, please do not hesitate to contact me. Additionally, for more information regarding this blog, please refer to the disclosure policy tab located above. Thank you.