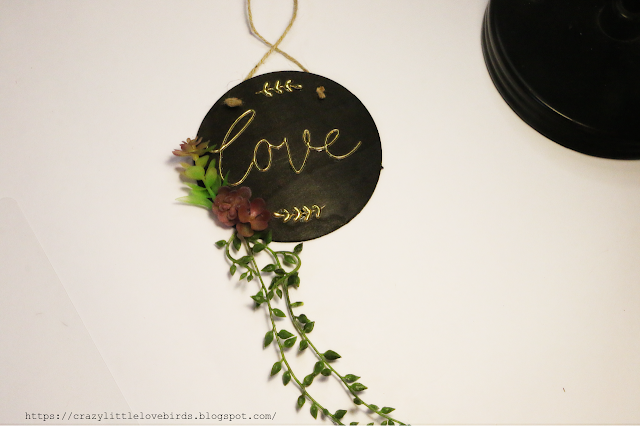
DIY Easy Succulent Love Sign


Hi everyone! I hope you are all doing well. I decided to work on a simple project that takes little time, and a few materials. Today we are creating an easy succulent love sign.


Materials needed

Black paint

One small round wood sign

paintbrush

Gold sticker design

Succulents

Two strands of vines

Adhesive/Hot glue

Floral snips/ Scissors
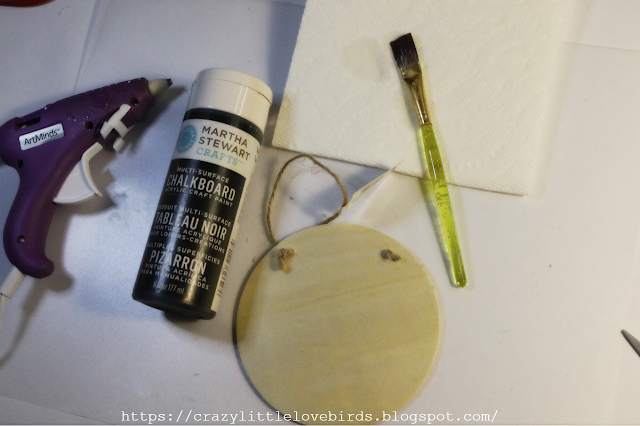


Start by applying your black paint to your wooden round sign. I applied paint to the front side of my wood sign, but you can apply paint on both the front and the back of the sign if you choose to do so.

Apply around two coats of your black paint, and a total of four coats if you decide to paint the front and back of your sign.
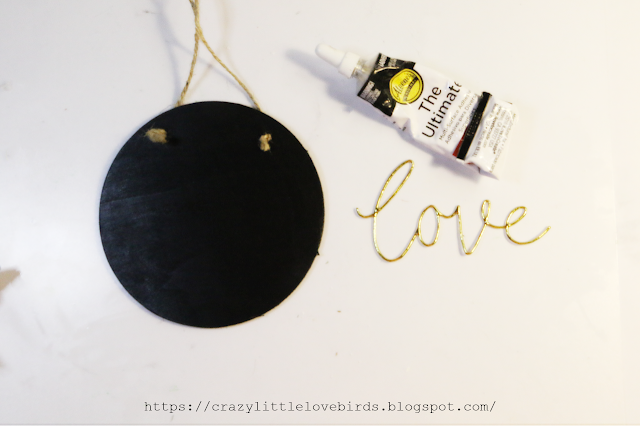
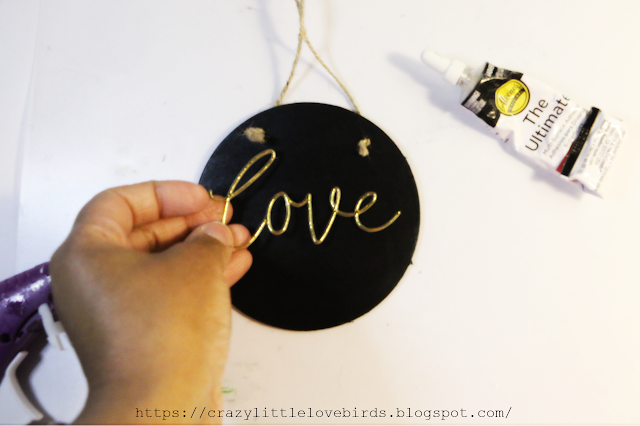


Next, take your love gold sticker, and apply a little adhesive to give it extra hold when placed onto your sign. I did this because I have noticed that the sticky backing on some stickers doesn't hold as well once applied on top of a painted surface.
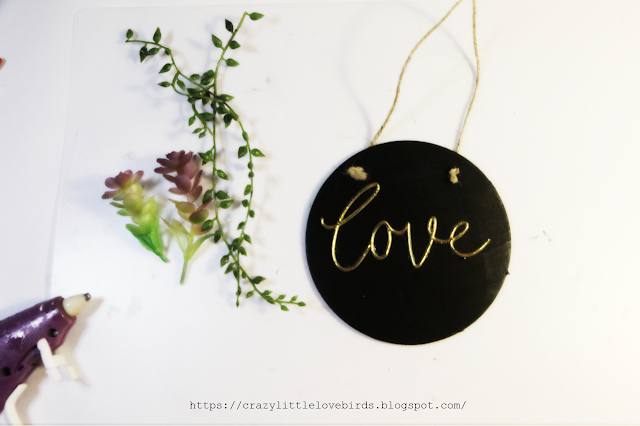


Next, gather your vines, and succulents. Using some floral snips, cut your vine into two medium strands. When cutting your succulents, cut the succulents into smaller sections. 
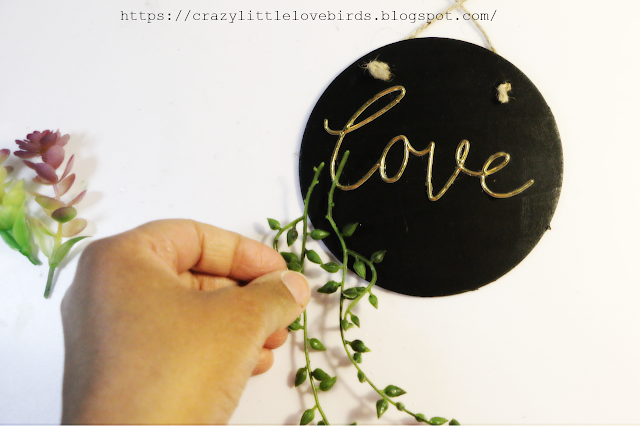

Take your two strands of the vine, and add them to the bottom left-hand side of your sign. Apply a small amount of hot glue, and gently press each vine down. 
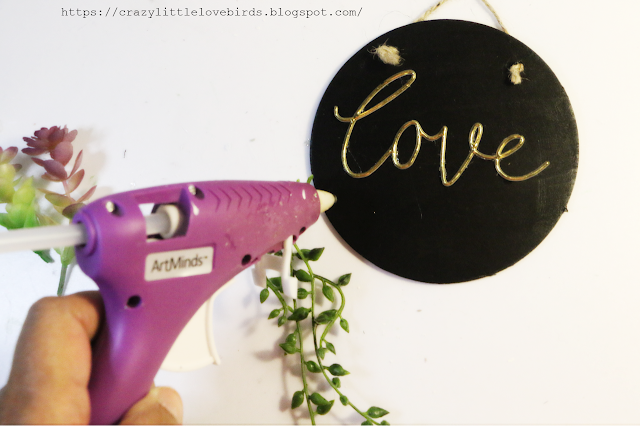

Once you have added on your vines, take your hot glue, and apply your succulent flowers around your vine.
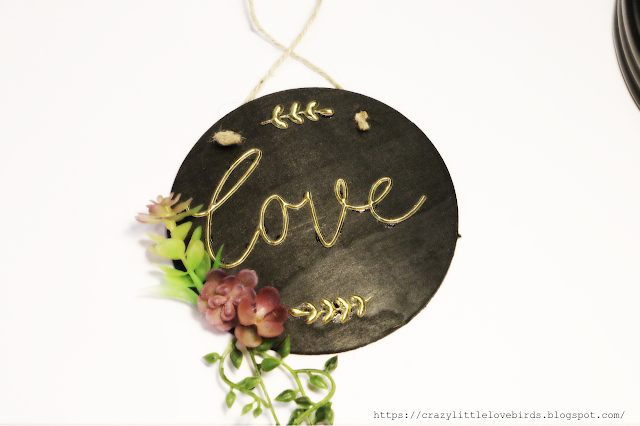
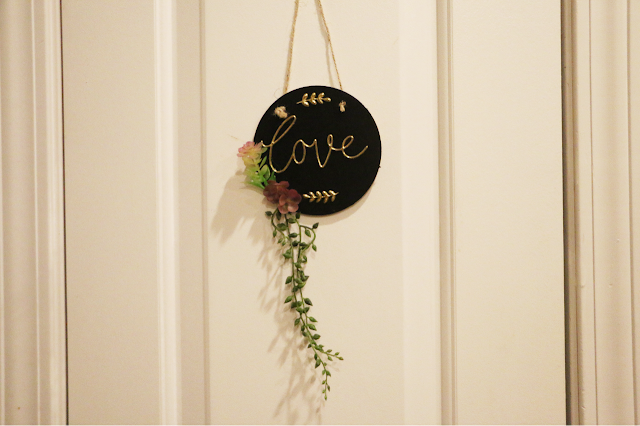


It is optional, but you can add a few extra gold stickers to your sign. I added one on top, and on the bottom as well.

Your succulent love sign is now complete! Thanks so much for stopping by, and be sure to check out my other DIY projects like my, DIY Dollar Tree Wood Crate Vase Holder.


Pin/Share/Save


Comments

  1. I love all the stickers, they are clever, this turned out darling! Shared on Twitter and Pinned!

    ReplyDelete

Post a Comment

Welcome! I love hearing your thoughts and seeing what you’ve been up to. Please leave a comment or ask a question below—I do my best to respond to everyone! To keep the blog comments safe and inspiring, spam will be removed. Thank you for being a part of this blogging space!

Popular posts from this blog

The Crazy Little Lovebirds Link Party 152

  Welcome to The Crazy Little Love Birds Link Party #152! I’m so happy you’re here! This is a warm and friendly gathering where you can share your amazing ideas—whether it's tasty recipes, fun family activities, creative crafts, home projects, or any other joyful inspirations. If you love finding new DIY ideas and learning from other bloggers, you’re in the perfect spot! Happy Friday! I hope that you all have a wonderful weekend. Congratulations  to our featured bloggers Rabbit in Carrot – Craft Attic Resources A sweet little felt rabbit tucked inside a carrot. Quick, cute, and perfect for spring or Easter crafting. Honey & Wheat Germ Bread – Scratch Made Food A wholesome whole‑grain loaf with honey and wheat germ. Easy, hearty, and great for everyday baking. Marbled Paper with Shaving Cream – Artful Analog A fun, colorful marbling project using shaving cream. Fast, kid‑friendly, and perfect for handmade papers. Splish Splash Summer Spotlight – Our Grand Lives A r...

The Crazy Little Lovebirds Link Party 151

  Welcome to The Crazy Little Love Birds Link Party #151! I’m so happy you’re here! This is a warm and friendly gathering where you can share your amazing ideas—whether it's tasty recipes, fun family activities, creative crafts, home projects, or any other joyful inspirations. If you love finding new DIY ideas and learning from other bloggers, you’re in the perfect spot! Happy Friday, blogging friends! I'm happy to share that we did get some rainy days. They helped cool things down, even if it was just a few degrees cooler; I'll take it! How was your week? I hope you all had a nice one. As always, thank you for joining the party this week. I'm happy to share the fabulous features from the last party. Congratulations to our featured bloggers Mod Peacock Hair Clip – Crochet Pattern This vibrant and playful peacock hair clip is a delightful project. Val & Holland offer a free crochet pattern that is quick to make, colorful, and ideal for using up scrap yarn. If you enj...

Our Adventures.-The Denver Art Museum

We decided to take a day trip to explore the downtown Denver area. On this particular day, my husband and I were celebrating our 17th wedding anniversary and wanted to have a mini date that included time with the kids as well. Our adventure started with us eating at the Cheesecake Factory. We wanted to make sure our tummies were full before we took on this day trip. The food was amazing, and we just really enjoyed this time together.  The weather wasn't so cold, but we still made sure to bundle up in warm coats. The Denver Art Museum is located in the Civic Center of downtown Denver. I also learned that this museum is one of the largest art museums between the West Coast, and Chicago. -We learn something new each day. This was actually our first time visiting the art museum.  During our visit, we viewed some beautiful and very creative pieces of art.  This museum has 70,000 objects in the museum's collection. There are approximately 18,000 in the Nativ...

Simple Diy Autumn Floral Arrangement

  This simple Autumn floral arrangement takes just a few materials.  And is a beautiful addition to any space!  Materials needed 1 metal pitcher -The metal pitcher that I am using was purchased at Target and was $3. 1 lighted leaf garland - I purchased this lighted leaf garland at my local Michael's Store It takes two double A batteries. 1  can of spray paint I wanted to add some color to my pitcher. For my pitcher, I am using spray paint purchased at my local Michael's store. The color is Espresso. Autumn floral I chose to go with some deep orange/yellow leaves, a few deep green leaves, and mini yellow sunflowers.  (orange leaves and green leaves were purchased at Target in the dollar section.  And mini Sunflowers were purchased from Michael's). Creating your Autumn arrangement When spraying your pitcher make sure that you cover your workspace. **A simple tip** When spraying make sure you apply it in light coats. This will help the spray paint from creatin...

Dollar Tree Peel‑and‑Stick Wallpaper Box Makeover

I transformed a simple, everyday box into a beautiful and functional storage piece for my belongings. This makeover is both easy and budget-friendly, using affordable supplies from Dollar Tree along with some creative touches to enhance the box's appearance. With a few simple steps, you can create an attractive decorative storage box that can be styled in any room of your home. Whether you're looking to organize small items on your desk or add a pop of color to your living space, this project is versatile and practical. If you have a box that you're considering throwing away, think again! This DIY project not only gives new life to unused items but also allows you to showcase your creative side. Join me as I guide you through transforming an ordinary box into a charming accent piece you'll love to display. Quick video tutorial Materials Peel‑and‑stick wallpaper (Dollar Tree) Gold acrylic paint Decorative edge scissors Adhesive gems Paintbrush Optional: greenery or small...

All content copyright 2010-2026

I kindly request that my photos and words not be taken or used without my permission. If you have any inquiries, please do not hesitate to contact me. Additionally, for more information regarding this blog, please refer to the disclosure policy tab located above. Thank you.