
DIY Dollar Tree Mirror Upgrade

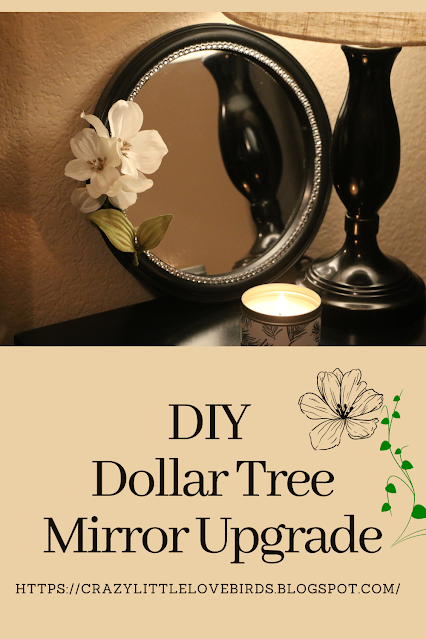
Transform your plain Dollar Tree mirror into a stylish and unique home decor with this easy DIY mirror upgrade. You can discover budget-friendly ways to give your mirror a fresh look and add a touch of elegance to your space. This DIY project is quick and easy; you only need a few materials to give your mirror a new look. So, if you're ready, let's create your own mirror upgrade!

Round mirror with gems and faux white floral attached to the mirror


For this project, you will need

Hot glue, gems, mirror and faux floral

One pack of diamond gem wrap

One mirror

Floral

Hot glue

Wire cutters/ Scissors

You can purchase all of these materials from your local Dollar Tree, or any other discount store you might have in your area. I purchased the mirror and gem wrap from my local Dollar Tree.

 My floral was purchased at my local Michaels craft store.  My total for this project was around five dollars.

three gem strips near round black mirror

First, take your gem wrap, and cut around four long strips of your wrap. Once you have done this step, take your strips and remove the paper backing when applying them to your mirror. 

When removing the paper backing, you should still have a sticky surface.

Round black mirror with gems attached to it.

Take your gem wrap, and gently press it down on the outer surface around the mirror, just above the glass surface. You will repeat this step for each strip. 

faux floral near round mirror

Next, take your floral pieces and begin the cut the stems. You will want to leave some of the stem, as well as some of the leaves. 

white faux flowers attached to round black mirror

After cutting your floral, take your hot glue, and apply a small amount on the back of each of your floral pieces. 

Gently press each floral piece onto your mirror. Get creative, and place them where you would like. 

faux white flowers displayed on round black mirror

Black round mirror with faux white flowers and gems displayed near a lamp on a table

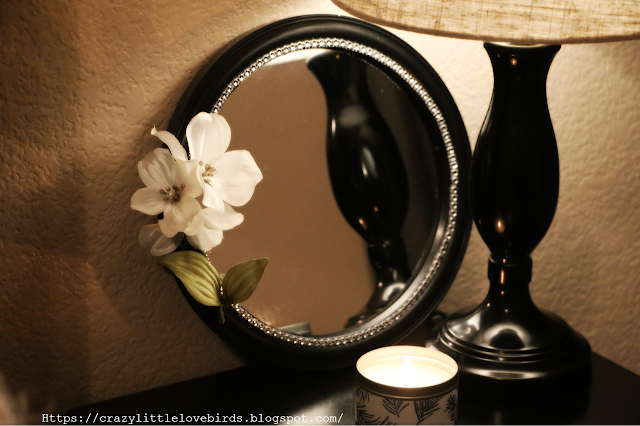
You're all done! Now all that is left is to find a spot to display your beautiful mirror upgrade. Wasn't that simple? And I just love the way it turned out. 

Let me know in the comment below if you decide to create your very own mirror design. 

You might also enjoy

DIY Dollar Tree Wood Crate Vase Holder


Pin/Save/Share

Pinterest pin showing round mirror with faux floral and gems


Comments

  1. Oh, so elegant looking. Thanks so much for linking up at #IMadeItMondayLinkParty 16. Pinned.

    ReplyDelete
    Replies
    1. Dee, thank you. Love that it is a Dollar Tree mirror. Very inexpensive, and a great way to decorate.

      Delete
  2. CONGRATS, Stephanie! Your post is FEATURED at #IMadeItMondayLinkParty 17.

    ReplyDelete
  3. This is gorgeous! Whether for a gothic Halloween, everyday decor or both! Featuring when my party opens.

    ReplyDelete
    Replies
    1. Carol, aw thank you! I appreciate the feature. :)

      Delete
  4. How pretty! Featuring you at Wednesdays in the Studio!

    ReplyDelete

Post a Comment

Thank you for taking the time to leave a comment. Your feedback is greatly appreciated. I strive to respond to every comment and welcome any questions. Additionally, I will visit your blog and leave a comment if you provide your name or blog link! ***However, spam or comments that do not offer valuable feedback will be deleted.***

Popular posts from this blog

How to Transform Glass Garlic Jars into Multi-Functional Pin Cushions with Storage

Transform your glass garlic jars into multi-functional pin cushions with storage by following this creative and practical DIY tutorial. You will learn how to repurpose these jars into stylish and useful organization tools for sewing or crafting supplies. Hello everyone! A while ago, I purchased some pin cushions from my local Dollar Tree and stored them away, completely forgetting about them. Today, while cleaning, I came across them and decided to use them with my glass garlic jars. I thought the glass garlic jars would be wonderful for creating multi-functional pin cushion storage jars. Materials Three pin cushions Glass jars (I'm reusing my garlic jars) Mod Podge Paintbrush Acrylic paint Sewing and craft accessories to add to each glass jar Adding Mod Podge and Paint to jars To give my jars a stained glass appearance, I combined my Mod Podge and paint. I used a paintbrush to add a thin layer of the mixture and then used a drying tool to dry the paint. I repeated this process for...

Transforming a Chocolate Box into a Beautiful Hanging Heart

Chocolates always have a way of making things better, don't they? In this project, we'll repurpose a heart-shaped chocolate box into a beautiful hanging heart decoration that you can proudly display for Valentine's Day. I'll provide you with a list of materials needed and guide you through the simple step-by-step process. So, get ready to give your leftover chocolate box a new lease on life! Materials One heart-shaped chocolate box Acrylic paint One sanding block Fabric heart garland (I purchased my fabric heart garland at Dollar Tree) Paintbrush Faux flowers and greenery Hot glue Twine or rope Scissors Floral cutters Prepping the box I used a heart-shaped box for my project, which had raised letters and hearts design. To prepare the box, I used a sanding block to sand down the lettering and design. It was easier than tearing the packaging paper off.  Applying Acrylic paint After sanding down the box and cleaning my workspace, I applied acrylic paint with a paintbrush. ...

Easy Dollar Tree Halloween Floral Creation DIY

Create your own simple Halloween floral arrangement using Dollar Tree supplies with this easy DIY tutorial. Embrace your creativity with this enjoyable and budget-friendly project. Hey everyone! Today, I want to share a simple craft idea using items from Dollar Tree. I recently visited my local store and found a Halloween-themed mini tin pail pack. I already had some foam balls at home, so I knew exactly what I wanted to make. We will create an easy floral decoration that's perfect for Halloween. This craft is quick, and you might already have some materials at home. If you're ready, let's start making the Halloween floral creation! Quick Video Tutorial Materials needed: - Mini tin buckets (I purchased mine at Dollar Tree) - Craft foam balls (smaller size) - Hot glue - Foam flowers (pack found at Dollar Tree) - Mini pumpkins (using mini pumpkin cocktail picks found at Dollar Tree) -Paintbrush Start by removing the handle from the tin pail.  Before attaching the foam ball to...

All content copyright 2010-2025

I kindly request that my photos and words not be taken or used without my permission. If you have any inquiries, please do not hesitate to contact me. Additionally, for more information regarding this blog, please refer to the disclosure policy tab located above. Thank you.