
Cute Dollar Tree Sign Display

Are you ready to add some cuteness to your Dollar Tree sign? Come along with me as we transform a simple round sign into a stunning display using Mod Podge, tissue paper, and other materials. This project is perfect for beginners and guaranteed to bring a smile to your face.

Cute Dollar Tree Sign Display


Materials needed:

- Round wooden sign
- Paintbrush
- Decorative tissue paper
- Faux greenery
- Paint
- Floral
- Wooden letters
- Craft clothespins
- Scissors
- Wood glue
- Craft knife


Cutting decorative tissue paper

Start by cutting a section of decorative tissue paper that fits over the inner area of your round wooden sign.


To begin with, place your tissue paper on a flat surface. Use a craft knife to cut around the top of your sign. Keep cutting around the edges until you have made your way around the entire sign. You will only need two sections of tissue paper. Leave the middle portion of the sign as is to maintain the natural wood look.


Applying Mod Podge 

Once the tissue paper is in place, use a paintbrush to apply Mod Podge on your wooden surface. To remove any creases and lines, use a blow dryer. Feel free to use any technique that works best for you. Apply a second coat of Mod Podge over the tissue paper and repeat the previous steps. Finally, remove the tissue paper.


Applying paint to sign

Apply paint to the middle section of your sign.


Adding paint to wooden letters

This is optional, I applied a thin coat of paint to my wooden letters. The color I am using is called espresso.


Attaching wooden letters to sign

To proceed, grab your wooden letters and apply wood glue to attach them to your sign.

Adding clothespins to sign

Apply some wood glue and attach the clothespins to your sign.


Adding greenery to your sign
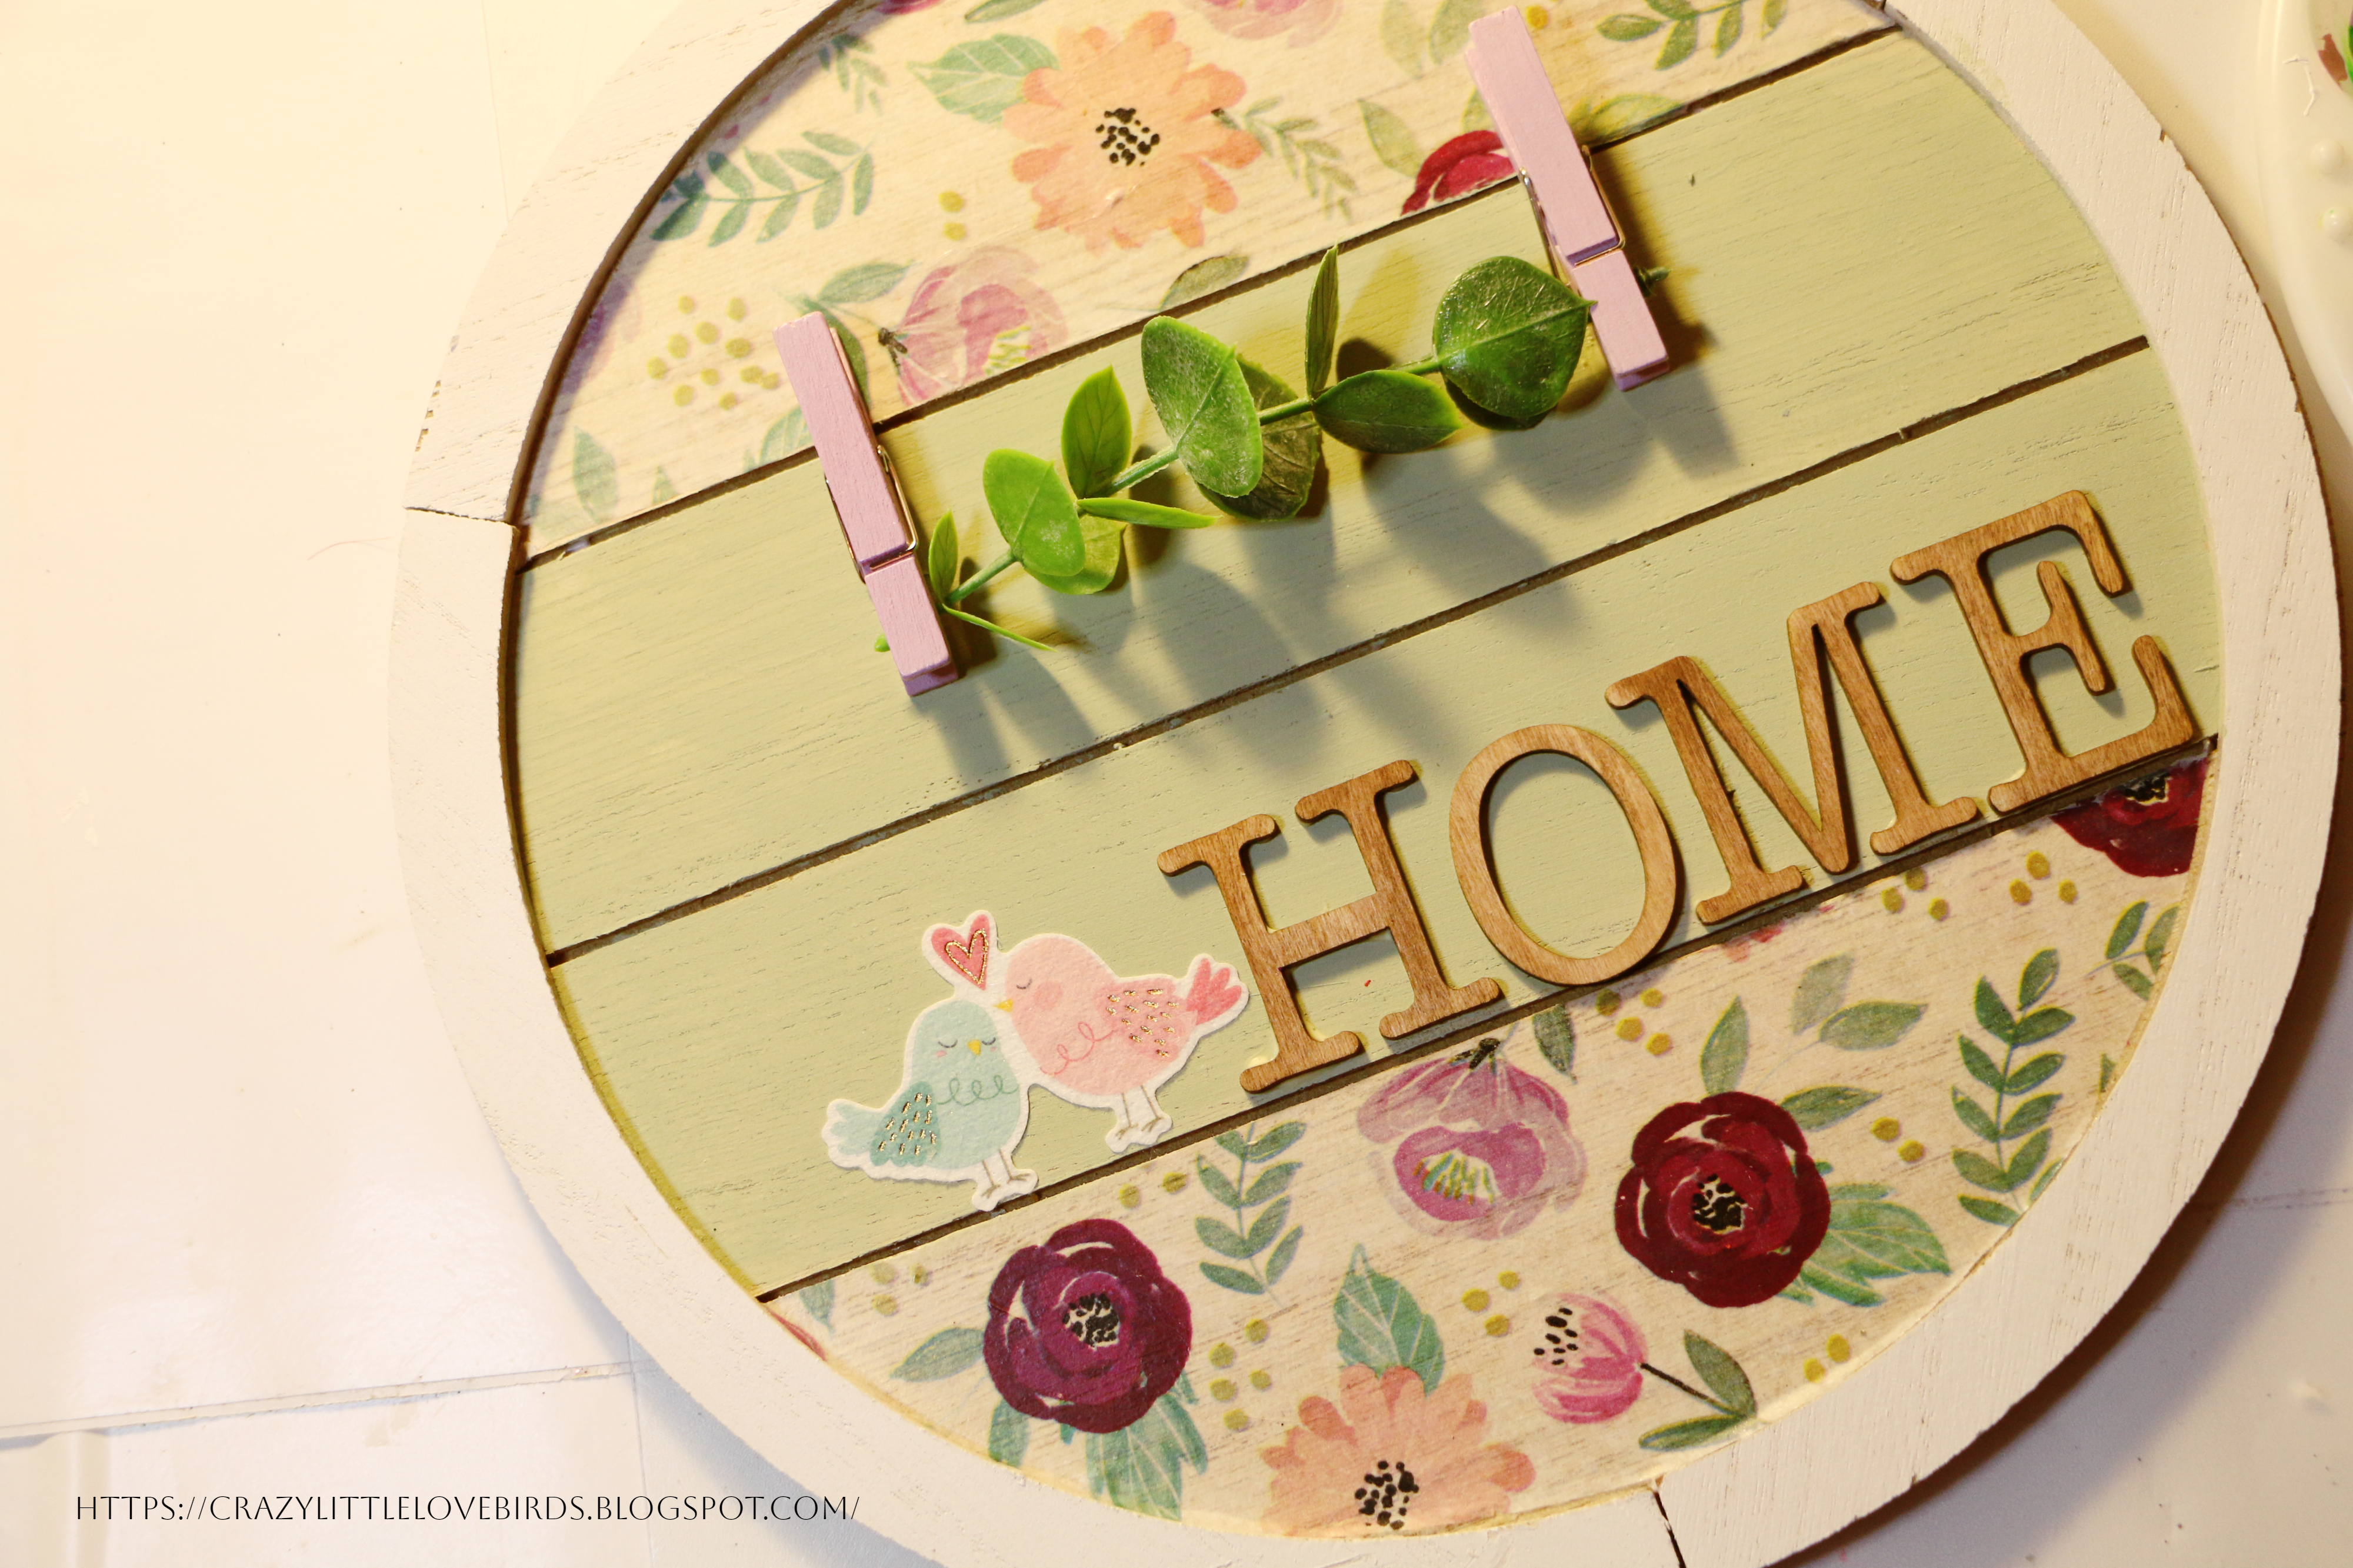
Take your artificial greenery and attach it to your clothespins. To ensure a secure hold, apply some wood glue on the inside opening of the clothespins before attaching the greenery. Additionally, you can add a cute sticker next to your wooden letters to enhance their appearance.
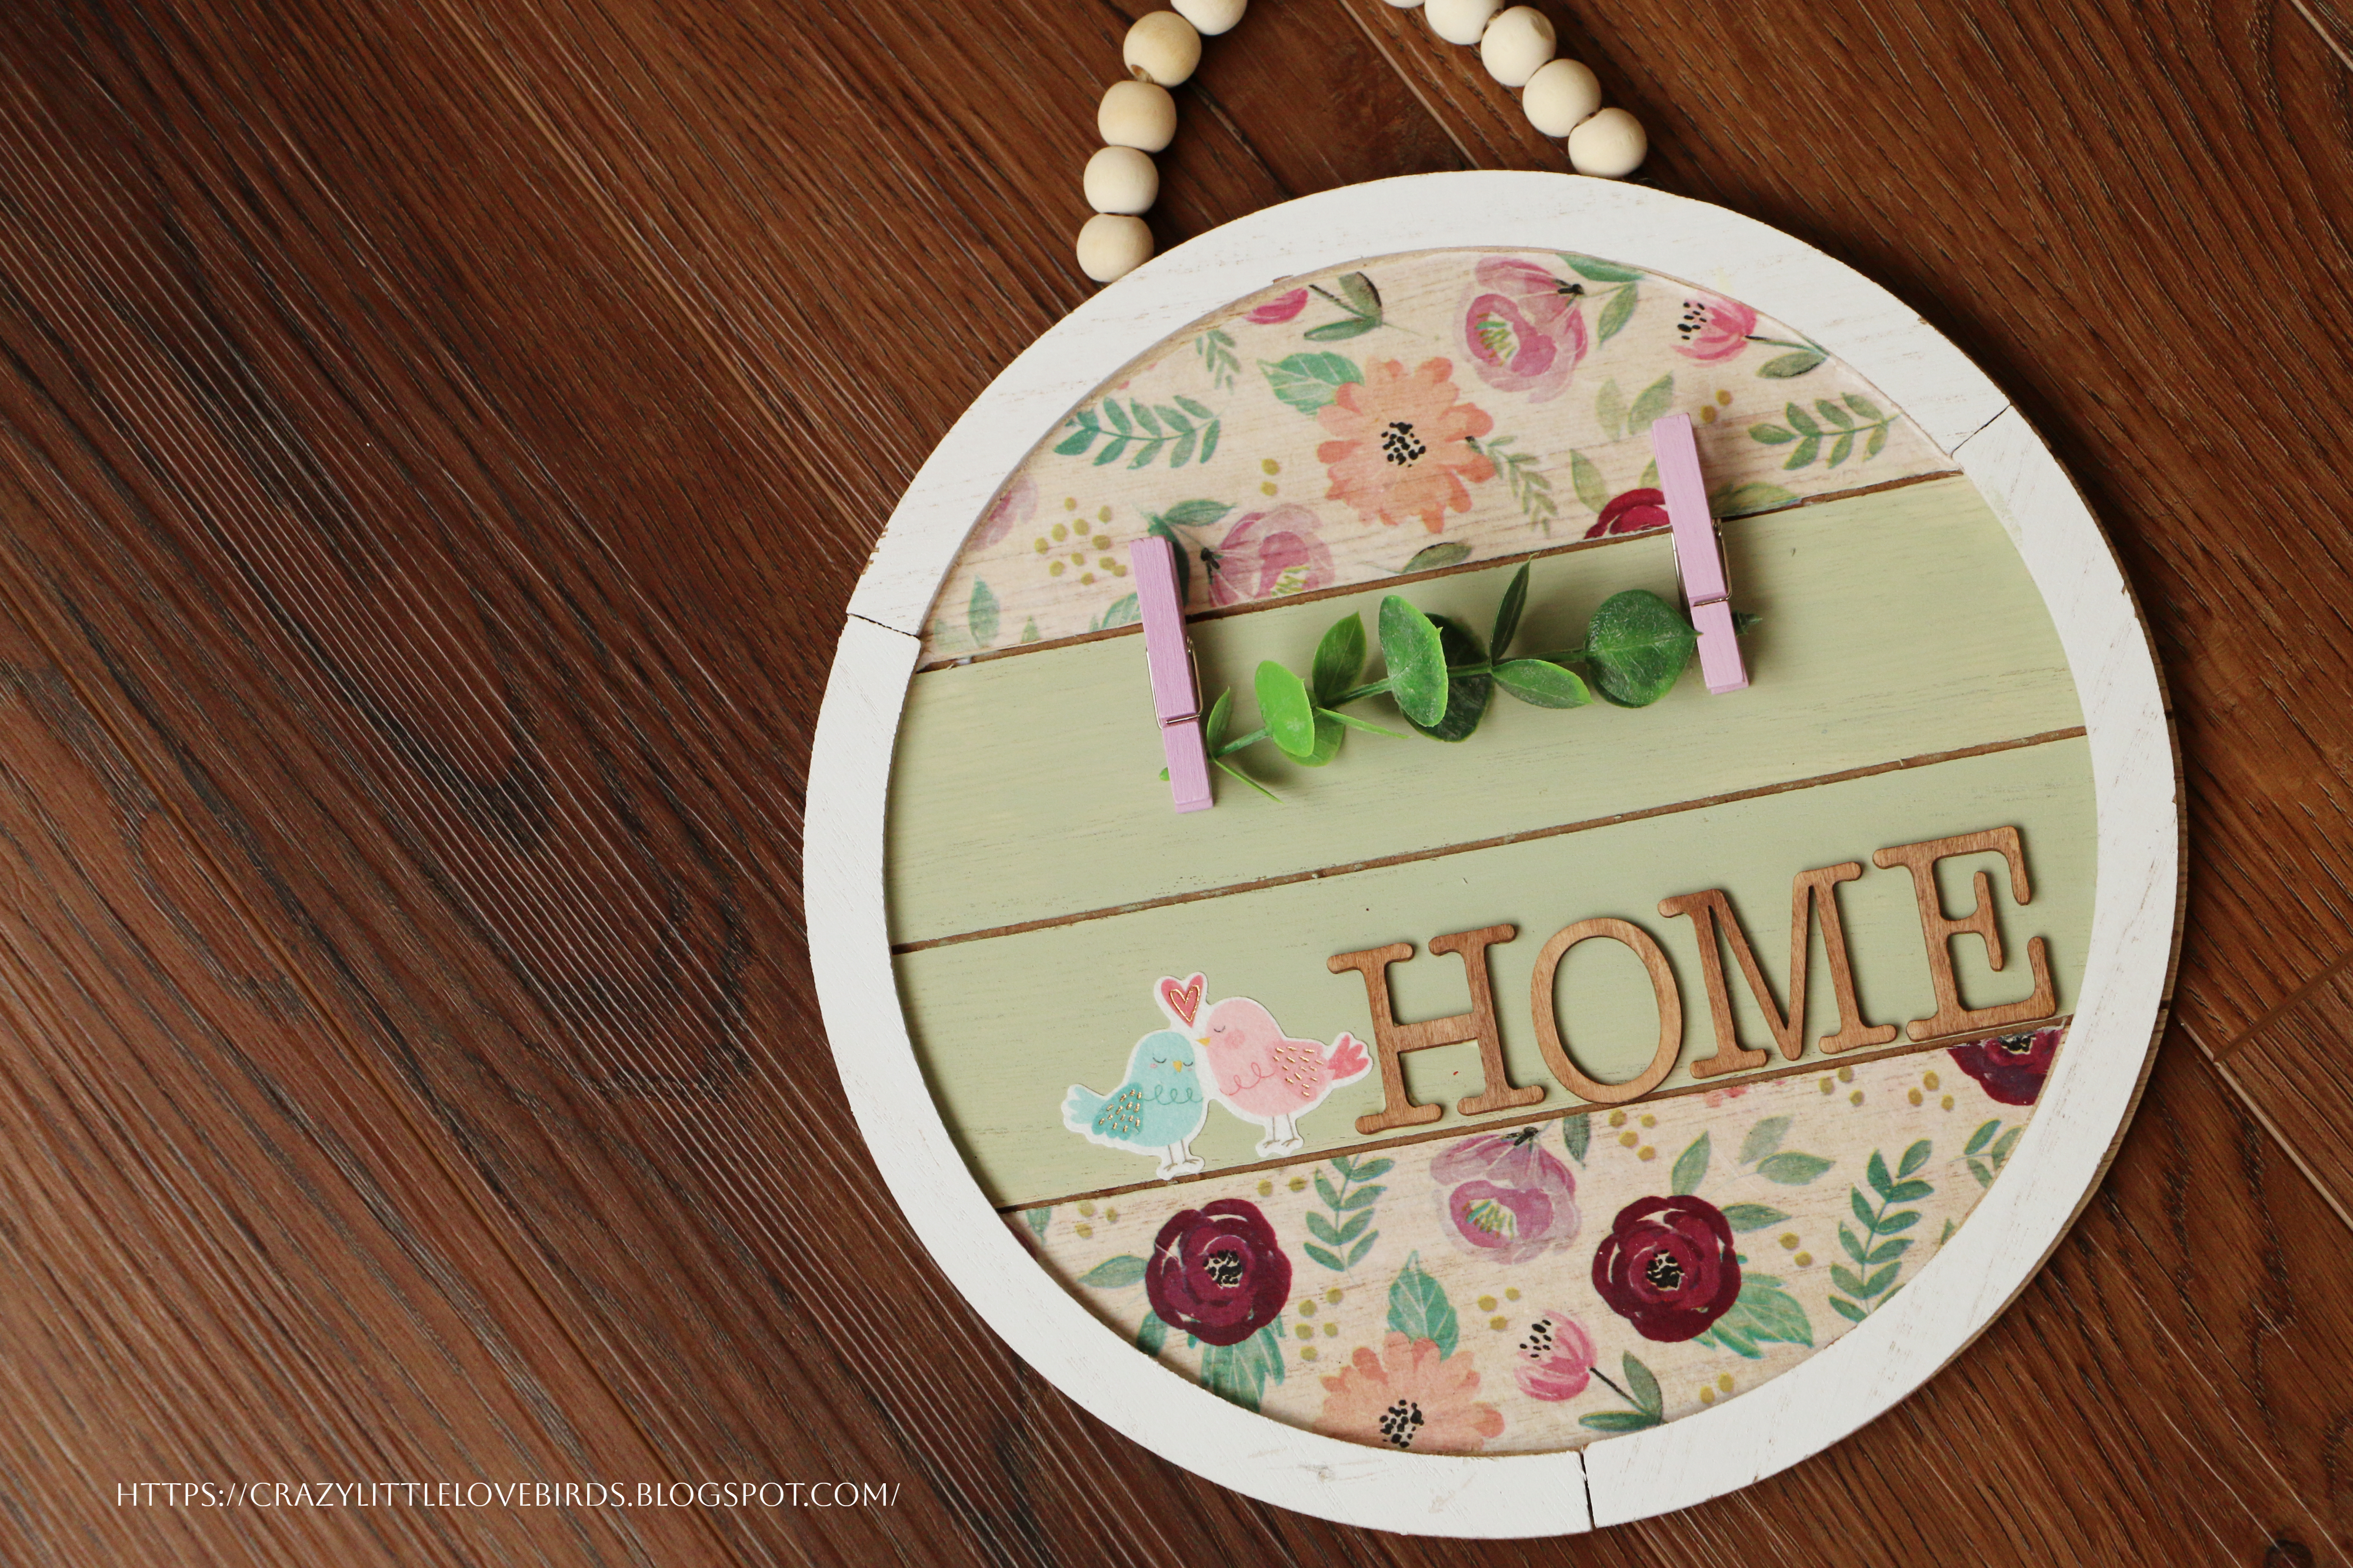

Your sign is complete and I just love the way it turned out. It is simple and takes very little time to create. So if you were wondering what you create using the round sign from Dollar Tree, I hope this gives you an idea of what to create. Also, be sure to check out my other DIY round sign decoration I created on my craft blog.

Thank you for stopping by and creating with me.

Pin Share Save


Comments

  1. This is so cute! I love that tissue paper. Thanks for sharing on Happiness is Homemade over at Life as a LEO Wife. I'd love to have you come & share on Crafty Creators Link Party as well. It has a different audience, and they would love this. It's open from Thursdays at 6am through Monday nights at 11:59. Hope to see you there!
    Niki | Life as a LEO Wife

    ReplyDelete
  2. It is cute and I love the colors you used. Thanks so much for linking up at I Made It Monday Link Party 1. Shared.

    ReplyDelete
    Replies
    1. Thank you! I thought the colors were a great combination. Thank you for stopping by.

      Delete
  3. Stephanie, CONGRATS! Your post is FEATURED at #IMadeItMondayLinkParty 2.

    ReplyDelete
    Replies
    1. Dee, thank you so much. I'm always so happy to share on your link party. ☺️

      Delete
  4. I really love this and love the pretty fabric you used

    ReplyDelete
  5. That is so pretty; I love the colors!

    ReplyDelete
  6. Great look and surprisingly simple!

    ReplyDelete
  7. This is so cute! The tissue paper you chose is lovely. Thanks for sharing this post at the Will Blog for Comments #25 linkup. :)

    ReplyDelete
  8. What a sweet decoration! Thank you for sharing how to make it with Hearth and Soul, Stephanie!

    ReplyDelete
  9. April, thank you very much. Always happy to share. 😊

    ReplyDelete
  10. This is so cute, love using Mod Podge never tried modge Mod Podgeing fabric though.

    ReplyDelete
  11. Thanks for sharing with us, I'll be featuring your this week when the next to Grandma's house we go link party starts!

    ReplyDelete
    Replies
    1. Tarahlynn, thank you very much! Happy to be one of the featured posts. 😊

      Delete

Post a Comment

Welcome! I love hearing your thoughts and seeing what you’ve been up to. Please leave a comment or ask a question below—I do my best to respond to everyone! To keep the blog comments safe and inspiring, spam will be removed. Thank you for being a part of this blogging space!

Popular posts from this blog

The Crazy Little Lovebirds Link Party 153

  Welcome to The Crazy Little Love Birds Link Party #153! I’m so happy you’re here! This is a warm and friendly gathering where you can share your amazing ideas—whether it's tasty recipes, fun family activities, creative crafts, home projects, or any other joyful inspirations. If you love finding new DIY ideas and learning from other bloggers, you’re in the perfect spot! Happy Friday! How was your week? I hope you all had a nice week. I've decided to completely dig up my flowerbeds and start each of them over next growing season. The heat did a number on my flowers this growing season. Our grass also did not do well this year. So now we are left with so many decisions about what to do next.  I'm excited to share the wonderful featured posts with everyone. As always, thank you to each of you who participates in the party each week. Congratulations  to our featured bloggers Agua Fresca Punch – Seasonal & Holiday Recipe Exchange A refreshing watermelon agua fresca that...

The Crazy Little Lovebirds Link Party 152

  Welcome to The Crazy Little Love Birds Link Party #152! I’m so happy you’re here! This is a warm and friendly gathering where you can share your amazing ideas—whether it's tasty recipes, fun family activities, creative crafts, home projects, or any other joyful inspirations. If you love finding new DIY ideas and learning from other bloggers, you’re in the perfect spot! Happy Friday! I hope that you all have a wonderful weekend. Congratulations  to our featured bloggers Rabbit in Carrot – Craft Attic Resources A sweet little felt rabbit tucked inside a carrot. Quick, cute, and perfect for spring or Easter crafting. Honey & Wheat Germ Bread – Scratch Made Food A wholesome whole‑grain loaf with honey and wheat germ. Easy, hearty, and great for everyday baking. Marbled Paper with Shaving Cream – Artful Analog A fun, colorful marbling project using shaving cream. Fast, kid‑friendly, and perfect for handmade papers. Splish Splash Summer Spotlight – Our Grand Lives A r...

DIY Dollar Store Autumn Wagon

Hi, I'm so happy that you decided to check out this simple Diy Autumn wagon craft. If you are a follower of my blog, you probably know just how much I  enjoy Autumn.  We have just a few more days, and we can finally welcome Autumn. I'm super excited about this. Today I created this simple Autumn wagon. All of my materials for this craft came from my local dollar store. Are you ready to create your very own Autumn wagon?  I'm sure the answer was yes! It is simple, and you'll just love the way it all turns out when you are all done.  Materials Needed (If you are only making one wagon, just buy one of each listed below) 1 Small straw bale 2 sets of pumpkin decorations 2 wooden baskets 1 wired twine Paint brushes/water/ glass jar 2 Wooden cars (you'll just want these for the wheels) Paint (I used red, orange, bronze, and black) Gold glitter glue Hot glue gun Optional **** 1 set of squirrels or any other animals you are able to find. (The squirrels that I have are actual...

DIY Floral Wooden Jack‑O’‑Lanterns (Easy Fall Decor)

I’ve been having so much fun creating fall projects this year. These floral wooden jack‑o’‑lanterns  started as simple wooden pumpkins, but with a few pretty transfers and some soft paint colors, they turned into the sweetest little fall accents. I love how the florals give them a cozy, cottage‑style feel while still keeping that classic jack‑o’‑lantern charm. They’re quick to make, easy to customize, and such a cute way to add a warm autumn touch to your home. Materials Wooden pumpkin cutouts Floral transfers Acrylic paint (your chosen colors) Gold acrylic paint Green acrylic paint Mini dowels Hot glue gun + glue sticks Small wooden stands Brown acrylic paint Paintbrushes   Add the floral transfers I started by placing my floral transfers onto each wooden pumpkin, just arranging them until they felt right. Once they were where I wanted them, I used a little rubbing tool to press them down and transfer the design onto the wood. Take your time with this part — slow, even pressu...

Dollar Tree Peel‑and‑Stick Wallpaper Box Makeover

I transformed a simple, everyday box into a beautiful and functional storage piece for my belongings. This makeover is both easy and budget-friendly, using affordable supplies from Dollar Tree along with some creative touches to enhance the box's appearance. With a few simple steps, you can create an attractive decorative storage box that can be styled in any room of your home. Whether you're looking to organize small items on your desk or add a pop of color to your living space, this project is versatile and practical. If you have a box that you're considering throwing away, think again! This DIY project not only gives new life to unused items but also allows you to showcase your creative side. Join me as I guide you through transforming an ordinary box into a charming accent piece you'll love to display. Watch the video tutorial Materials Peel‑and‑stick wallpaper (Dollar Tree) Gold acrylic paint Decorative edge scissors Adhesive gems Paintbrush Optional: greenery or s...

All content copyright 2010-2026

I kindly request that my photos and words not be taken or used without my permission. If you have any inquiries, please do not hesitate to contact me. Additionally, for more information regarding this blog, please refer to the disclosure policy tab located above. Thank you.