
Are you ready to add some cuteness to your Dollar Tree sign? Come along with me as we transform a simple round sign into a stunning display using Mod Podge, tissue paper, and other materials. This project is perfect for beginners and guaranteed to bring a smile to your face.
Cute Dollar Tree Sign Display


Materials needed:
- Round wooden sign
- Paintbrush
- Decorative tissue paper
- Faux greenery
- Paint
- Floral
- Wooden letters
- Craft clothespins
- Scissors
- Wood glue
- Craft knife

Cutting decorative tissue paper
Start by cutting a section of decorative tissue paper that fits over the inner area of your round wooden sign.

To begin with, place your tissue paper on a flat surface. Use a craft knife to cut around the top of your sign. Keep cutting around the edges until you have made your way around the entire sign. You will only need two sections of tissue paper. Leave the middle portion of the sign as is to maintain the natural wood look.


Applying Mod Podge
Once the tissue paper is in place, use a paintbrush to apply Mod Podge on your wooden surface. To remove any creases and lines, use a blow dryer. Feel free to use any technique that works best for you. Apply a second coat of Mod Podge over the tissue paper and repeat the previous steps. Finally, remove the tissue paper.


Applying paint to sign
Apply paint to the middle section of your sign.

Adding paint to wooden letters
This is optional, I applied a thin coat of paint to my wooden letters. The color I am using is called espresso.

Attaching wooden letters to sign
To proceed, grab your wooden letters and apply wood glue to attach them to your sign.

Adding clothespins to sign
Apply some wood glue and attach the clothespins to your sign.

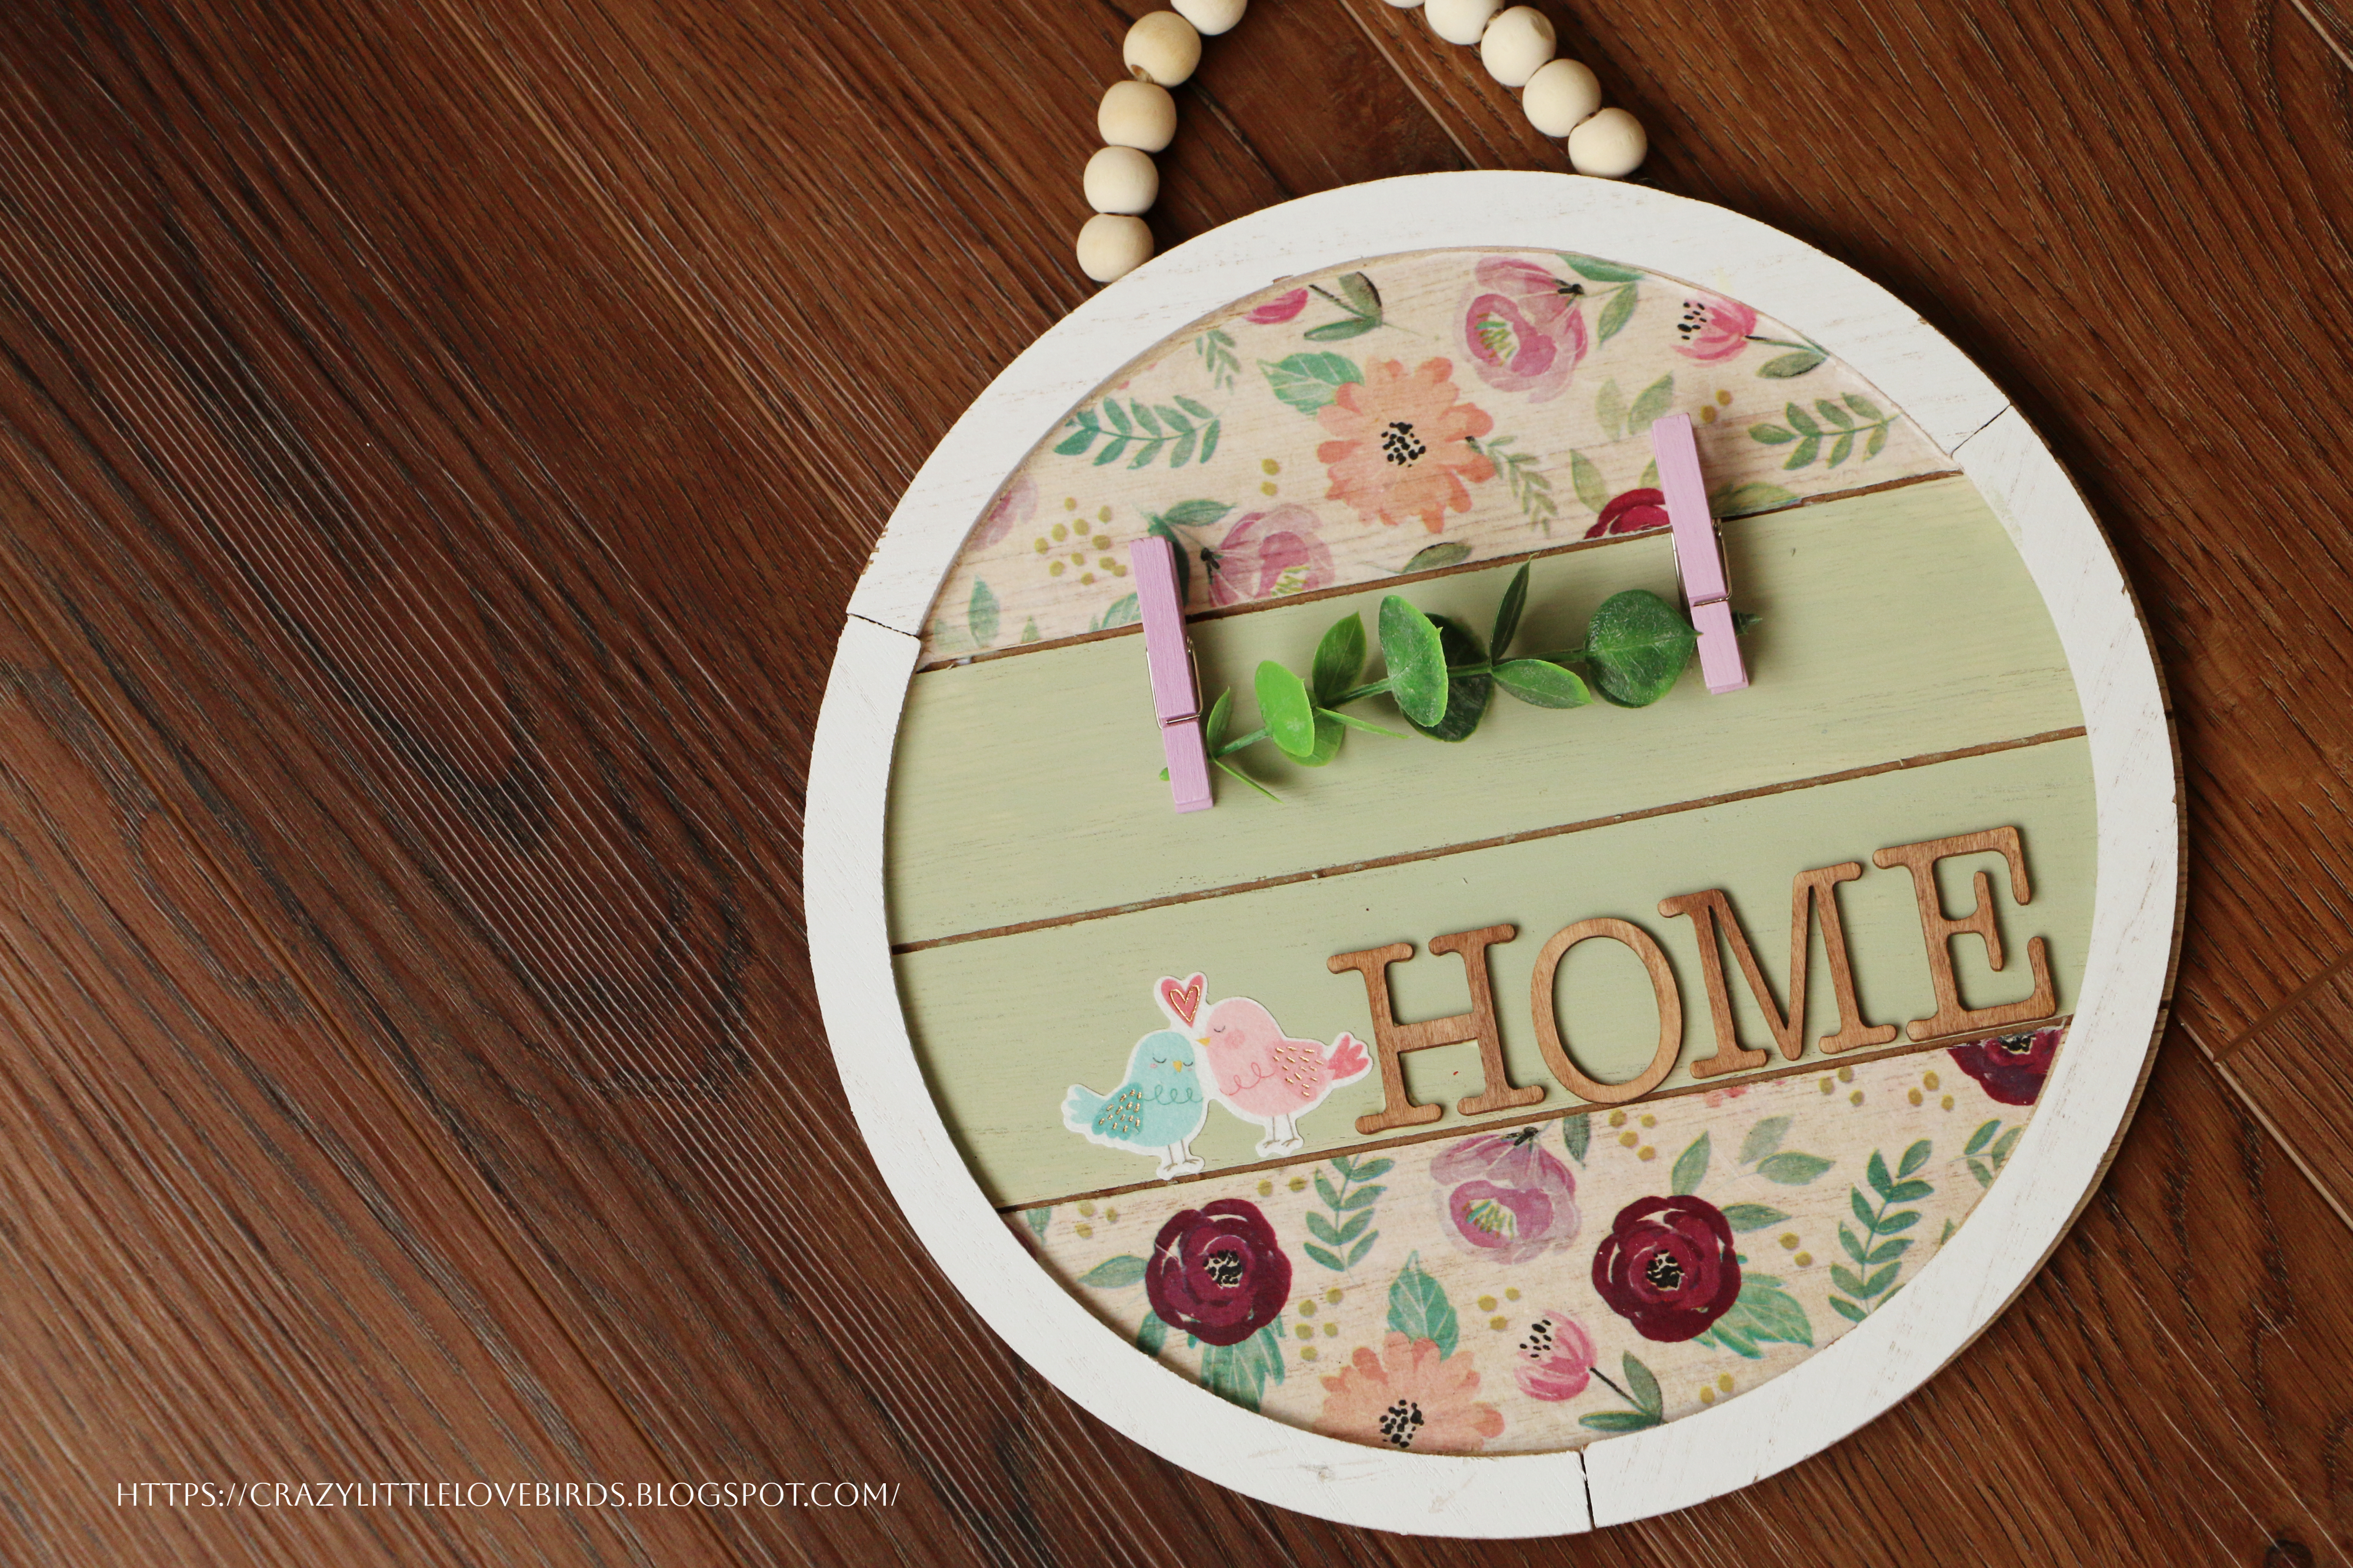
Adding greenery to your sign
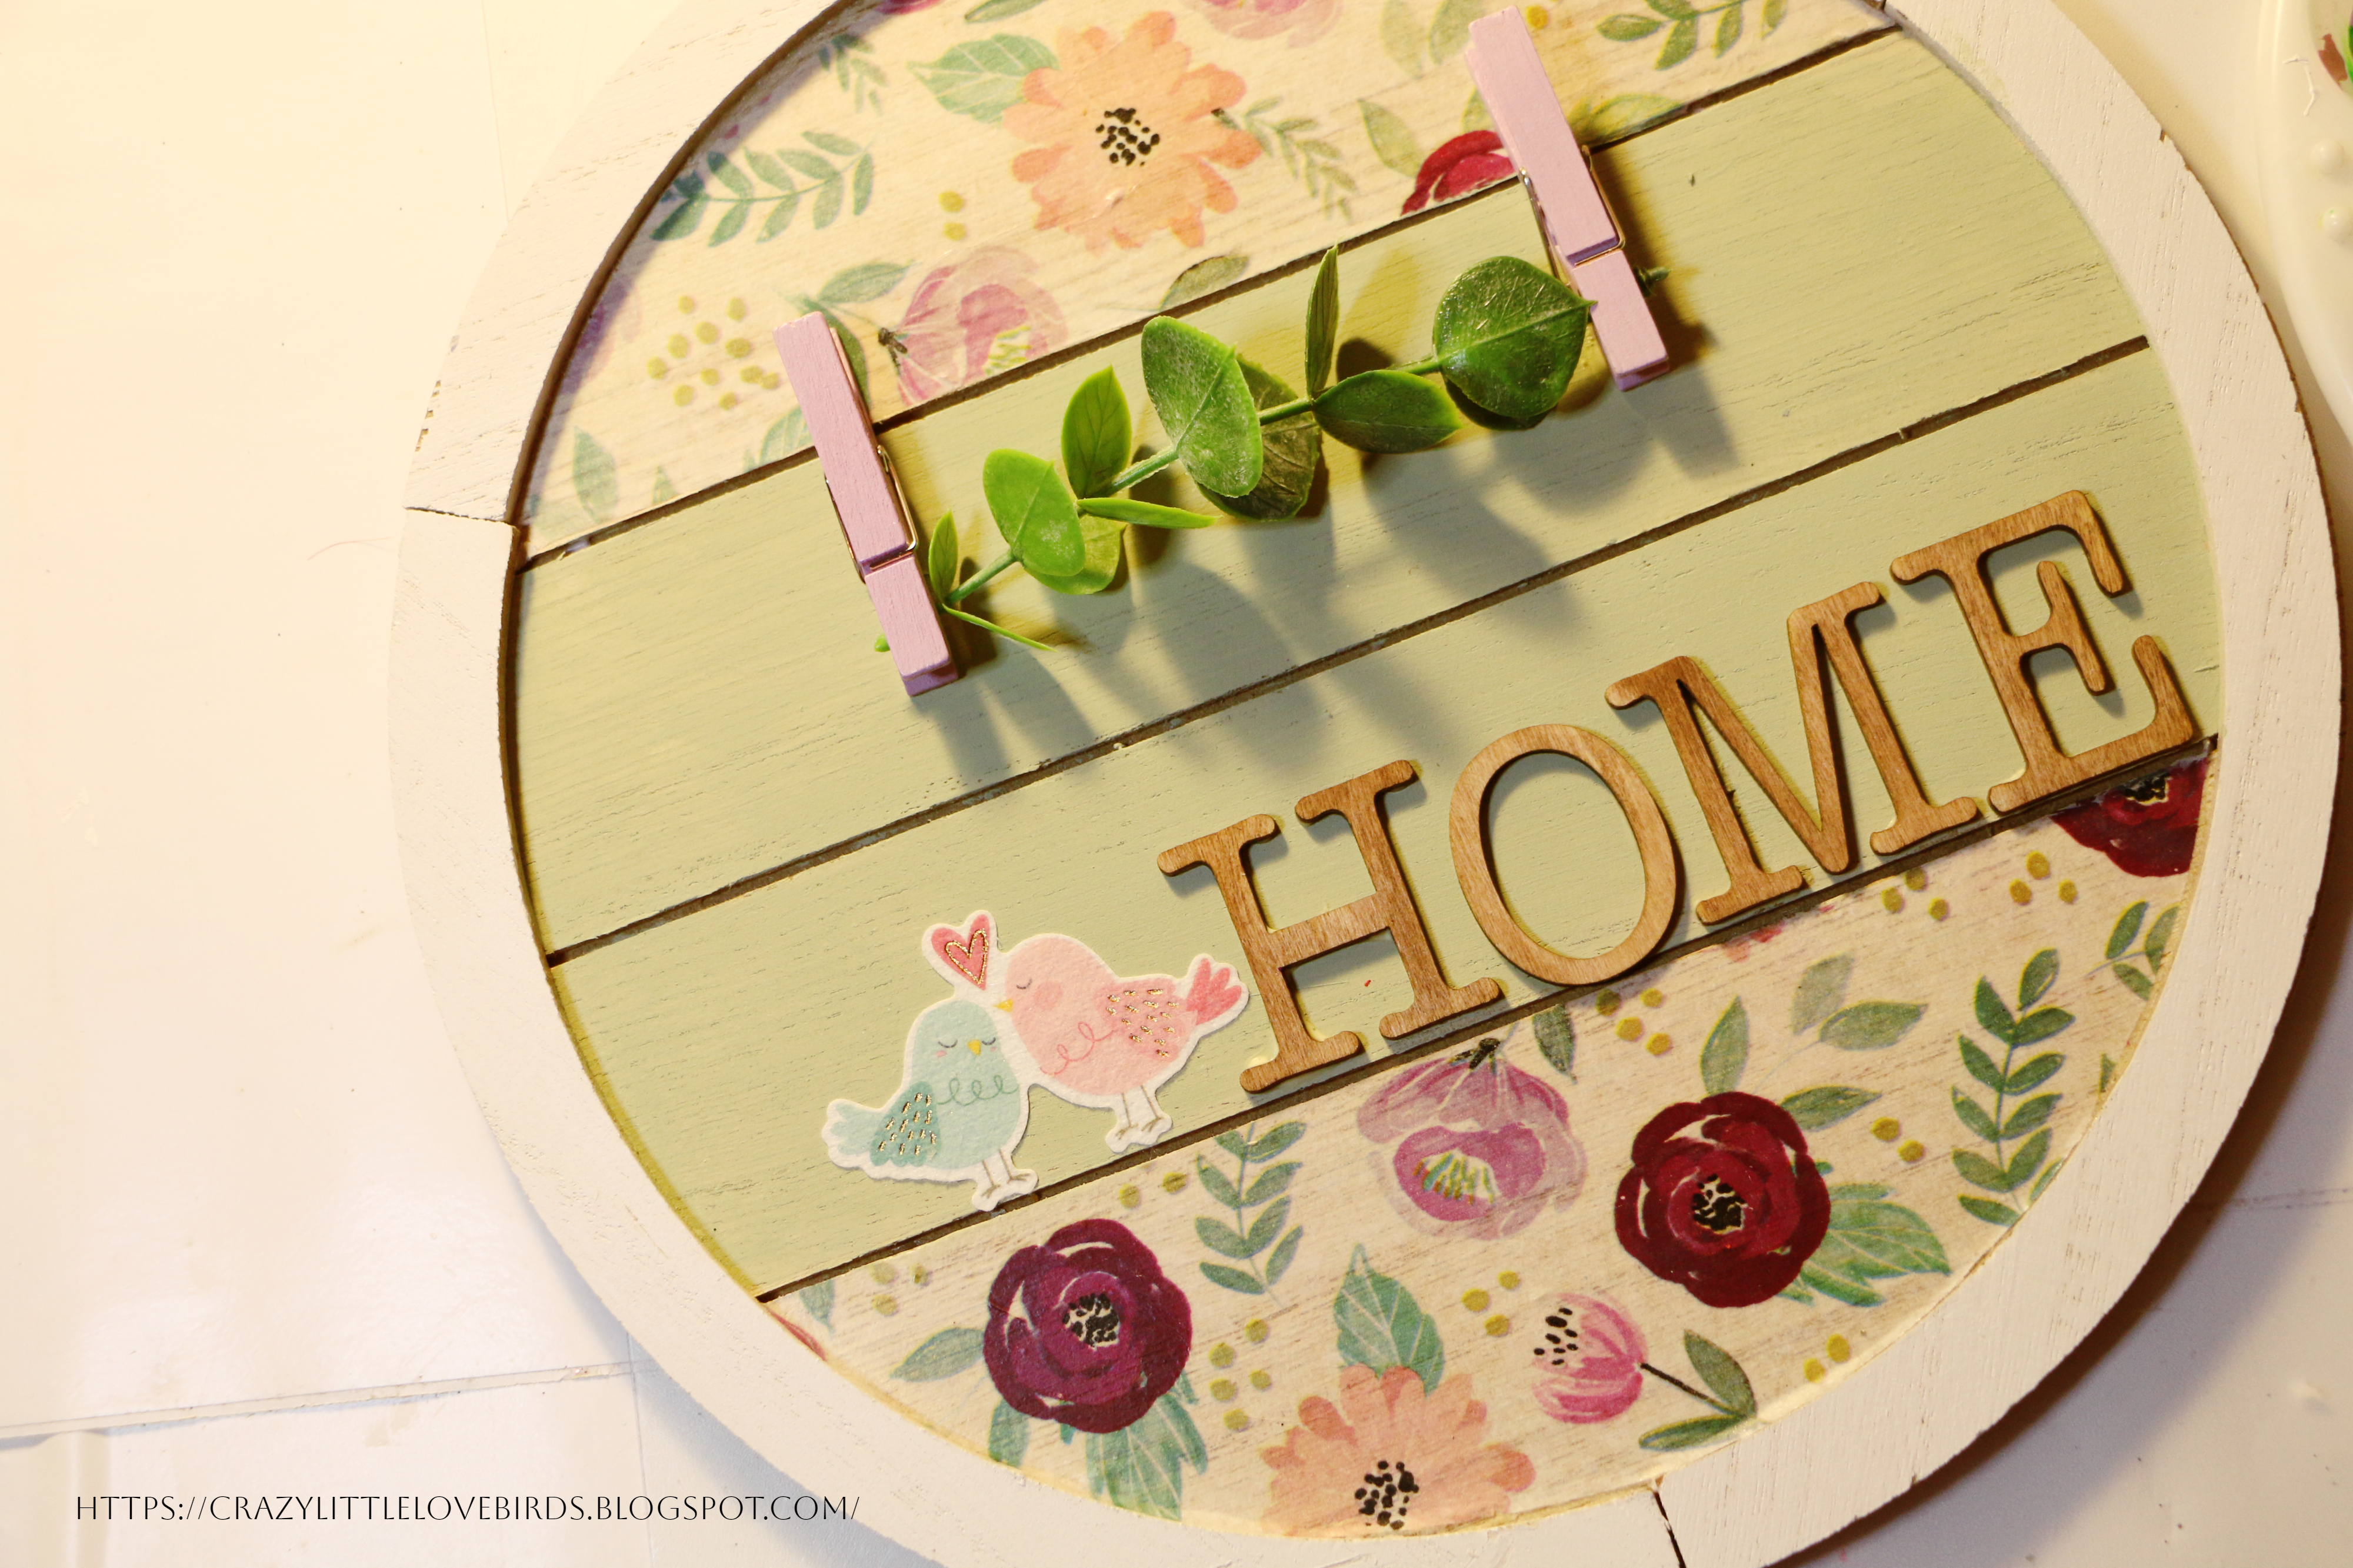
Take your artificial greenery and attach it to your clothespins. To ensure a secure hold, apply some wood glue on the inside opening of the clothespins before attaching the greenery. Additionally, you can add a cute sticker next to your wooden letters to enhance their appearance.
Thank you for stopping by and creating with me.
Pin Share Save

.png)
This is so cute! I love that tissue paper. Thanks for sharing on Happiness is Homemade over at Life as a LEO Wife. I'd love to have you come & share on Crafty Creators Link Party as well. It has a different audience, and they would love this. It's open from Thursdays at 6am through Monday nights at 11:59. Hope to see you there!
ReplyDeleteNiki | Life as a LEO Wife
Thank you so much! 😊
ReplyDeleteIt is cute and I love the colors you used. Thanks so much for linking up at I Made It Monday Link Party 1. Shared.
ReplyDeleteThank you! I thought the colors were a great combination. Thank you for stopping by.
DeleteStephanie, CONGRATS! Your post is FEATURED at #IMadeItMondayLinkParty 2.
ReplyDeleteDee, thank you so much. I'm always so happy to share on your link party. ☺️
DeleteI really love this and love the pretty fabric you used
ReplyDeleteNatasha, thank you so much. :)
DeleteThat is so pretty; I love the colors!
ReplyDeleteJoanne, thank you so much!
DeleteGreat look and surprisingly simple!
ReplyDeleteThis is so cute! The tissue paper you chose is lovely. Thanks for sharing this post at the Will Blog for Comments #25 linkup. :)
ReplyDeleteJennifer, thank you so much. 😊
DeleteWhat a sweet decoration! Thank you for sharing how to make it with Hearth and Soul, Stephanie!
ReplyDeleteApril, thank you very much. Always happy to share. 😊
ReplyDeleteThis is so cute, love using Mod Podge never tried modge Mod Podgeing fabric though.
ReplyDeleteThanks for sharing with us, I'll be featuring your this week when the next to Grandma's house we go link party starts!
ReplyDeleteTarahlynn, thank you very much! Happy to be one of the featured posts. 😊
Delete